Provide the best software to recover passwords for
Windows, SQL Server, PDF, Word, Excel, Outlook, FTP, Email, etc.


5 Ways to Create a New Local Account in Windows 11
Can't find the option to create a local account? How can I create a new local user on a shared PC? By default, Microsoft recommends using Microsoft online account instead of local account, but it is not mandatory. In this tutorial we'll show you 5 simple methods to create a new local account in Windows 11, even if you're unable log in to your PC.
Method 1: Create Local Account from Settings App
Press the Windows key + I together to launch the Settings app. Select Accounts on the left and then click Family & other users on the right.
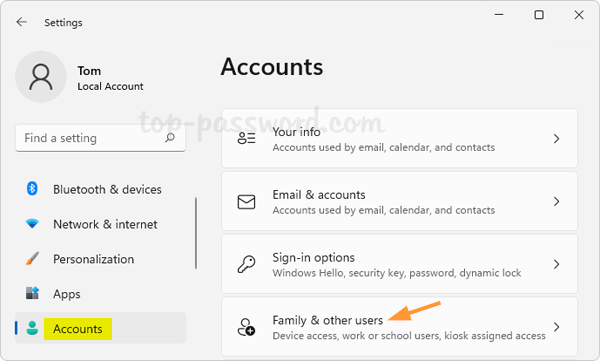
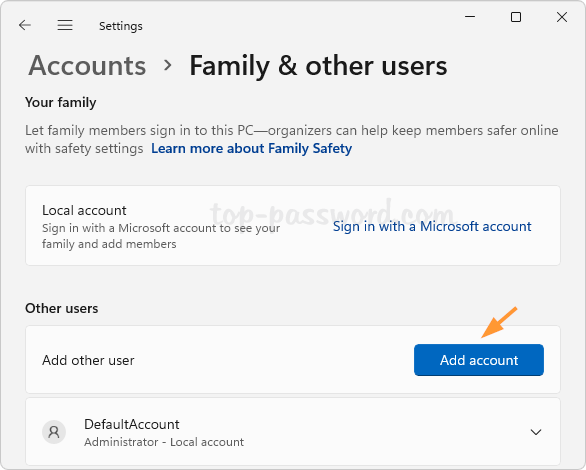
Click on the Add account button under the "Other users" section.
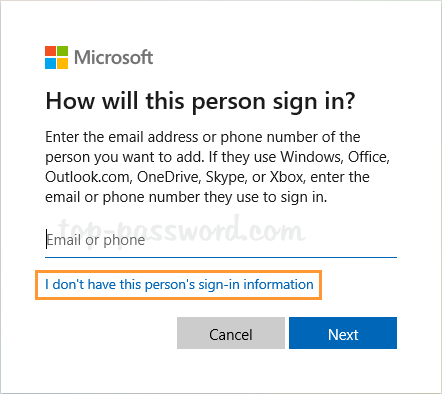
Click on the "I don't have this person's sign-in information" link.
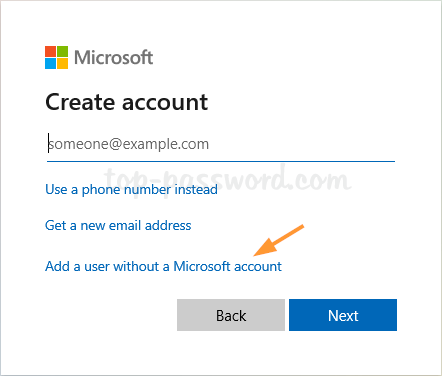
Proceed to click on the "Add a user without a Microsoft account" link.
Once you see the "Create a user for this PC" page, enter the user name, password, and answer three security questions in the respective fields, and click on Next.
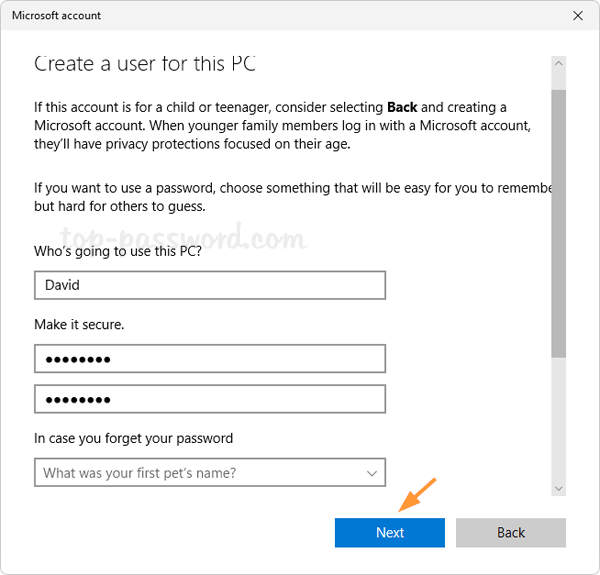
Note: Setting up security questions and answers can help you recover your local account if you forget its password
Method 2: Create Local Account Using Netplwiz
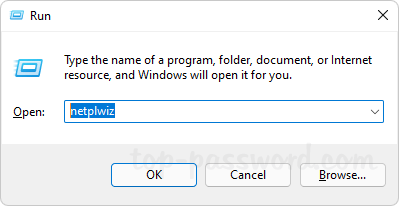
Press the Windows key + R to bring up the Run dialog box. Enter netplwiz and click OK.
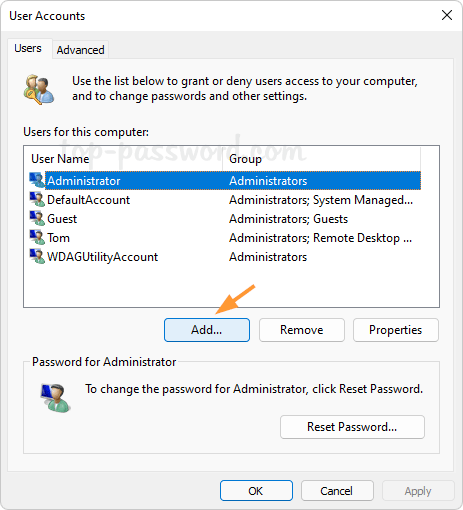
On the User Accounts window, click on the Add button.
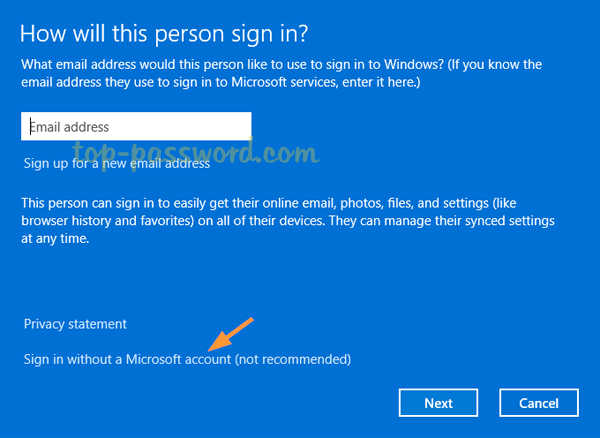
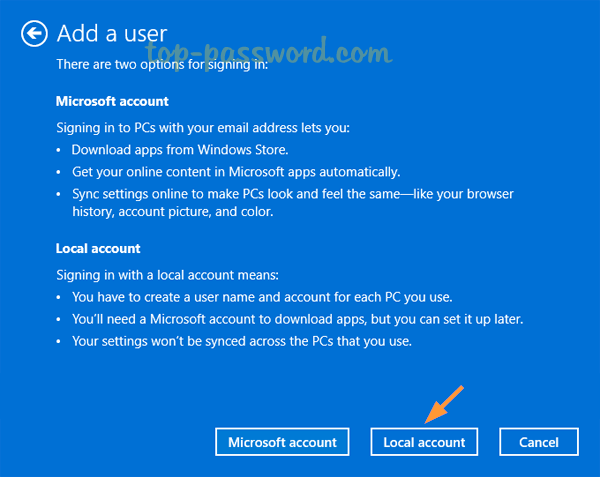
Click the "Sign in without a Microsoft account (not recommended)" option at the bottom.
The next page will explain the pros and cons of each account type. Proceed to click the Local account option.
Enter your desired User name, type and confirm its password, and add a password hint. Click on Next.
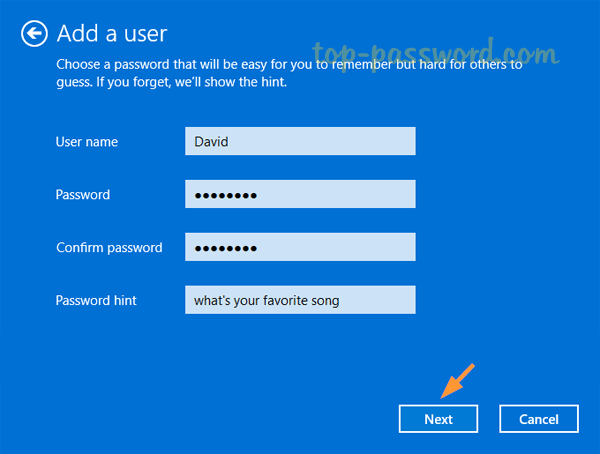
Afterwards, click on Finish to complete the process of adding a new local account.
Method 3: Create Local Account Using Local Users and Groups
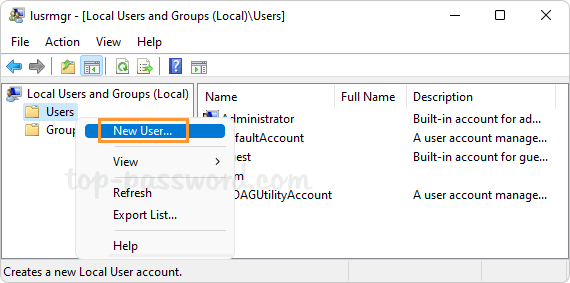
Press the Windows key + R to open the Run box. Type lusrmgr.msc and press Enter.

On the "Local Users and Groups" window, right-click Users in the left pane and then select New User.
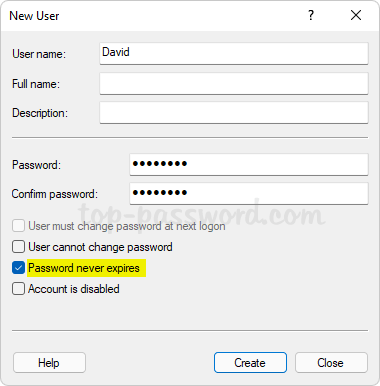
Enter the username and password for your new local account, and click on Create. The "User must change password at next logon" option is checked by default, I recommend uncheck it and check the "Password never expires" option instead.
Method 4: Create Local Account with Command Prompt or PowerShell
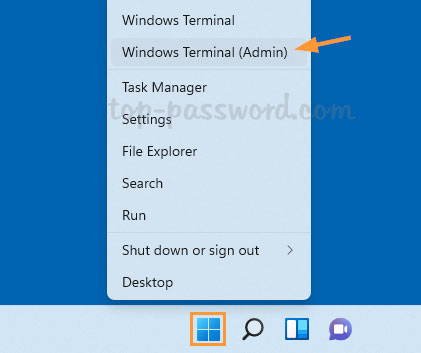
Right-click on the Start button on the taskbar, and select "Windows Terminal (Admin)".
It will open an elevated Command Prompt or PowerShell window. To create a new local account, simply run the following command. Replace account_name and new_password with your username and desired password respectively.
net user account_name new_password /add
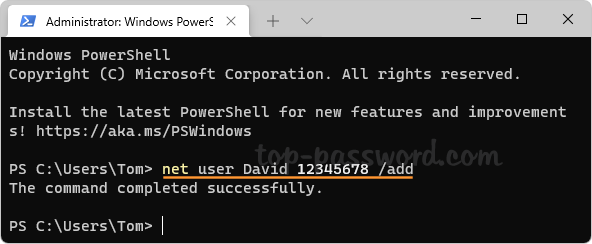
- A standard local account will be created immediately.
Method 5: Create Local Account with PCUnlocker Live CD
Can't log in to Windows 11 as your user profile is corrupted or all accounts are locked out? If you're having trouble signing into your local account or Microsoft account, you can create a new Administrator account without logging in. The software you need is PCUnlocker Live CD:
Boot your locked PC with PCUnlocker Live CD (or USB) which needs to be created from a working PC. When you see the following screen, click the Options button and select "Create Local Account".
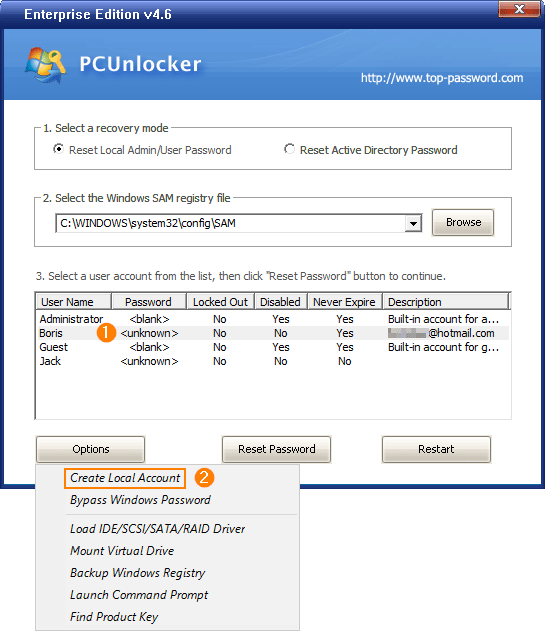
-
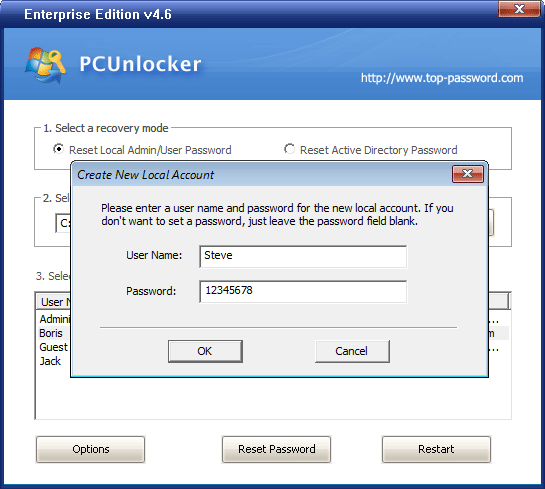
Enter the username and password for your new account, and click OK.
- Reboot your computer and remove the CD. You will be able to see the new local account listed on Windows sign-in screen, and you can log in without problem.
Ready to try or buy?
Related Articles