I have my Windows 7 account password protected but now I can’t remember the password. I just set it up today but I forgot the password I chose. How do I unlock this password so I can use my computer?
Protecting your computer with a password should be common practice, especially if other people potentially have physical access to it. But if you forget the Windows password, you’ll lock yourself out of your computer. How to unlock a password protected computer without formatting the hard drive?
Fortunately, there is a Windows password unlocker software called Reset Windows Password, which can help you to reset/unlock lost administrator and other user passwords that are used to log on to Microsoft Windows operating system. In this article we’ll walk you through the steps to unlock any password protected computer running Windows 7, Vista or XP.
How to Unlock a Password Protected Computer without Logging in?
Step #1: First of all you’ll have to download Reset Windows Password utility on another computer. Once the download is complete, unzip the download file and you’ll get the bootable ISO image: ResetWindowsPwd.iso. Burn it to a blank CD using a image burning software like ISO2Disc or ImgBurn.
Step #2: Now turn on your password protected computer, insert the burned disc into your CD/DVD-ROM. Make sure you have set the boot sequence to CD first in your BIOS.
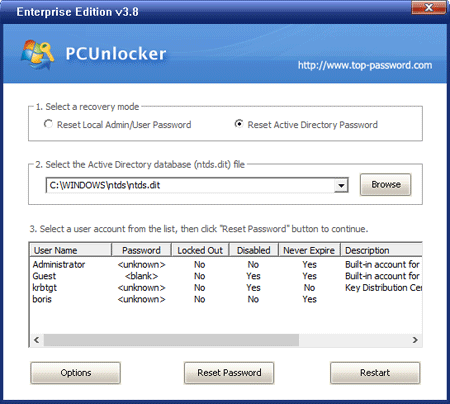
Step #3: Once your computer boots from the CD, it will start the Reset Windows Password program soon after the booting procedure is complete. By default, the program will display a list of local user accounts inside your Windows SAM database.
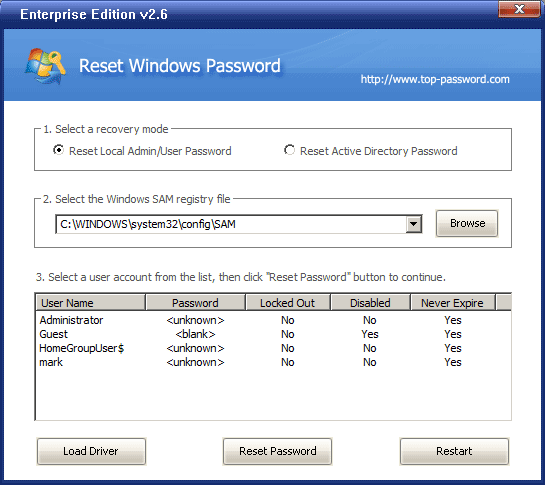
Step #4: Choose a user account and then click on “Reset Password” button. Confirm your operation and the program will reset the password and also unlock your user account when it was locked out or disabled.
Step #5: After unlocking the password, restart the computer and take the bootable CD out from the CD/DVD drive. When booting to the Windows login screen, left the password area empty and you can then log on your computer immediately.
Conclusion
So that is how can you unlock a password protected computer running Windows 7, Vista or XP. If your computer doesn’t have a CD/DVD drive, you can use a USB flash drive instead and follow the same steps above to unlock your computer password easily.