How can I transfer PowerToys settings to another Windows 11 computer? Need to create a backup of your PowerToys settings before reinstalling Windows? In this tutorial we’ll walk you through the steps to backup and restore PowerToys settings in Windows 11.
Part 1: Backup PowerToys Settings with Ease
Once you open PowerToys, select the General category. On the right-hand pane, scroll down to the bottom and you should see the “Backup & restore” section. Click the Browse button to choose the location where you want to save your backup, and then click the Backup button.
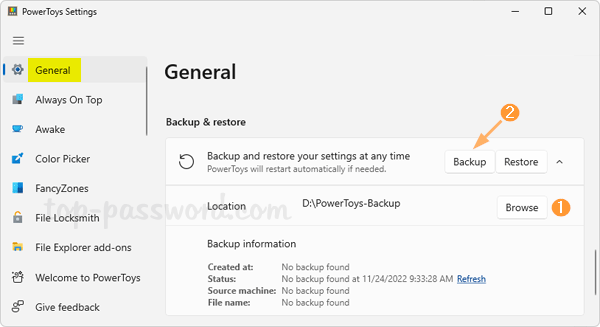
You’ll immediately get the message saying “Backup completed”.

The backup file ends with .ptb extension, which is actually self-extracting archive. If you rename the file extension to .zip and unzip it, you’ll see a bunch of .sqlite files.

Part 2: Restore PowerToys Settings on the Same or Different PC
Before getting started, transfer or copy the .ptb file you’ve backed up previously to your target computer. Next, follow these steps to perform the restore:
Open the PowerToys app and choose the General category. Under the “Backup & restore” section, click the “Refresh” link to make sure your target .ptb file is detected by PowerToys. If there are multiple .ptb files at the backup location, just the file with the latest date will be used for restoring.
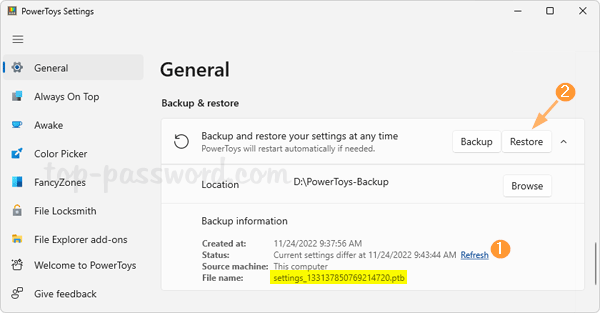
Click the Restore button. PowerToys will automatically restart and apply your new settings.