Sometimes you might want to schedule Windows to shutdown automatically after a specified amount of time. For example, let’s say you’re downloading a big file at night. You know it will take about one hour for it to be complete, but it’s too late and you must sleep now. You don’t want to leave your laptop running overnight.
Here I’ll show you 2 methods to set up auto shutdown in Windows 10 and 8, and instruct your computer to automatically shutdown after a given amount of time, or at a specified time.
Method 1: Auto Shutdown Windows 10/8 After a Certain Amount of Time
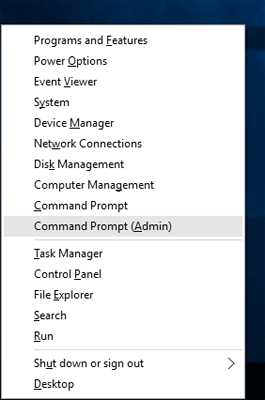
- Press the Windows key + X opens the Quick Access Menu. Click on Command Prompt (Admin).
- Using the shutdown command you can set your computer to automatically shutdown after the amount of time you specified. For example, if you want to shutdown computer exactly after 120 seconds, type the command as follow:
shutdown /s /t 120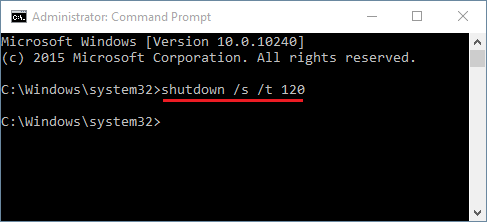
- Once you execute the command above, the system will force close all running applications and shutdown after 2 minutes.
Method 2: Auto Shutdown Windows 10/8 At a Specified Time
But sometimes you might want to schedule your Windows computer to shutdown at a specified time. For example, if you have a habit of listening music on your laptop before bed, you might have the tendency to fall asleep but forgot to turn off your computer. To avoid this, you can configure your PC to shutdown automatically at midnight. Here’s how:
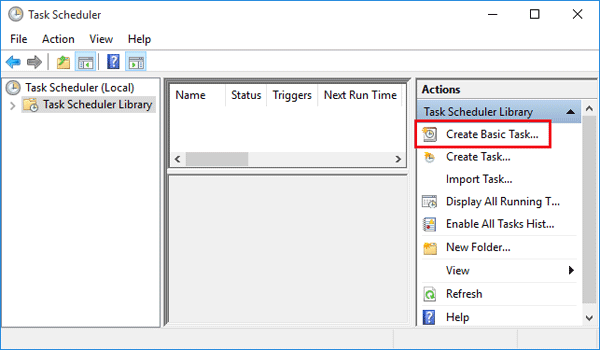
- You’ll need to open up Task Scheduler to create a schedule task. Press the Windows key + R and type taskschd.msc in the Run box.
- The Task Scheduler window will come up. Select Create Basic Task from the Actions panel on the right.
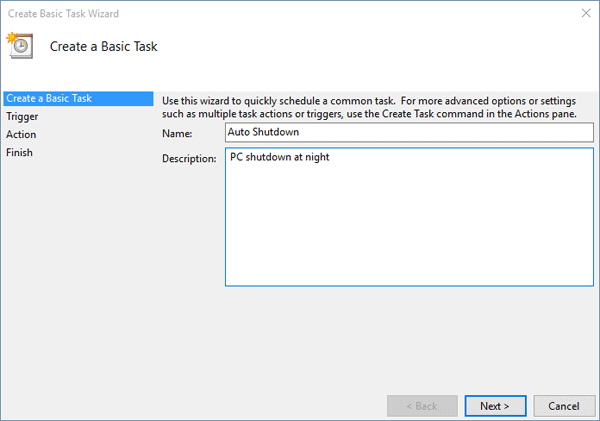
- Enter a meaningful name and description of the task you are going to create, and then click on Next.
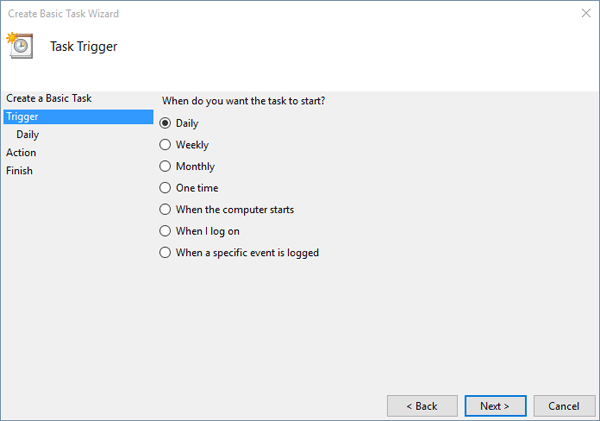
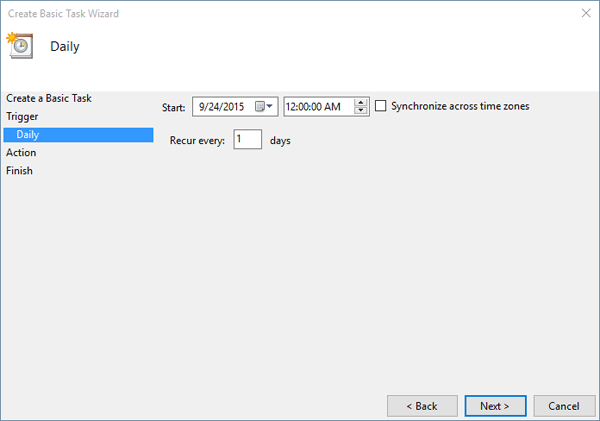
- Select the radio button “Daily” and click on Next to continue.
- Now enter the starting date and time. Also, make sure that you are choosing for the task to reoccur every day.
- Select the radio button “Start a program” and click on Next.
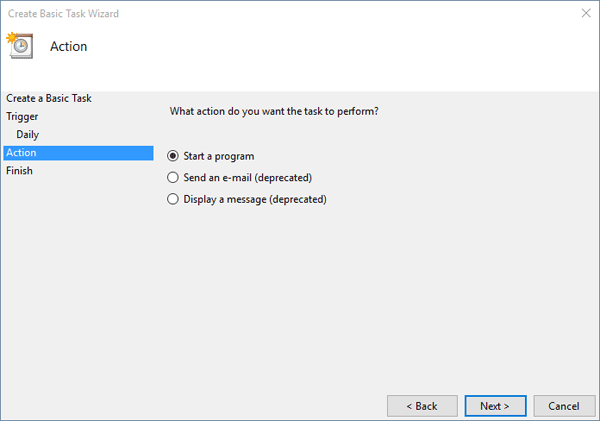
- Click on Browse button to locate shutdown.exe under the system folder c:\windows\system32. Enter /s as the application argument which forces your Windows computer to shut down.

- Go through the summary, and if everything is fine, click on Finish.
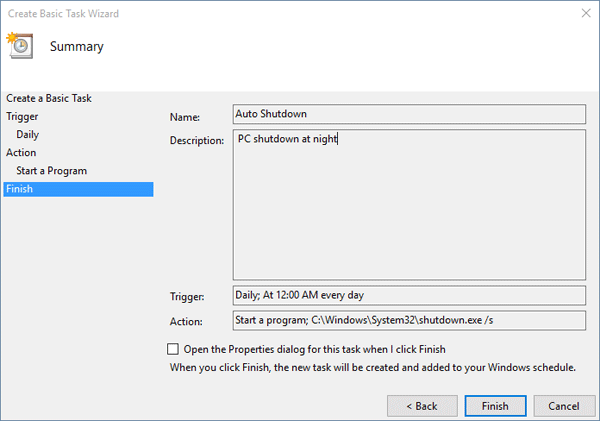
Now you have successfully configured the automatic shutdown at night.