If you want to boot a virtual machine from a CD or ISO image, you need to change the boot sequence so that it starts with virtual CD drive. However, it can be difficult to access the BIOS Setup as the POST screen clears too quickly, especially if you’ve enabled UEFI in your VM. In this article I’ll describe 2 methods to change the boot order for a guest VM hosted by VMware ESXi.
Method 1: Change Boot Order Using vSphere Client
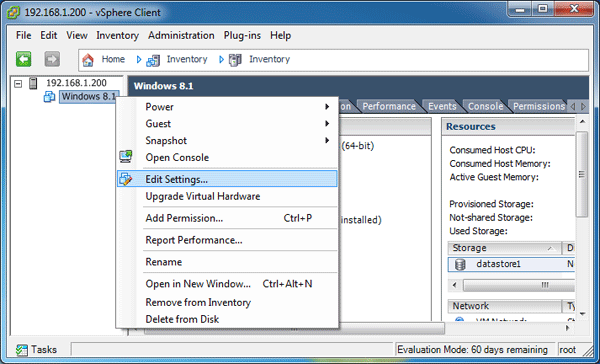
- Open up your VMware vSphere Client and log into your server. Make sure the VM that you want to modify is powered off.
- In the vSphere Client inventory, right-click on the virtual machine and select Edit Settings.
- When the Virtual Machine Properties dialog appears, click the Options tab. From the list on the left, click Advanced > General. Click the Configuration Parameters button on the right.
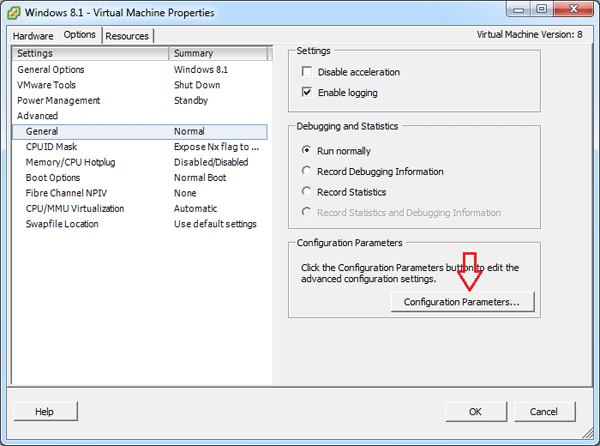
- In the Configuration Parameters dialog, click Add Row button. Type bios.bootOrder to the Name column and the devices (for example, cdrom,hdd,floppy) in the Value column.
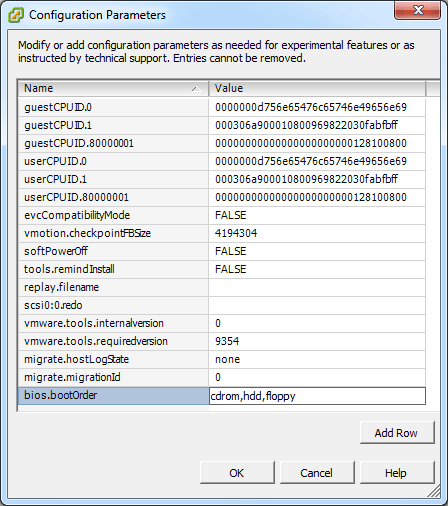
- Click OK to save the changes.
Method 2: Modify .VMX File in VMware ESXi
- Open up your VMware vSphere Client and log into your server. Make sure the VM that you want to modify is powered off.
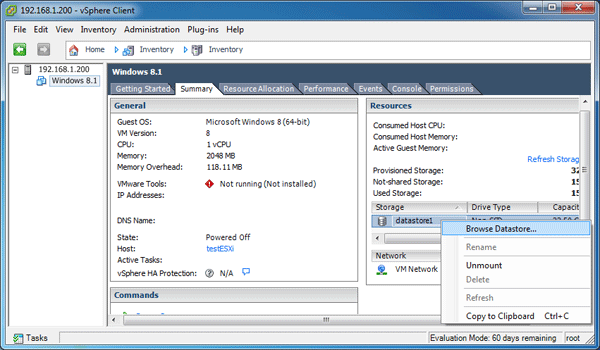
- Click on your target virtual machine from the left side tree, and then click Summary tab on the right pane.
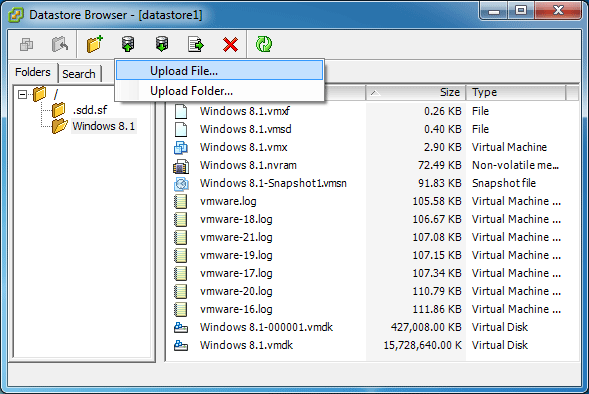
- Under the Resources area for your VM, there should be a list of datastores. Right-click on the datastore where the target VM files are saved, and select Browse Datastore.
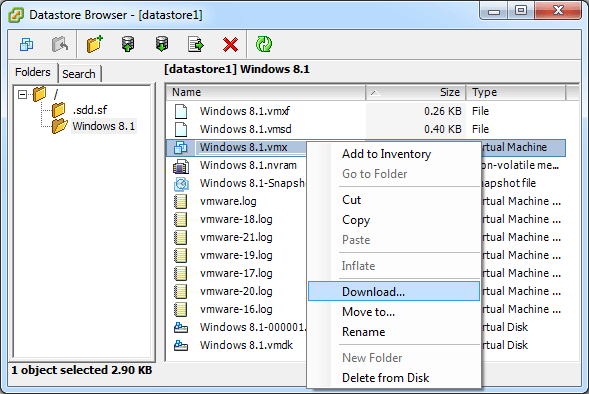
- Navigate to the folder for your particular VM, and find the .vmx file. Right-click on the file and select Download. Save the file somewhere easily accessible.
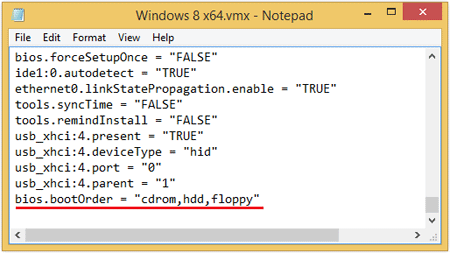
- Open up the .vmx file with WordPad or your favorite text editor, and then add the following line to the bottom of the file:
bios.bootOrder = "cdrom,hdd,floppy"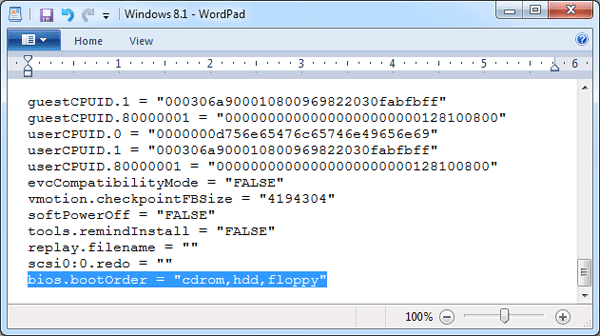
The line above will set the boot sequence to cdrom, hdd and floppy. Save the file.
- Go back to the Datastore Browser. Click the upload icon in the toolbar and select Upload File, and select your modified .vmx file. Upload it to overwrite the existing .vmx file in your VM.