When you use Microsoft Outlook as your email client, your email messages, contacts, appointments, task, notes are automatically saved in a personal storage folder (also known as a .pst file). Backing up your Outlook data is an important job especially if your computer crashes or if your want to transfer them to a new computer.
In this article, I explain how to easily backup Outlook mail messages and then restore (or transfer) them to another Windows-based computer.
Part 1: Backup Outlook Mail Messages
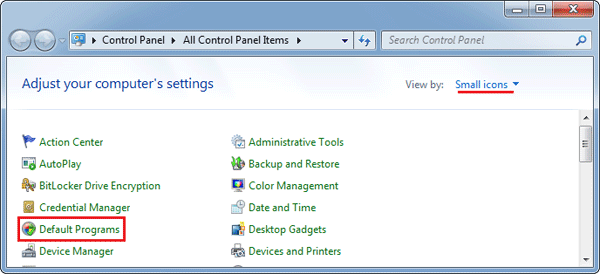
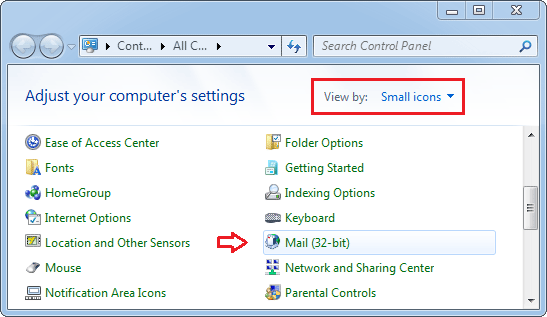
- Click Start, and then click the Control Panel.
- In the upper right corner of the Control Panel, click the pull-down menu and choose Small Icons. Double-click on Mail.
- The Mail Setup window should be open now. Click on the the Data Files button.
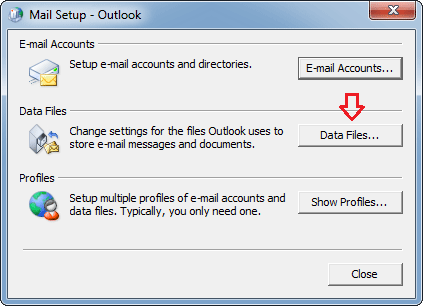
- In the Account settings window, select a mail account (in case of multiple ones) and click on the Open Folder button.
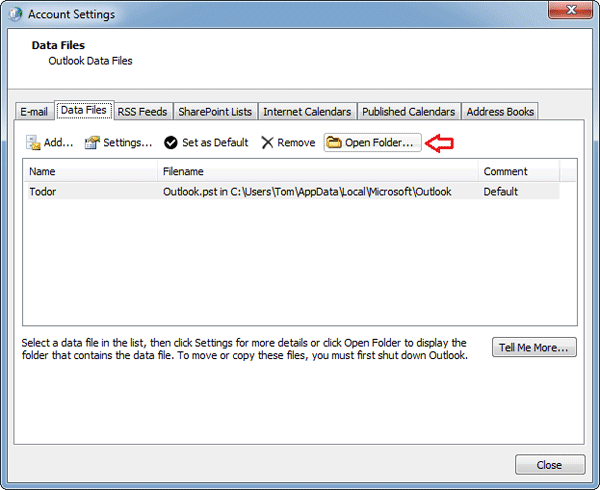
- Windows Explorer will open to the Outlook .PST file that contains mail messages for your selected mail account.

- With Outlook closed and the folder open, copy the .PST file to a safe location, such as an external hard drive. Better yet, make sure that your regular backup routine includes this folder.
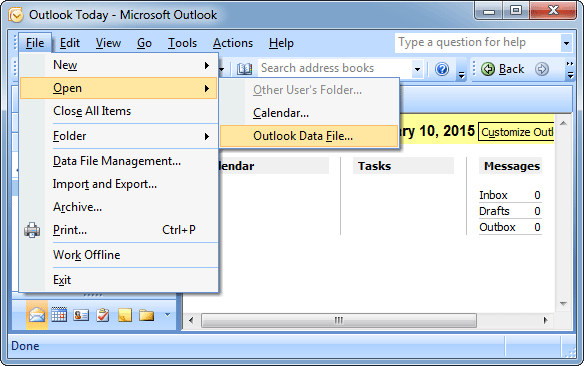
Part 2: Restore Outlook Mail Messages
Here is how to import the .PST file back into Outlook to gain access to your mail messages again.
- In Outlook application, click the File menu. Navigate to the Open sub-menu, then click Outlook Data File.
- Navigate to wherever your .PST file is located. Select the PST file you backed up previously and click OK.
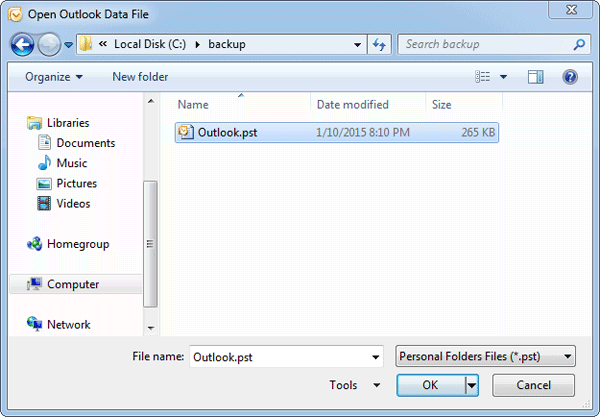
- Once restored, you’ll be able to browse and view all items including mail messages inside your selected PST file.