Is there a simple PowerShell script to format a USB disk? If you have a brand new hard drive, or you want to erase all the data from a disk, you have to format it. In this tutorial we’ll explain how to format a hard drive using PowerShell commands in Windows 10.
How to Format Hard Drive Using PowerShell?
- To open Powershell as admin in Windows 10, press the Windows key + X together and then select “Windows PowerShell (Admin)“.

- Type the following command to find the hard drive you want to format.
Get-Disk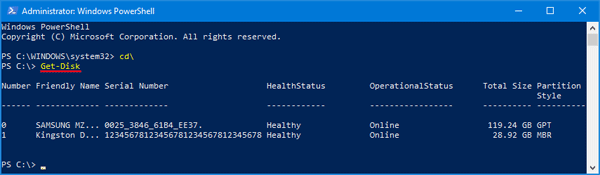
- To clear all partitions and volumes from your disk, type the following command. Replace 1 with the disk number of the drive you want to format.
Clear-Disk -Number 1 -RemoveData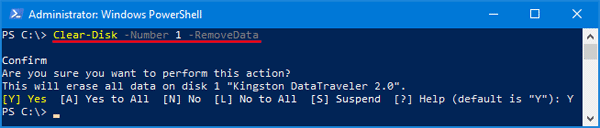
- Next, create a new partition on your blank disk, and assign a drive letter:
New-Partition -DiskNumber 1 -UseMaximumSize -IsActive -DriveLetter E
- To format the newly-created partition with the NTFS file system, type the following command and press Enter. Replace ‘USB’ with the volume label you want to use.
Format-Volume -DriveLetter E -FileSystem FAT32 -NewFileSystemLabel USB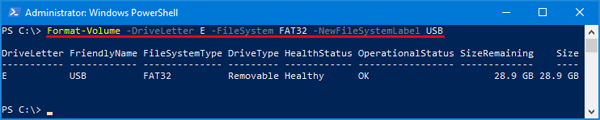
- Once you’ve completed the steps, you can now access the new partition in Windows Explorer.