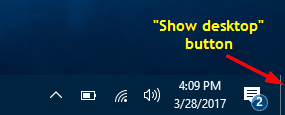
The “Show Desktop” button is actually a small rectangular icon at the far right side of the taskbar in Windows 10. If you click it, it will minimize all open windows and take you to the desktop. I never use it because I just press the WIN + D keyboard shortcut instead. In this tutorial we’ll show you a simple way to hide / remove the “Show Desktop” button from Windows 10 taskbar.
How to Remove “Show Desktop” Button from Windows 10 Taskbar?
7+ Taskbar Tweaker is a tiny freeware to completely tweak and customize the taskbar in Windows 10/8/7. Here’s how to use it to remove “Show Desktop” button from Windows 10 taskbar:
- Download the freeware 7+ Taskbar Tweaker (about 1.2Mb) and save it to your Windows 10 computer.
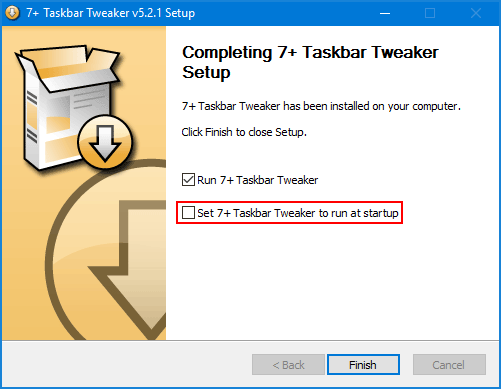
- After the download is complete, double-click the setup file to install it locally. When you get to the step of completing the installation, make sure you uncheck the box “Set 7+ Taskbar Tweaker to run at startup“, because there is no need to run the program each time you turn on the computer.
- Once launching the program, you should see an checkbox called Hide the “Show desktop” button at the bottom-right corner under the Other section.
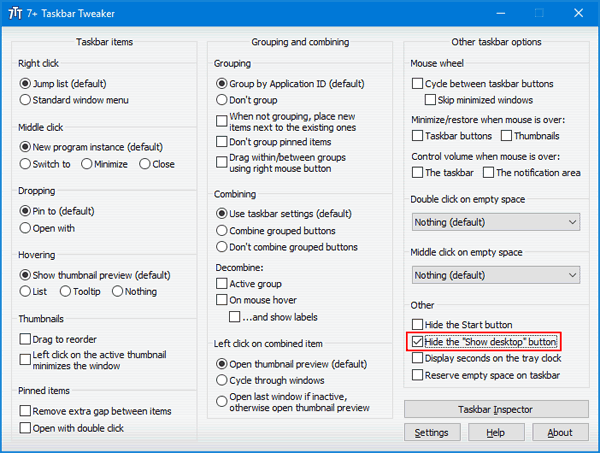
Select this checkbox, and you’ll see the “Show Desktop” button is removed from the taskbar in Windows 10. (Deselect that box and the “Show Desktop” button will be back again.)