How to delete a drive letter for a device that is no longer connected? Look for a way to hide all drive letters in Windows Explorer? This tutorial shows you how to hide or remove drive letters in Windows 10, 8 and 7.
Part 1: Hide Drive Letters
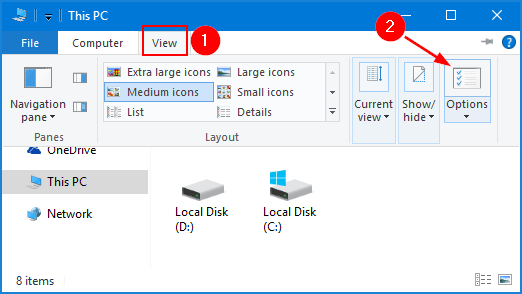
- Open File Explorer, click the View tab from the ribbon toolbar and then click Options.
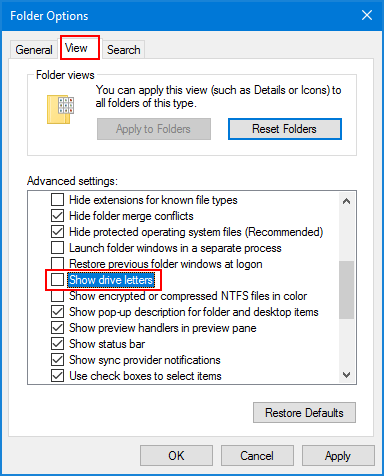
- In the Folder Options window, select the View tab. Under the Advanced settings, uncheck the “Show drive letters” option and click OK.
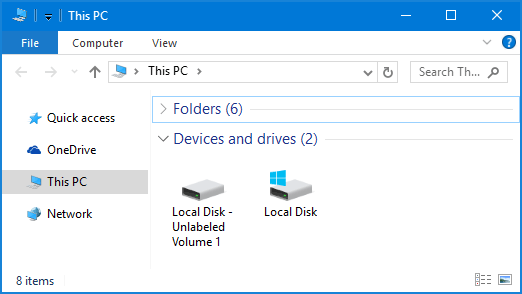
- You’ll find the drive letters of all your partitions are disappeared.
If you want to restore the drive letters, just repeat the above steps and check the “Show drive letters” option.
Part 2: Remove Drive Letter for Windows Partition
This method allows you to remove / delete drive letter that was assigned to your partition. The partition will be invisible to all your Windows accounts and will continue to exist with its content intact.
- First, you need to open the Disk Management tool. In Windows 10/8, just press Windows key + X and select Disk Management. If you’re using Windows 7, right-click My Computer icon on your desktop and select Manage, you can then find Disk Management in the left pane.
- Right-click the partition you want to remove drive letter, then select Change Drive Letter and Paths.
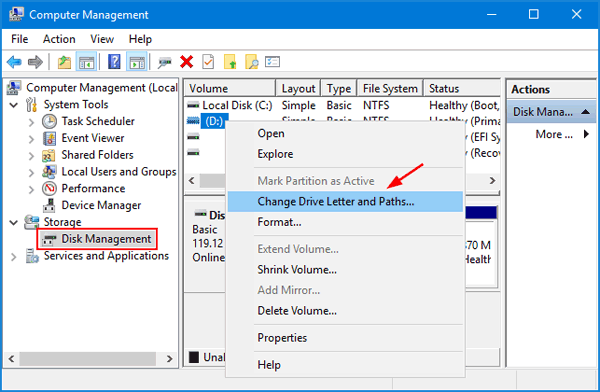
- In the resulting dialog box, click Remove.
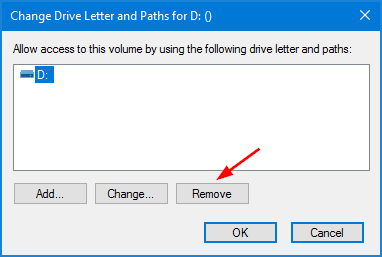
- You are asked to confirm the removal of the drive letter. Click Yes.

- The partition is now hidden and it is no longer accessible from the operating system you are currently using. If you assign a drive letter to that partition later, the partition will be visible again and all your files remain intact.