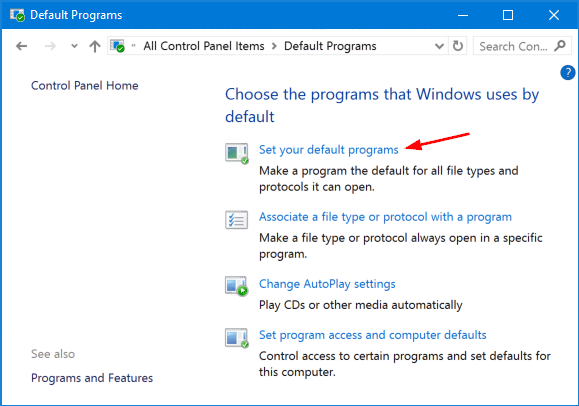
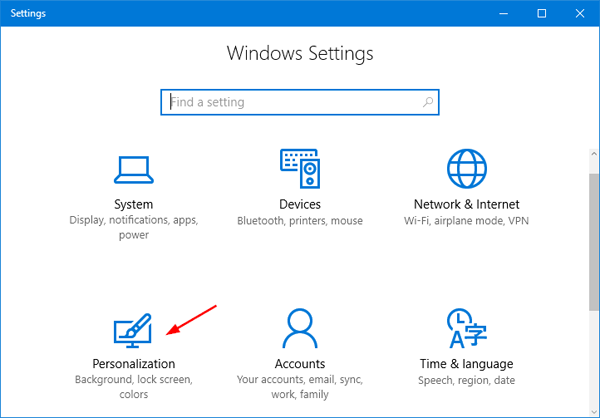
In Windows 10, most Control Panel features have been moved to the Settings app, and Settings will eventually replace the Control Panel. Starting with Windows 10 Creators Update (build 1703), there is a new feature that allows you to hide certain pages of the Settings app. In this tutorial we’ll show you how to use group policy or registry editor to hide certain or all pages of the Settings app in Windows 10.
Method 1: Hide Settings Pages in Windows 10 Using Group Policy
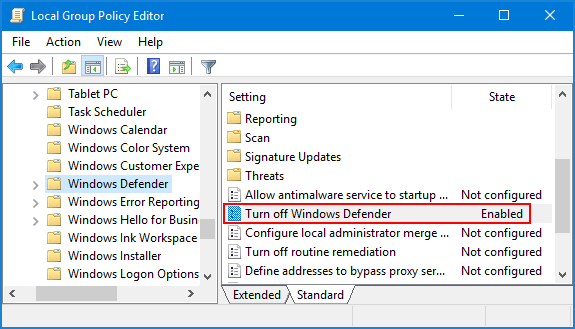
- Press Windows + R keys together on your keyboard, then type gpedit.msc and press Enter.

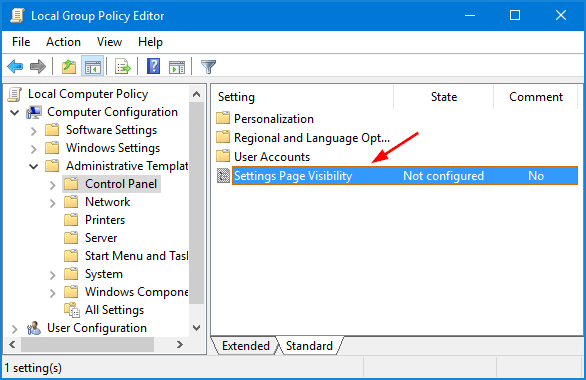
- When the Local Group Policy Editor opens, navigate to: Computer Configuration > Administrative Templates > Control Panel. In the right pane, you will find the option named Settings Page Visibility. It is a new policy in Windows 10 Creators Update.
- Double-click the Settings Page Visibility policy. Set it to Enabled. In the text box, you can specify a list of settings pages to show or hide. For example, if you want to hide the “Sign-in options” page from the Settings app, then type:
hide:signinoptions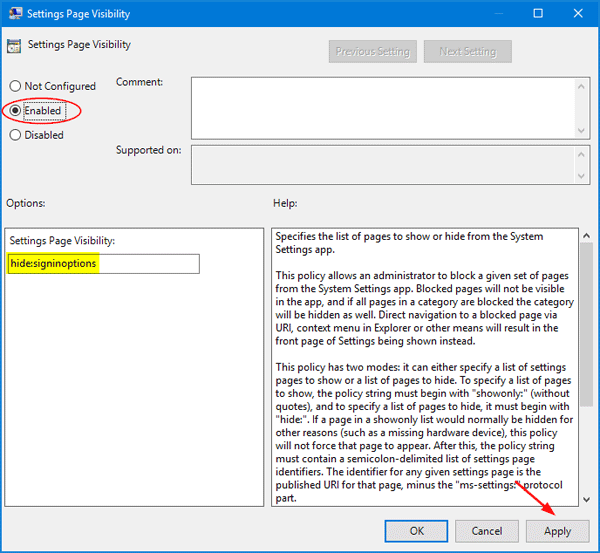
Note: signinoptions is the URI of the Sign-in options page. To look up URIs for every pages of the Settings app, please check this article.
For example, to hide the the Bluetooth page and the Display page, type the value:
hide:bluetooth;displayIf you want to specify that only About and Bluetooth pages should be shown and all other pages hidden:
showonly:about;bluetoothIf you want to hide all settings pages, type:
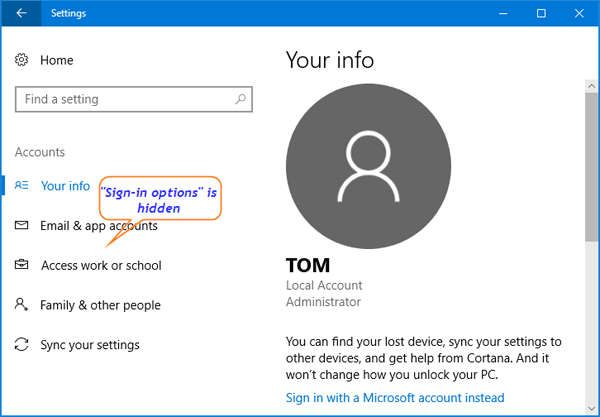
showonly: - Next click Apply and then OK. Re-open the Settings app to check if it takes effects. In my case, the Sign-in options page is disappeared.
If you’ve configured the policy to hide all settings pages, you’ll see nothing after launching the Settings app:

Method 2: Hide Settings Pages in Windows 10 Using Registry Editor
- Press Windows + R keys together on your keyboard, then type regedit and press Enter.

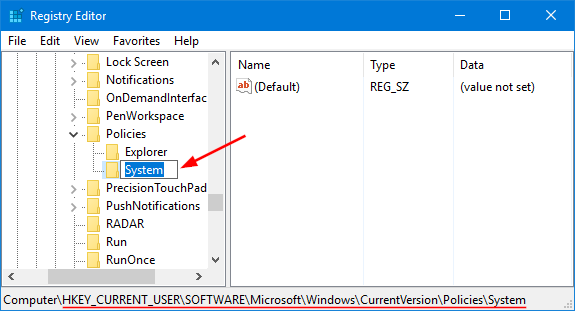
- When the Registry Editor opens, navigate to the following key:
HKEY_LOCAL_MACHINE\SOFTWARE\Microsoft\Windows\CurrentVersion\Policies\ExplorerIf you don’t see the Explorer key, then just create it yourself.
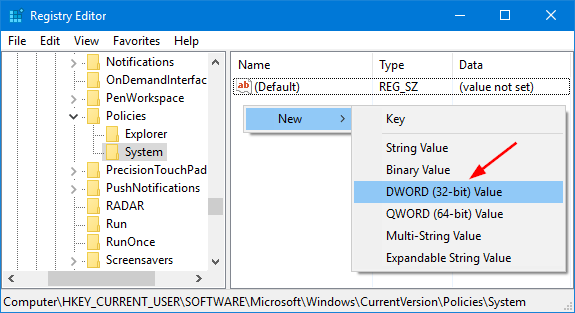
- Right-click on the Explorer key in the left pane, and then select New > String Value. Name the value as SettingsPageVisibility.
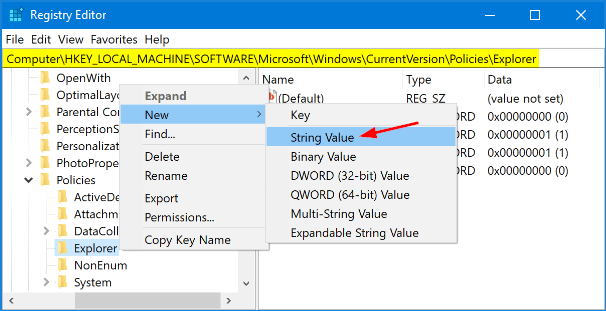
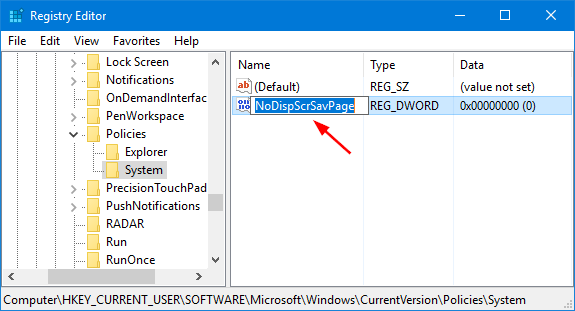
- Double-click on SettingsPageVisibility. In the Edit String window, if you want to hide certain pages in the Settings app, use the code:
hide:pageURI;pageURI;pageURI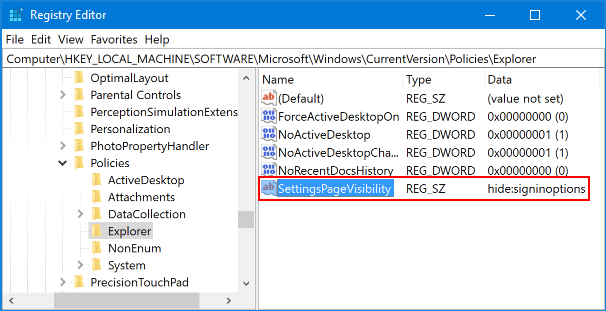
- Close Registry Editor and relaunch the Settings app to see the changes.