When you tap or draw something on a touch screen, a round spot appears under your fingertip if you’ve enabled Touch Feedback in Windows 10. This provides you with visual feedback that your tap was recognized. In this tutorial we’ll show you 3 ways to enable or disable Touch Feedback in Windows 10.
Method 1: Enable or Disable Touch Feedback via Settings
- Use Windows + I keys on the keyboard to open the Settings, and then click Ease of Access.

- Select the “Other options” in the left menu. There you should see a setting for “Show visual feedback when I touch the screen” on the right.
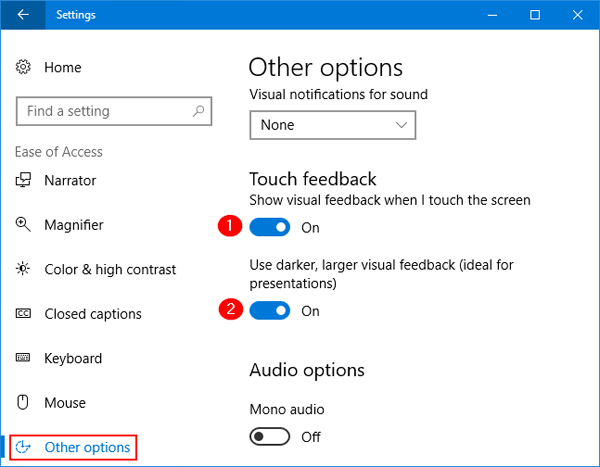
- Toggle it off if you want to get rid of the annoying grey touch circle on your screen. Or toggle it on to enable Touch Feedback and optionally turn on “Use darker, larger visual feedback (ideal for presentations)“.
Method 2: Enable or Disable Touch Feedback via Control Panel
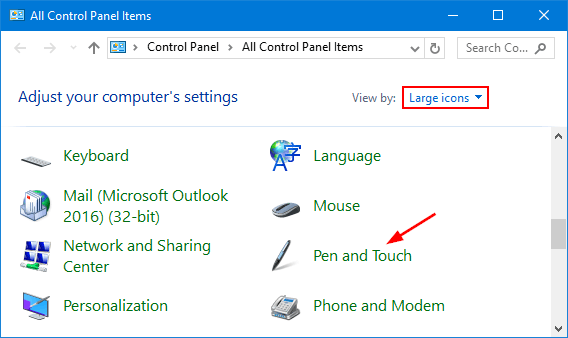
- Open the Control Panel in Large icons view, and click Pen and Touch.
- In the Pen and Touch window, click the Touch tab at the top. Check the option “Show visual feedback when touching the screen” to turn on Touch Feedback. If you want darker and larger visual feedback, check the “Optimize visual feedback for projection to an external monitor” box.
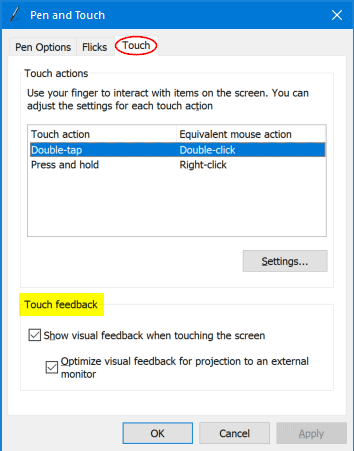
- If you want to turn off Touch Feedback, uncheck the option “Show visual feedback when touching the screen“. Once you have set the desired options, click Apply and then OK.
Method 3: Enable or Disable Touch Feedback via Registry Editor
- Open the Registry Editor and browse to the following registry location:
HKEY_CURRENT_USER\Control Panel\Cursors - There you should see two DWORD values “GestureVisualization” and “ContactVisualization” on the right. If you want to disable Touch Feedback, just set both of them to zero. If you want to enable Touch Feedback, set GestureVisualization to 31 in decimal, and set ContactVisualization to 1.
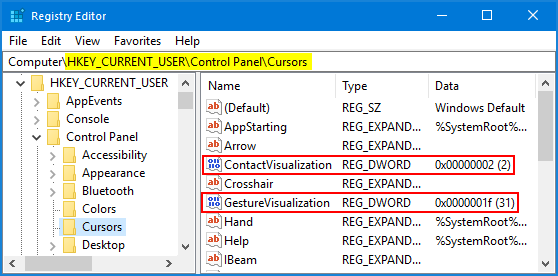
- If you to turn on “Darker, Larger Visual Feedback”, keep GestureVisualization as a decimal value 31 and set ContactVisualization to 2.
- Close Registry Editor and reboot your computer for the changes to take effect.