While plugging in a new device, Windows 10 automatically downloads and installs the device driver via Windows Update. Every time Windows 10 checks for OS updates, it will also update the device drivers. However, some drivers from Microsoft may not be fully compatible with the device driver you have installed and it might result in system instability.
In this tutorial we’ll show you 3 different ways to stop automatic driver updates in Windows 10. Note that the Local Group Policy Editor is not available to Windows 10 Home users.
Method 1: Stop Automatic Driver Updates Using Windows Settings
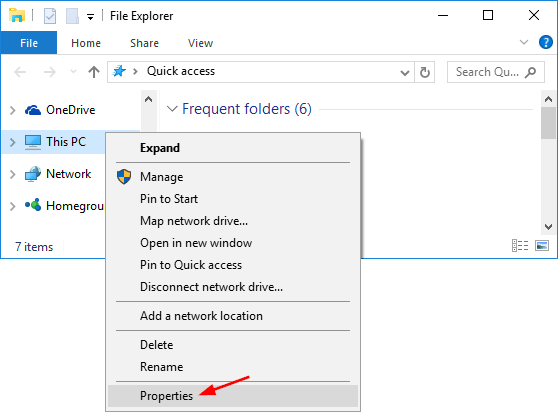
- Open a File Explorer window. Right-click This PC from the navigation pane and choose Properties.
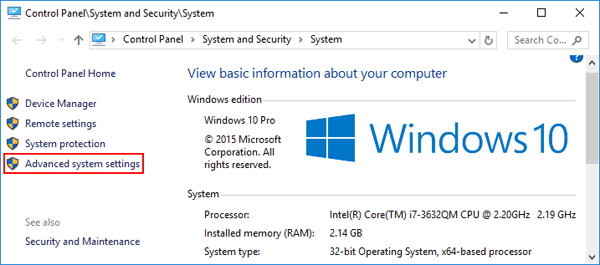
- Click the Advanced system settings link located on the left hand side of the screen.
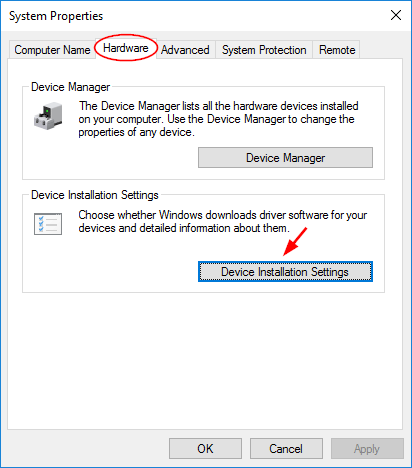
- When the System Properties window opens, select the Hardware tab, and click the Device Installation Settings button.
- You will be asked whether you want to automatically download manufacturers’ apps and custom icons available for your devices. Select No and click Save Changes.
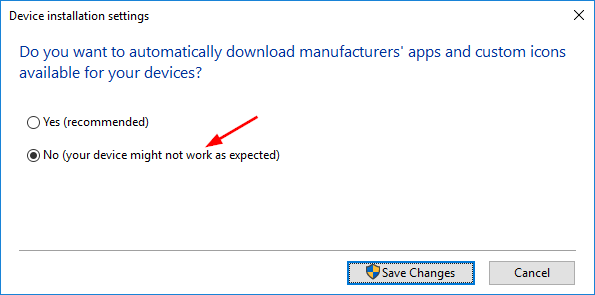
This should stop Windows from automatically downloading and installing device drivers from Windows Update.
Method 2: Stop Automatic Driver Updates Using Group Policy
- Press Windows key + R, enter gpedit.msc, and hit Enter to open Local Group Policy Editor.
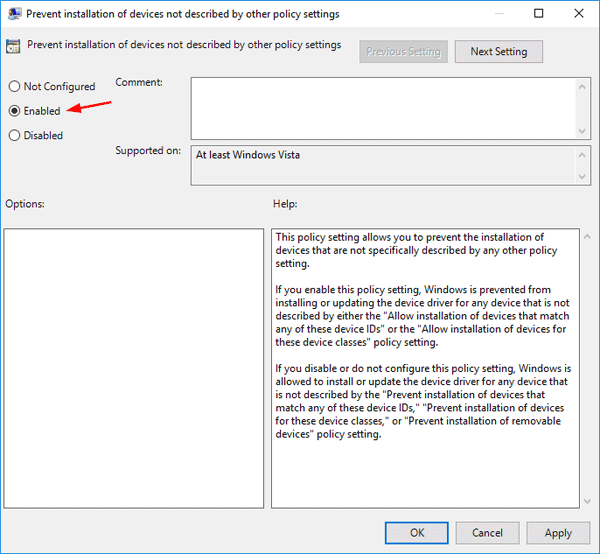
- Navigate to Computer Configuration –> Administrative Templates –> System –> Device Installation –> Device Installation Restrictions. In the right hand pane, find the “Prevent installation of devices not described by other policy settings” policy and double-click on it to modify.

- To turn off automatic driver updates, select Enabled and click OK. This will disable all driver updates.
Method 3: Stop Automatic Driver Updates Using Registry Editor
- Press Windows key + R to launch the Run dialog, enter regedit, and hit Enter to open Registry Editor.
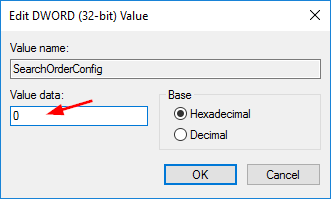
- Navigate to HKEY_LOCAL_MACHINE\SOFTWARE\Microsoft\Windows\CurrentVersion\DriverSearching. Double-click on the SearchOrderConfig entry on the right pane.
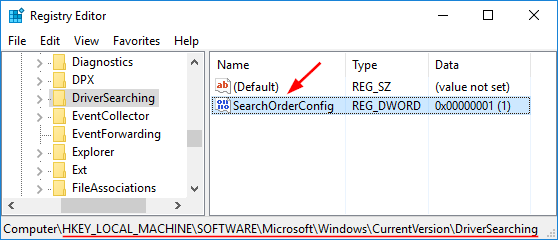
- Set the value data to 0 and it will turn off automatic driver updates. A value of 1 allows downloads of driver updates. Click OK and reboot your computer for the changes to take effect.