How can I see a list of the folders I have shared? Looking for a way to find all hidden or suspicious network shares on your computer? It’s a good security strategy to remove network shares when you no longer need to share files over a network. In this tutorial we’ll show you 3 ways to view all shared folders in Windows 11.
Method 1: View All Shared Folders in Windows 11 Using File Explorer
- Open File Explorer. Type
\\localhostin the address bar and press Enter.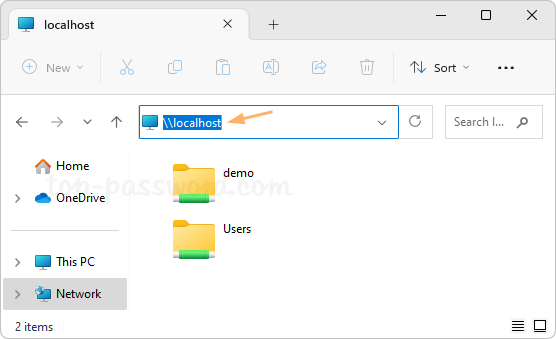
- It will list all the folders you have shared with anybody on the network.
Method 2: View All Shared Folders in Windows 11 Using Computer Management
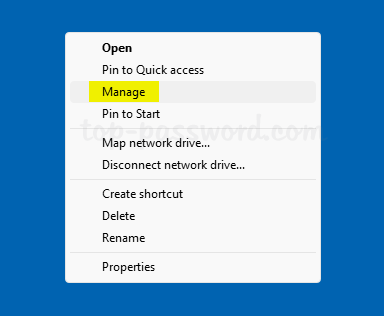
- Right-click the This PC icon on your desktop, and then choose “Show more options“.
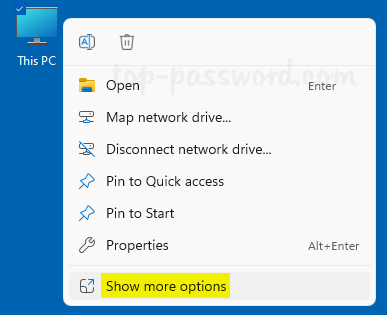
- Proceed to choose Manage from the pop-up menu.
- Once Computer Management opens, expand
System Tools -> Shared Folders, and then click Shares.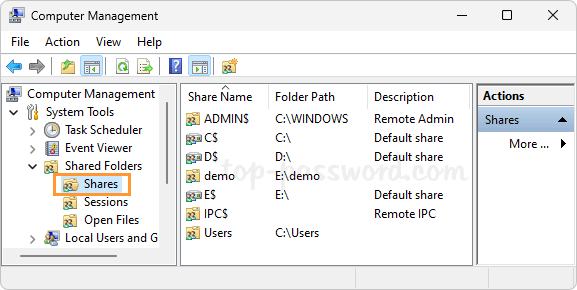
- You’ll see all network shares in the right pane, including the hidden administrative shares for each drive on your system ( C$ for the C drive). Additionally, you can click the “Open Files” (or “Session“) node from left navigation pane to see who is accessing which shared folders on your computer.
Method 3: View All Shared Folders in Windows 11 Using Terminal
- Right-click the Start button on the taskbar and select “Terminal (Admin)“.

- Type the
net sharecommand and press Enter. You will see a list of shared folders on your computer.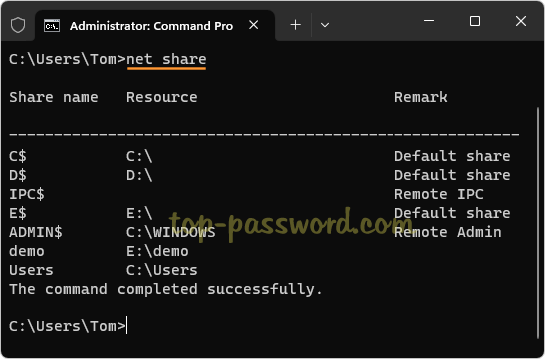
That’s it!