Printer connected but not printing? My HP printer used to work without any problems but now it will only print to file? These printing issues usually happen when an improper port is assigned to your printer. To fix such problems, you may need to change the printer port. In this tutorial we’ll walk you through the steps to change printer port in Windows 11.
How to Change Printer Port to Fix Printing Issues in Windows 11
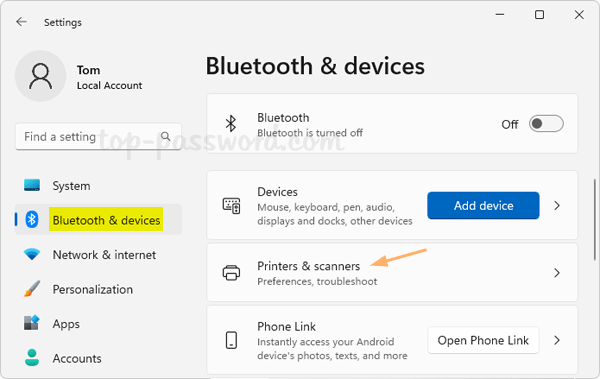
- Press the Windows + I keys to launch the Settings app. Head to the Bluetooth & devices category, then click “Printers & scanners” on the right pane.
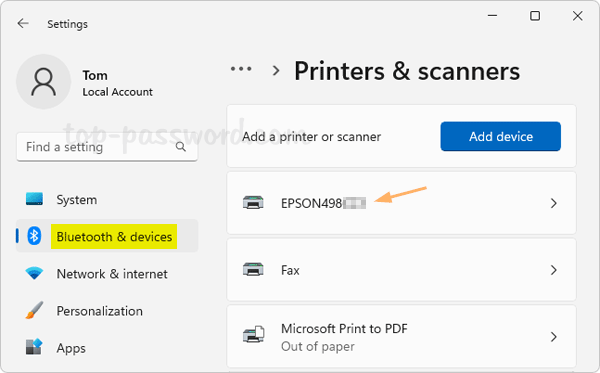
- Select the printer which you would like to change the port for.
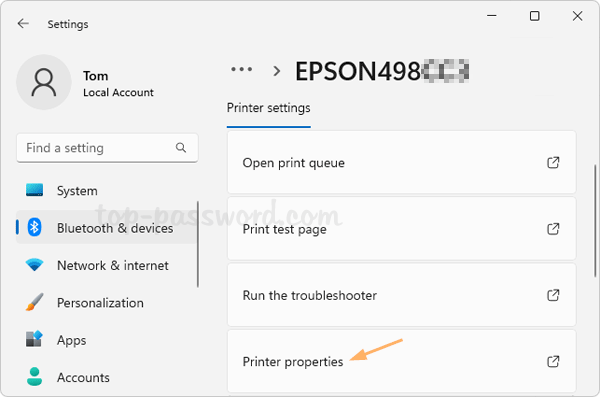
- Under the “Printer settings” section, click the “Printer properties” option.
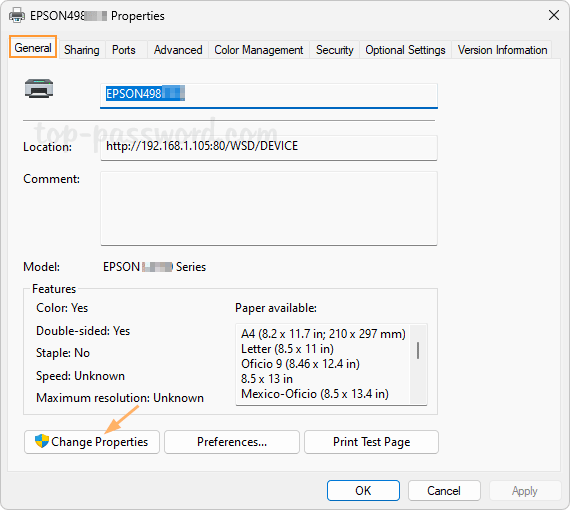
- When the printer properties dialog box opens, select the General tab and click the “Change Properties” button in the bottom left corner.
- Go to the Ports tab and you can see which port is currently associated with your printer. The nul: port is generally used for testing, while the local port is mainly for virtual printers, such as XPS. I recommend you assign a standard TCP/IP port to your physical printer.
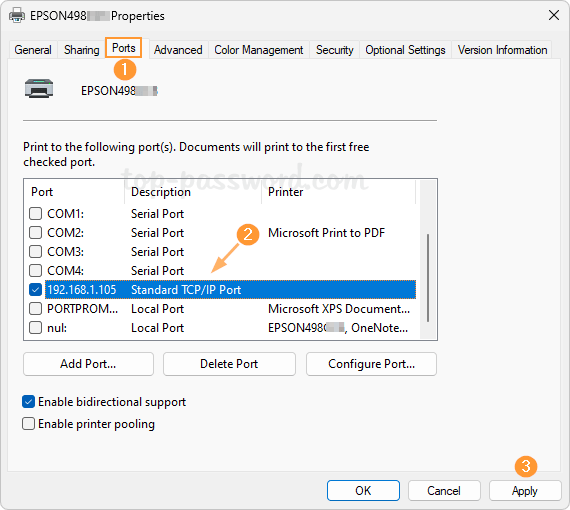
If the existing TCP/IP port points to a wrong IP address, just delete that port and then create a new TCP/IP port with the proper IP address, and assign it to your printer.
- After selecting the new port, click Apply and then OK. Hopefully your printer will work without printing issues.
That’s it!