How to search for files based on size in File Explorer? A good way to free up storage space is to find large files on your system, then delete or move them elsewhere. In this tutorial we’ll show you how to search for large files in Windows 11, without using third-party software.
How to Search for Large Files in Windows 11
Open File Explorer. Type * in the search box in the top right corner.
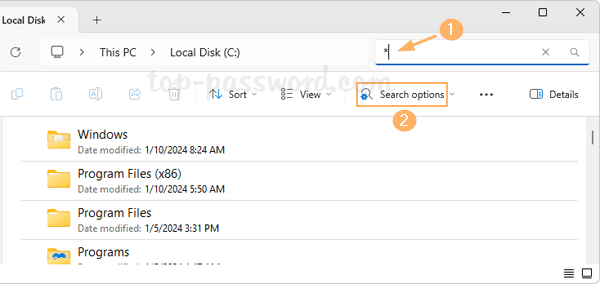
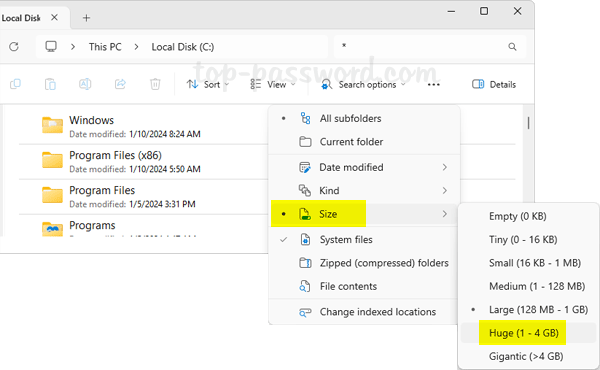
Then “Search options” button will appear in the toolbox, and you can click it to select the size of the files you’d like to find, ranging from Empty to Gigantic.
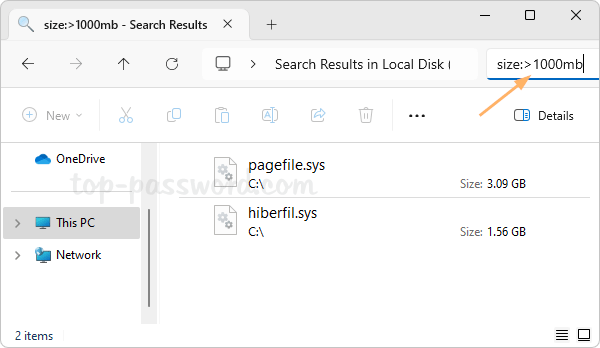
If the above search criteria don’t meet your needs, you can manually specify the minimum size of large files to filter. For example, when you’re looking for files larges than 1GB (about 1000 Mb), simply type size:>1000mb in the search box.
Once the large files are found, you need to determine if they can be deleted or moved to external hard drive. Deleting the system pagefile or hibernate file straightforward may cause system failure, but you can shrink their file size with the following proper methods:
- How to Change, Disable or Move Pagefile in Windows 10
- Reduce Hibernation (Hiberfil.sys) File Size in Windows 10
That’s it!