“I’m stuck on logon screen of Windows 7 professional. My password has an ö (german umlaut) character and the keyboard layout changed somehow to English. And on logon screen I can’t seem to find anywhere to change the keyboard layout. Hence I cannot logon to my Windows, can’t use my PC. What should I do?”
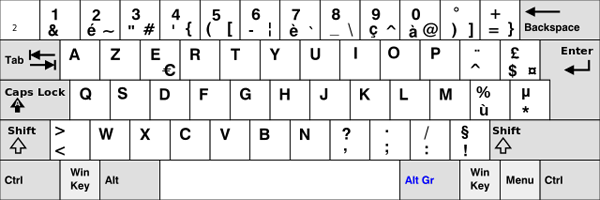
If for some reason a wrong keyboard layout is set for Windows welcome screen, the system might keep saying your login password is incorrect, even if you type in the password exactly the way they have been set. For example, if the keyboard layout is set to French, type QWERTY on a standard US keyboard and you’ll get AZERTY.
French Keyboard Layout:
In this tutorial we’ll show you how to change the default keyboard layout for the login / welcome screen in Windows 10, 8 and 7.
Tips: If you’re stuck at the login screen and see no chance to type in your password, you can boot off your computer from PCUnlocker Live CD to remove the login password. Afterwards you can log into Windows without typing password, then follow the steps below to fix the wrong the keyboard layout for Windows login screen.
How to Change Keyboard Layout for Windows 10/8/7 Login Screen?
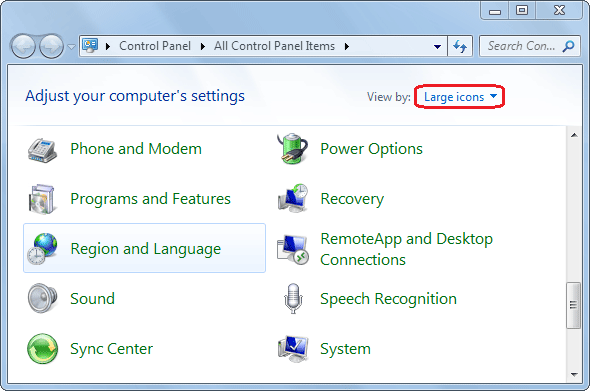
- First of all, you need to open the Control Panel. In Windows 7, simply click on the Start button and then click Control Panel. With Windows 10 or 8, press the Windows key + X to bring up the Quick Access Menu and select “Control Panel“.
- By default, the Control Panel opens with the Category view. You need to change the view to Large icons or Small icons. In Windows 7, click “Region and Language“.
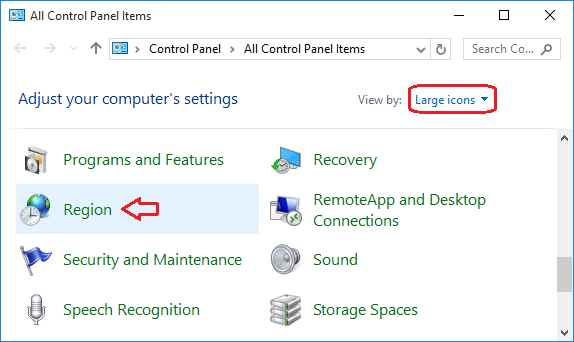
While in Windows 10 or 8, you have to click on “Region“.
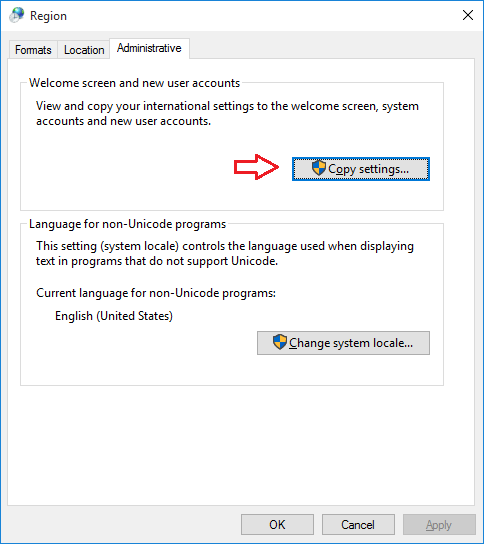
- Select the Administrative tab. Click on the Copy Settings button under Welcome Screen and New User Accounts. If prompted by UAC, click on Yes.
- In the dialog that appears, you can view the default keyboard layout and language for your current logged-on user, the Welcome/login screen, and new user accounts. To copy all “Current user” keyboard layout and language to the Windows welcome/login screen, tick “Welcome screen and system accounts“. Click OK.
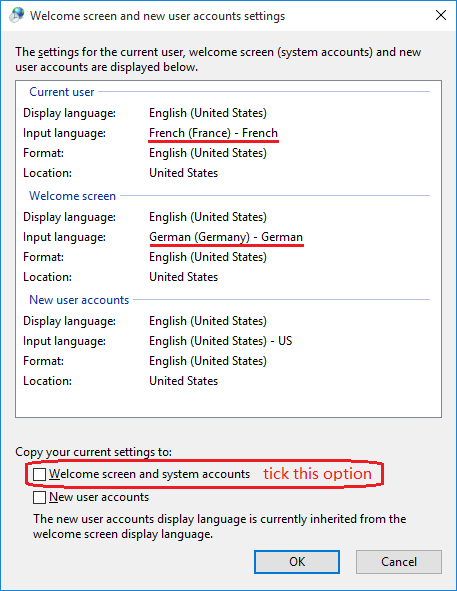
Note: The check boxes will not stay checked after clicking OK. The check boxes are only to copy the Current user settings to the checked option for this one time. If changes are made to the Current user settings, you can go back and check the boxes again to apply the changes.
- So this is how do I change the default keyboard layout for the login/Welcome screen in Windows 10/8/7.