Hibernation is a great way to cut down on the computer’s power consumption when it’s not in use. It also helps save battery on the laptops. When the computer is in hibernate it lets you save all the data in RAM to hard drive persistently and switch off the computer. Then you can switch on the computer with exact same settings and opened applications.
When you enable hibernation, it creates a file: hiberfil.sys, located on your root system partition which saved the state of all open documents and files. The file size of hiberfil.sys is about the size of your physical memory. So it would consume lots of hard disk space.
If you never plan to put your computer into hibernation then it’s probably a good idea to disable hibernation and gain all the disk space back. Here we’ll show you how to disable hibernation using Command Prompt in Windows 10, 8, 7, Vista and XP.
How to Disable Hibernation in Windows 10, 8, 7, Vista and XP?
- Go to Start Menu -> All Programs -> Accessories -> Command Prompt, right-click on it and select Run as Administrator. In Windows 8/10, press Windows + X to open WinX menu, then select Command Prompt (Admin).
- Type the command:
powercfg –h OFF
- Press Enter key, this will disable the hibernate feature.
- Now restart the computer, you won’t be able to see hibernate.sys file in your system drive. If you can still see it, simply delete it.
- Now you have successfully disabled hibernate and free the hard disk space.
If you want to enable hibernation again, you can use the same method above to open an elevated Command Prompt with administrator rights, then type the command: powercfg –h ON to enable the hibernation.
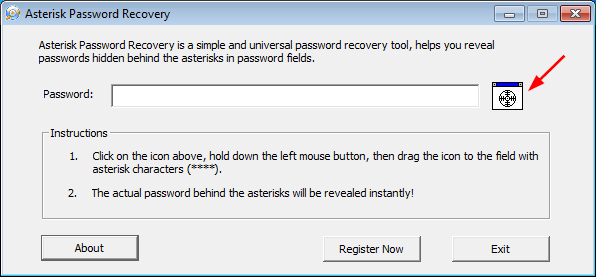
 , drag the icon to the password field with asterisk characters.
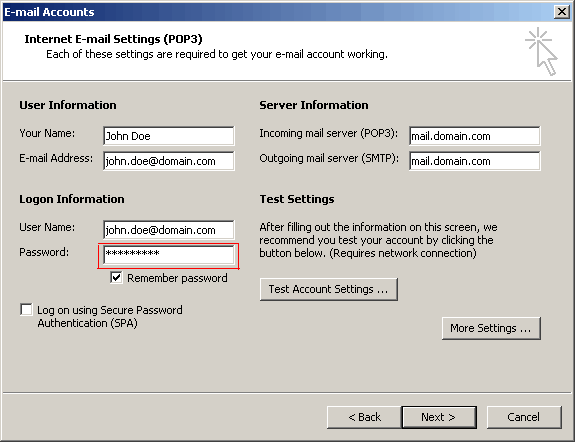