Can’t remember Windows user password? How to log into the computer without knowing the password? If you have been running Windows on your computer, chances are high that you haven’t assigned a password for the build-in administrator account. By default installation, Windows 8/7/Vista/XP has a built-in administrator account. Most computer owners don’t even know such an Administrator account is actually existed, don’t even mentioned they will create or set a password for Administrator user account.
The problem is that in normal Windows Welcome Screen where you choose which user account you want to log onto, the Administrator account is not displayed and is not shown. You need to start your computer in Safe Mode and the administrator account will be visible in the login screen. Just left the password box as blank and you should be able to log into Windows. After getting into Windows, you can go to Control Panel and reset your lost or forgotten password for any user account existing in your computer.
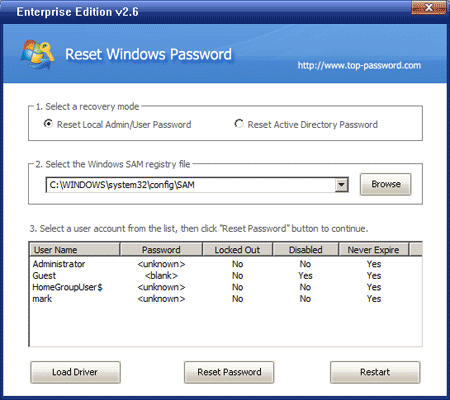
If the built-in administrator account is password-protected and you can’t remember the password, don’t worry! You can still log back into Windows easily but more instructions are involved. First you need to download the bootable ISO image of Reset Windows Password to a CD on another computer you can login, then use it to boot up your locked computer, the boot CD enables you to remove login passwords for any user account. After removing the password, restart your computer and you can then log into Windows without a password.