Guess what is the most annoying part of Windows 7 or Vista? Every time you try to access a system file/folder you get “Permission Denied” error. Windows 8/7/Vista doesn’t allow any user even the Administrator to modify (rename, delete, move) those system files. In order to gain full permissions to system files and folders, you need to take ownership & grant full control permissions to files & folder.
Taking ownership generally requires you to dive in and out of GUI menus, or break out the command prompt. It’s far more complicated than it needs to be, and thankfully, there is a free utility, called Ownership Changer, that makes this process easier.
Updated: We just released the first version of TakeOwnershipPro, a freeware to take ownership and grant yourself full permission to access any files or folders in Windows.
How to Add “Take Ownership” to Right-Click Context Menu in Windows?
Download and unzip the files contained in the TakeOwnership.zip file. Double-click the InstallTakeOwnership.reg file to install Take Ownership option in context menu.
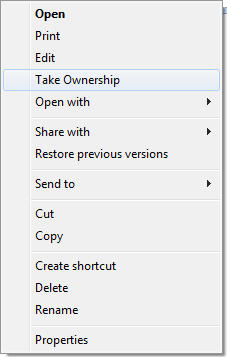
Here’s what the new right-click menu will look like after installing Take Ownership option:

If the Take Ownership option doesn’t work for you, or simply doesn’t suit your needs, double-click the RemoveTakeOwnership.reg file to remove it from context menu.