Is there a quick way to copy the file path instead of typing it? Just right-click on your selected file and select Properties from the context menu. The path is shown next to the Location header, and you need to append the file name at the end to get the full file path.

However, this method has inherently low efficiency, especially if you need to frequently copy the file path and paste it into a tool like Command Prompt or PowerShell. In this tutorial we’ll show you the fastest way to copy the full path of any folder or file in Windows 11 / 10 / 8 / 7.
Steps to Copy Full Path of Folders/Files
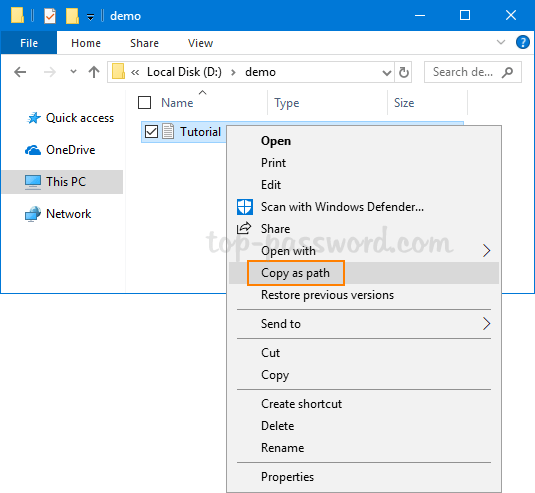
Open Windows Explorer and navigate to the files or folders whose path you want to copy. Once you are there, hold the SHIFT key and right-click the desired folders/files, then select “Copy as path” from the context menu. If you’re running Windows 11, you don’t need to hold down the SHIFT key.
Next, you can paste the full location of the selected folders/files anywhere including NotePad, Command Prompt or PowerShell.

That’s it! Hope you found this tip useful.