How do I delete a power plan that I no longer need? Windows allows you to use the built-in power plans (Balanced, Power Saver, and High Performance) or create a new power plan from scratch. This tutorial will show you 2 methods to delete custom or built-in power plan in Windows 11 / 10 / 8 / 7.
Method 1: Delete Custom Power Plan Using Control Panel
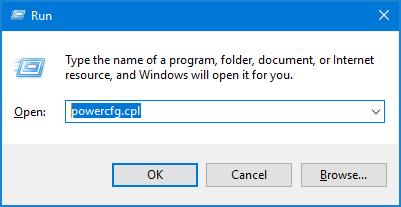
- Press the Windows and R keys together to open the Run dialog box. Type powercfg.cpl and press Enter to access one of the Control Panel applets – Power Options.
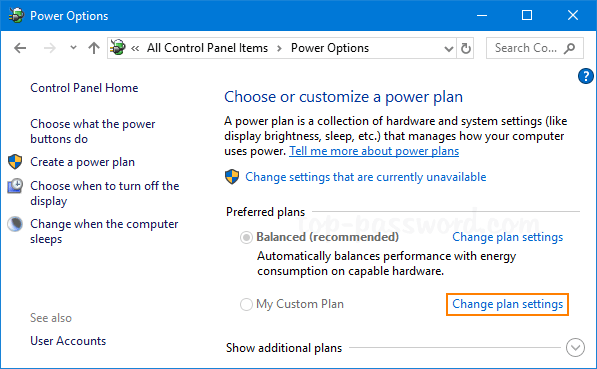
- To delete a custom power plan, you first have to choose another power plan as the active one. Then click on the link “Change plan settings” next to the custom power plan you want to delete.
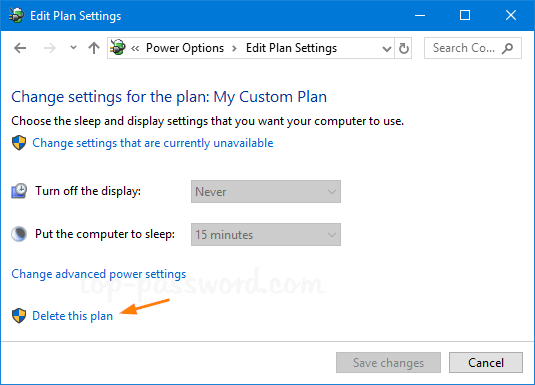
- In the next window, click on Delete this plan link at the bottom.
- Click OK to confirm the operation.

- After deleting the power plan, it will disappear from the Power Options window.
Method 2: Delete Custom or Built-in Power Plan Using Command Prompt
In addition to deleting custom power plan, this method also allows you to delete built-in power plans in Windows 10 / 8 / 7. Follow these steps:
- Open the Command Prompt as administrator. Run the powercfg /list command and it will list all existing power plans in your system along with their GUIDs.
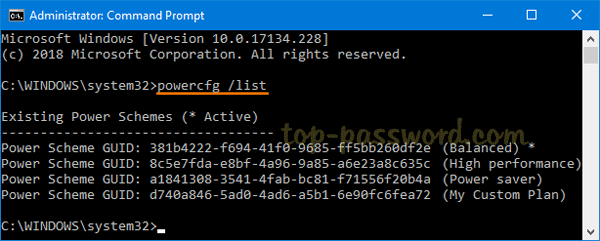
If the power plan you want to delete is active, then you have to set another plan as active by running this command:
powercfg -setactive GUID - Now, you can delete the desired power plan using the following command.
powercfg -delete GUID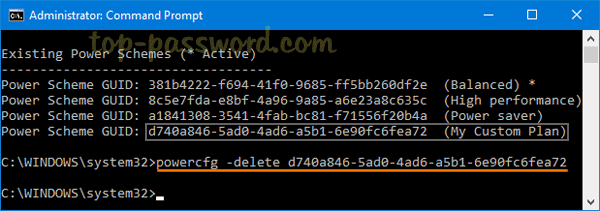
- When it’s done, the selected power plan is deleted and you cannot use it anymore.