Provide the best software to recover passwords for
Windows, SQL Server, PDF, Word, Excel, Outlook, FTP, Email, etc.


5 Ways to Change Standard User to Administrator in Windows 10/8/7
How do you change an existing standard user account into an administrator account without removing and re-adding the account? All admin accounts changed to standard user and lost admin rights on your Windows PC? There are 5 simple ways to to promote / change a standard user to a full administrator account in Windows 10, 8 and 7.
Method 1: Using Control Panel
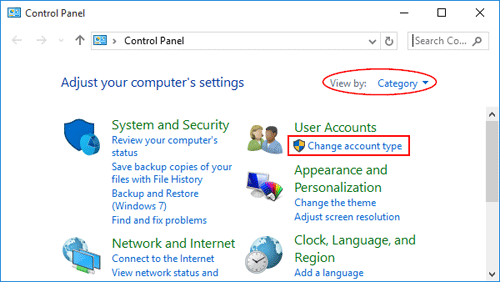
First of all, open the Control Panel. Set the View by option to Category. Click Change account type below the "User Accounts and Family Safety" (or "User Accounts") category.
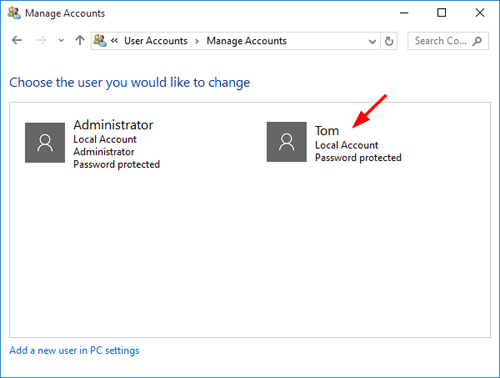
On the Manage Accounts window, click to select the standard user account you want to promote to administrator.
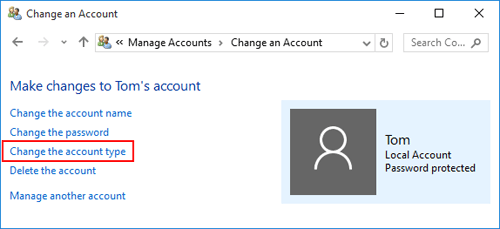
Click the Change the account type option from the left.
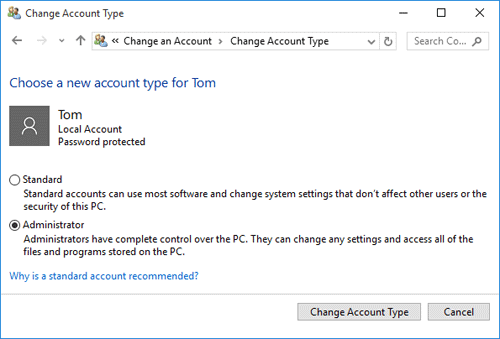
Select the Administrator radio button and click the Change Account Type button. Now, the account should be an administrator.
Method 2: Using Computer Management Console
The second method involves the use of the Computer Management console. Follow these steps to change standard user to administrator from Computer Management:
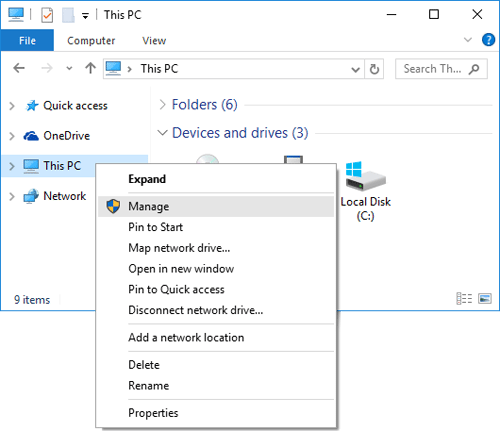
There are different ways of opening the Computer Management console. In File Explorer, right-click on "This PC" (or "My Computer") on the left pane and select Manage.
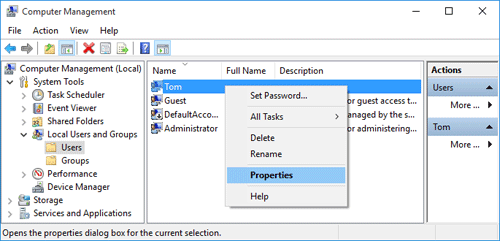
When the Computer Management console opens, expand to System Tools -> Local Users and Groups -> Users. Find the standard user in the list on the right that you wish to grant Administrator access, right-click on it and select Properties.
In the User Properties window, click the Member Of tab. You can see the standard account is not a member of Administrators group, so you have to add it.
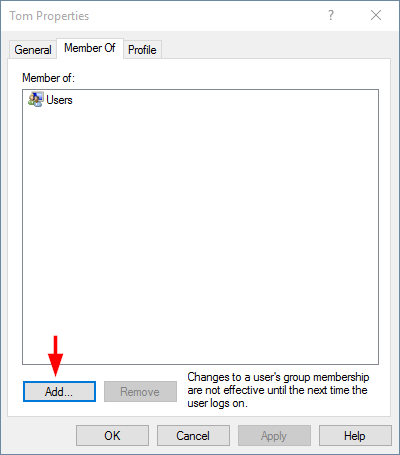
Once you've clicked the Add button and a "Select Groups" window will pop up. Click on Advanced.

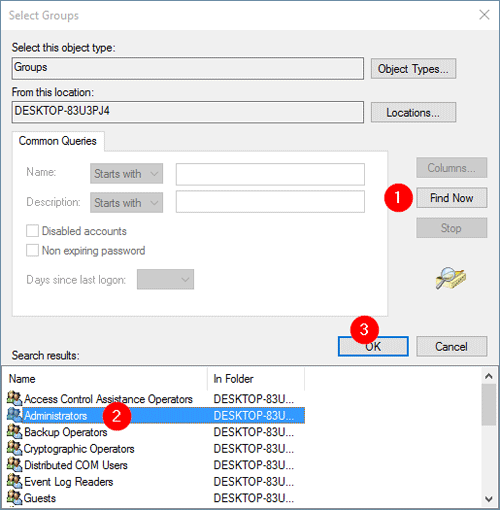
Click on Find Now to list available users and groups. Select the Administrators group from the search results, and click OK.
- When come back to the User Properties window, click OK. Now you've successfully change a standard user to administrator.
Method 3: Using Netplwiz
Netplwiz is a useful tool for managing user accounts in Windows 10, 8, 7 and Vista. Here's how to make standard user an administrator using the Netplwiz utility:
- Press the Windows key + R to open the Run box. Type netplwiz and press Enter.
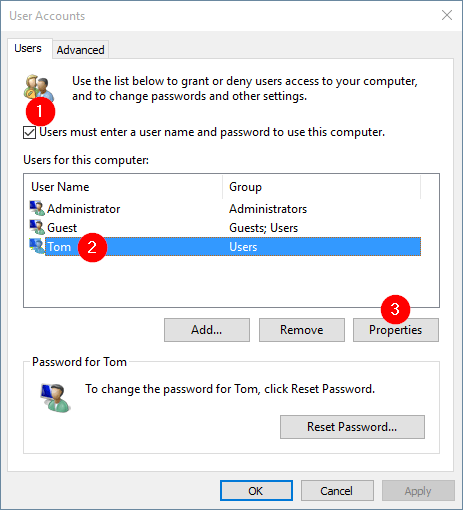
Check the "Users must enter a user name and password to use this computer" box, select the user name that you want to change the account type of, and click on Properties.
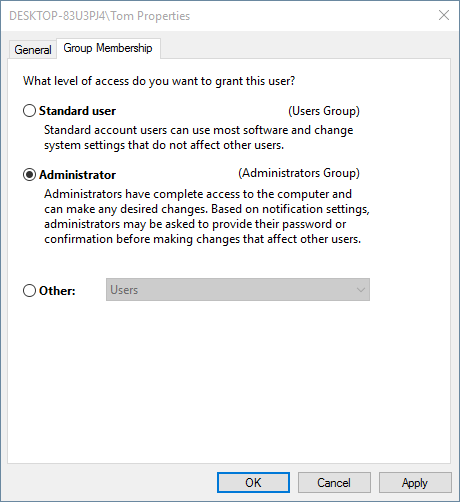
Click on the Group Membership tab. Click to check the Administrator radio button and click OK.
- Close the advanced User Accounts (netplwiz) window.
Method 4: Using Command Prompt
Here's how to change a standard user to administrator from an elevated Command Prompt:
- Open an elevated Command Prompt.
In the Command Prompt, you can use the net localgroup command to promote any user to an administrator. For example, to make Tom an administrator, type:
net localgroup Administrators Tom /add

- Now, the account should be an administrator.
If you've ever renamed the Administrators group or need to find out the name of a specific account, just type net localgroup at the Command Prompt and press Enter, it will list the names of all users and groups.
Method 5: Using PCUnlocker Live CD
All the methods above require you to log in to Windows under an existing user account with administrator access. If you couldn't login with any admin account, you have to use a piece of software from a bootable CD to change standard user to administrator. Here's how to turn a standard user account into administrator with PCUnlocker Live CD:
- If you don't already have one, create a PCUnlocker Live CD from another computer you have admin access to. Next boot up your target computer with the CD.
- If the boot order is set up correctly, your computer will load Windows PE from the CD and take you directly to the PCUnlocker program.
-
From the program you can see all local accounts that are detected in your Windows SAM file. Select a standard account and click on "Reset Password" button.
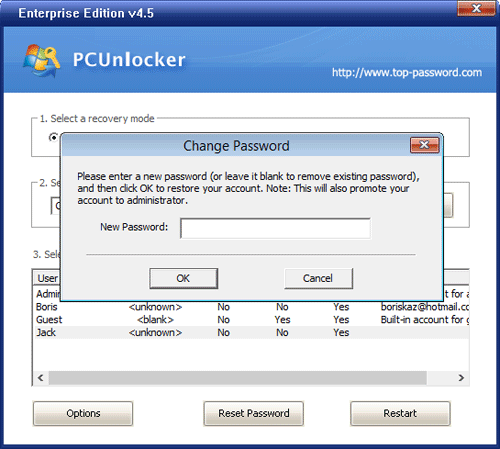
- Click Yes to confirm your changes. The program will remove your user password and promote your standard user account to administrator immediately.
- Reboot your computer and take out the CD. Log in to that user account and you should be able to perform administrative tasks.
Ready to try or buy?
Related Articles