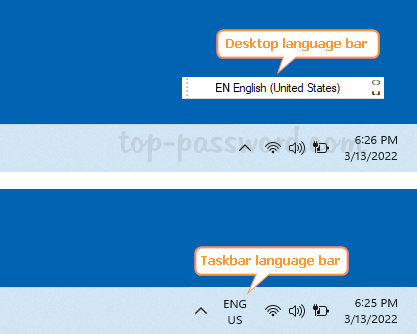
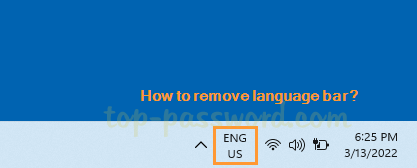
How can I hide the “ENG US” language switcher icon in the notification area? If you get used to changing the input languages with keyboard shortcut, it’s not necessary to show the language bar icon in the taskbar. In this tutorial we’ll show you how to easily remove the “ENG US” language bar from Windows 11 taskbar.
How to Remove the “ENG US” Language Bar from Windows 11 Taskbar
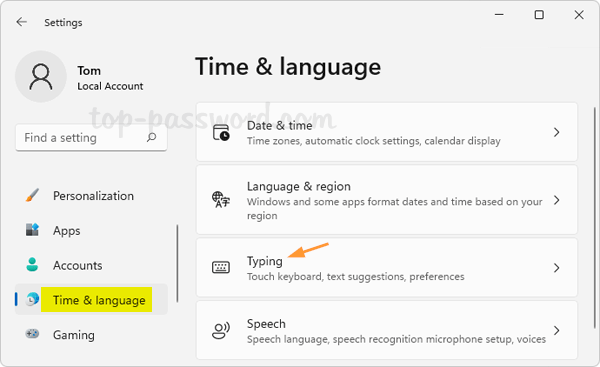
- Press the Windows + I shortcut keys to bring up the Settings app. Select Time & language from the left navigation pane, and click Typing on the right side.
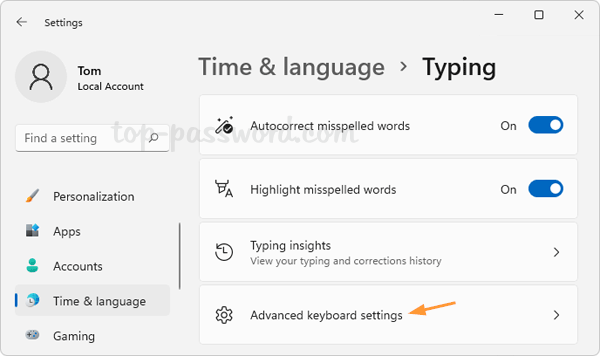
- Choose the “Advanced keyboard settings” option.
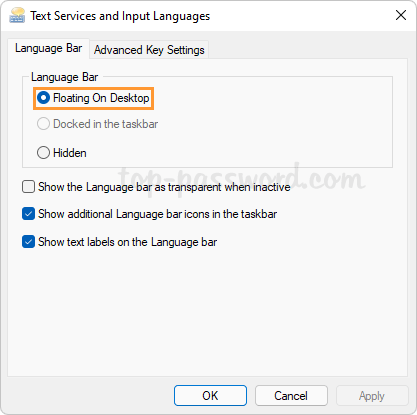
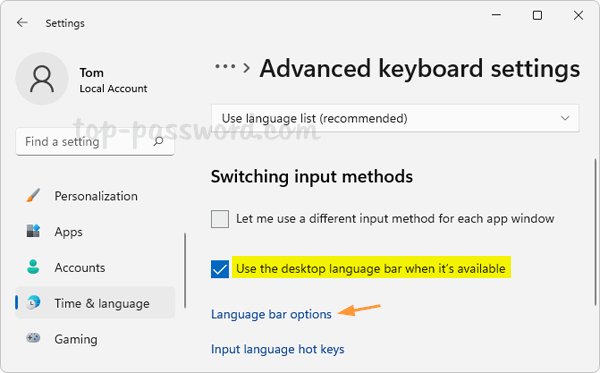
- Tick the “Use the desktop language bar when it’s available” checkbox and then click the “Language bar options” link.
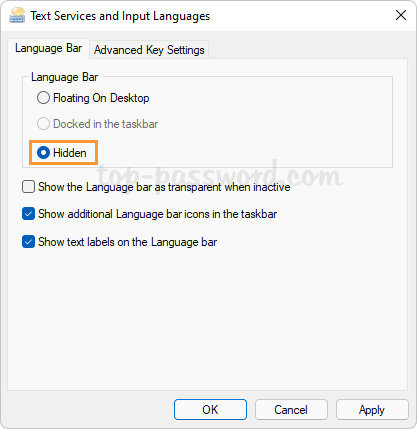
- Select the Hidden option under the Language Bar section. Click Apply and then OK.
- This should immediately remove / hide the “ENG US” language icon from your taskbar.
Conclusion
This method can also remove floating language bar from Windows 11 desktop. If you keep using the system default language on your computer, just uninstall the other language packs and the “ENG US” language switcher icon will automatically disappear from the taskbar.