How can I mute the beeping sound on Caps Lock, Num Lock or Scroll Lock keys? The Num Lock, Caps Lock and Scroll Lock keys are toggle keys which are used to switch between two functions. After turning on Toggle Keys feature, you will hear a sound every time a toggle key is pressed. In this tutorial we’ll show you 3 simple methods to turn on or off toggle keys sound in Windows 11.
Method 1: Turn on / off Toggle Keys Sound via Settings App
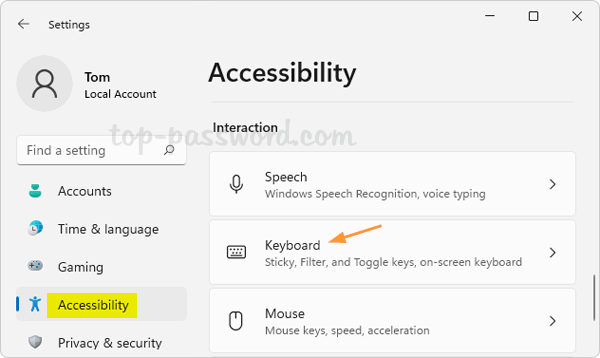
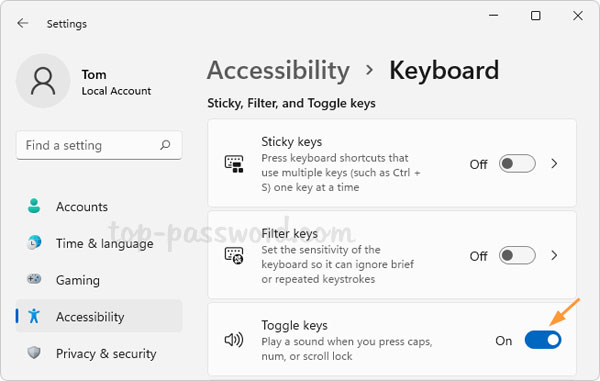
Press Windows logo key + I on the keyboard to open Settings. Select the Accessibility tab from the left-hand pane, then click Keyboard on the right.
You can then click the toggle button to turn on or off the Toggle keys feature.
Method 2: Turn on / off Toggle Keys Sound via Control Panel
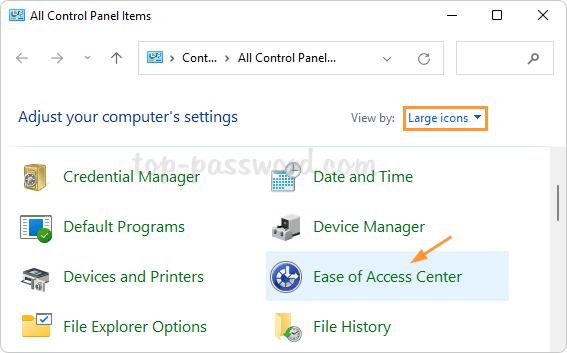
Open the Control Panel in Large icons view, and click on Ease of Access Center.
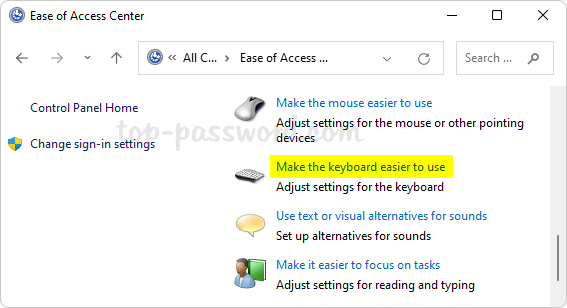
Click the “Make the keyboard easier to use” link.
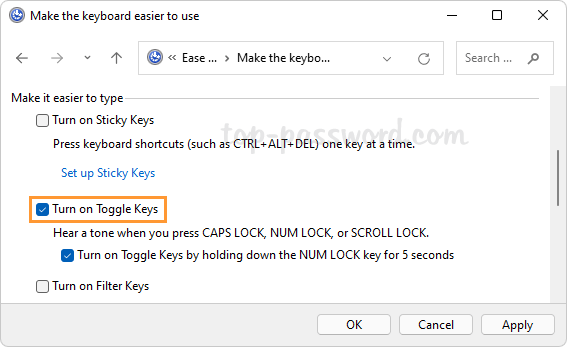
Scroll down to the “Make it easier to type” section, you can check or uncheck the “Turn on Toggle Keys” option to enable or disable toggle keys sound. Click OK to save your changes.
Method 3: Turn on / off Toggle Keys Sound via Registry Editor
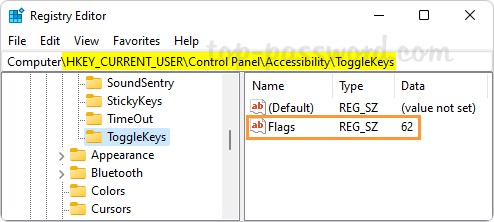
Open Registry Editor and navigate to: HKEY_CURRENT_USER\Control Panel\Accessibility\ToggleKeys. Double-click on the string Flags on the right pane.
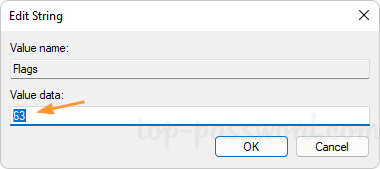
Enter 63 in the Value data box if you want to turn on Toggle Keys feature, or enter 62 for disabling toggle keys sound. Click OK.
Close Registry Editor. The changes will take effect on the next login, and you can then check if Windows will play a sound when you press Caps Lock, Num Lock, or Scroll Lock.