By default, Windows 10 will display your email address (if you’re using a Microsoft account) on the login screen. However, none of us would want everyone to see our email address when at public place with our computers. In this tutorial we’ll show you 3 ways to hide or show email address on Windows 10 login screen.
Method 1: Hide or Show Email Address Using Settings App
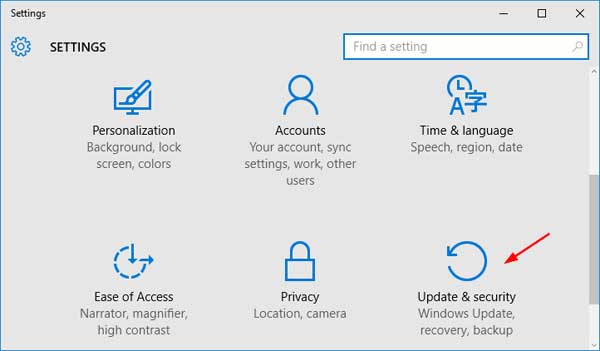
- To get started, you need to open the Settings app. Click the Start button in Windows 10 and select Settings, or press the Windows key + I keyboard shortcut.
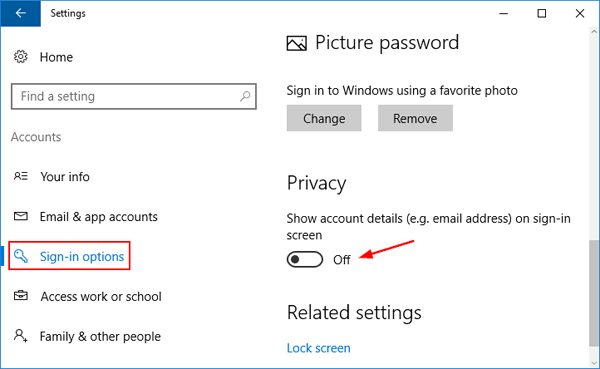
- On the main Settings screen, click on Accounts.
- Click the “Sign-in options” tab on the left-hand side. On the right-hand side, scroll down to the Privacy section and you will see the option named “Show account details (e.g. email address) on sign-in screen“. By default, the option is turned on. Toggle the switch to turn off it if you want to hide your email address on Windows 10 login screen.
However, those computers running old builds of Windows 10 probably don’t have the “Show account details (e.g. email address) on sign-in screen” option. In that case, you need to use the methods below to hide / show email address on the sign-in screen.
Method 2: Hide or Show Email Address Using Group Policy
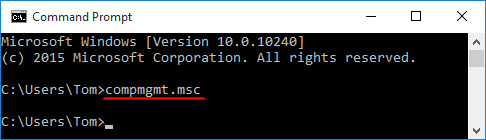
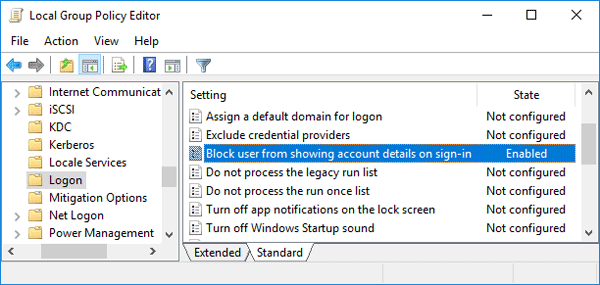
- Open the Local Group Policy Editor in Windows 10. In the left-hand pane, drill down to Computer Configuration -> Administrative Templates -> System -> Logon.
- On the right pane, find the “Block user from showing account details on sign-in” policy and double-click it. Set it to Enabled if you need to hide email address on the login screen, or set it Disabled or Not Configured if you allow email address displayed at the sign-in screen.
- When finished, exit the Local Group Policy Editor and restart your computer to test the changes.
Method 3: Hide or Show Email Address Using Registry Trick
If Local Group Policy Editor is not available in your Windows system, this registry hack can help you tweak the group policy setting. Both of these methods work in the same way, but the Group Policy Editor is a bit more user-friendly.
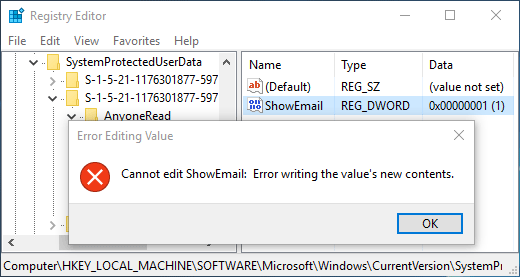
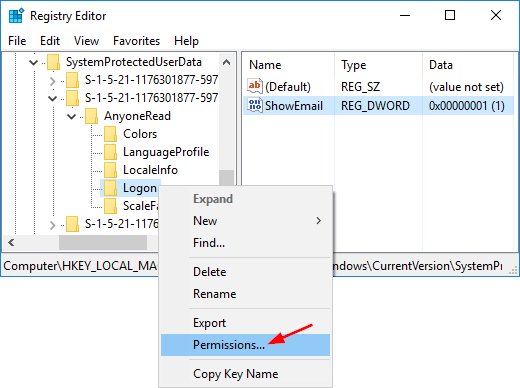
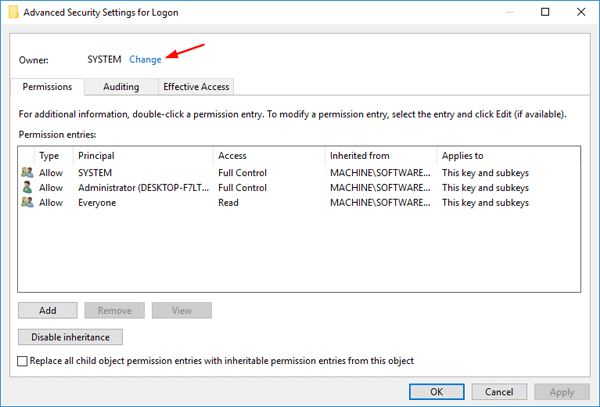
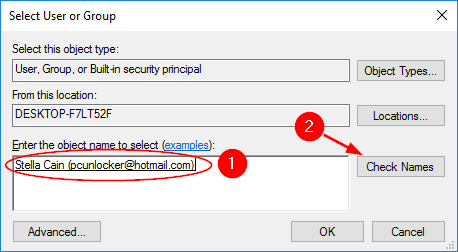
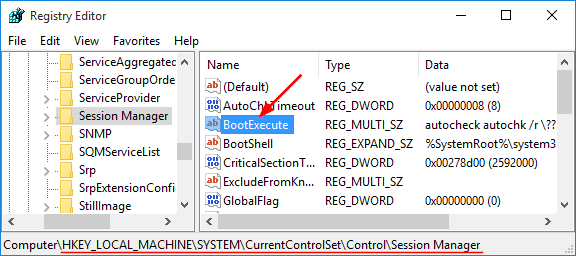
- Open the Registry Editor in Windows 10. Navigate to the following key:
HKEY_LOCAL_MACHINE\SOFTWARE\Policies\Microsoft\Windows\System - Find the BlockUserFromShowingAccountDetailsOnSignin value on the right pane and double-click it. Set the Value Data to 1 if you want to block Windows 10 show email address on the login screen. Or set the value to 0 and this will leave your email address visible at the sign-in screen.
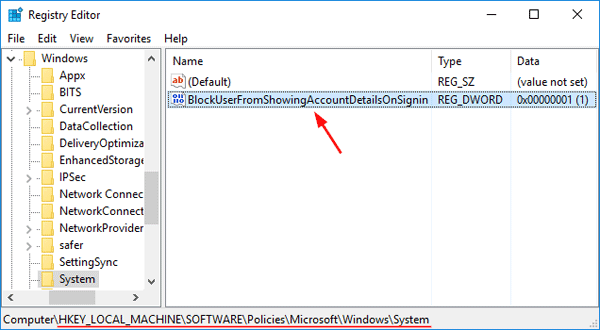
Note: if the BlockUserFromShowingAccountDetailsOnSignin value doesn’t exist, right-click on the empty space to create a new DWORD (32-bit) Value and name it with BlockUserFromShowingAccountDetailsOnSignin.
- Exit Registry Editor and reboot your computer. When you come to the login screen, you can check if your email address is shown or hide on Windows 10 login screen.
Notes:
If you’ve turned on the “Show account details (e.g. email address) on sign-in screen” option through the Settings app but your email address is still not shown at login, it’s possible that you’ve enabled the group policy “Block user from showing account details on sign-in“.
If you want to hide both your name and email address from the login screen, then you need to take use of the “Interactive logon: Do not display last user name” group policy.