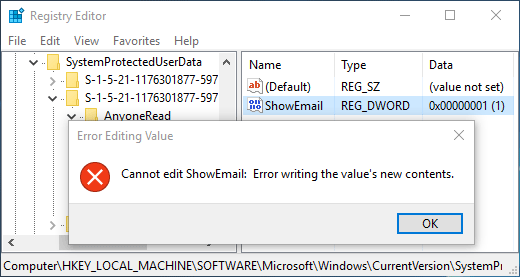
Sometimes you might encounter some registry keys that are protected by Windows. When you try to edit, rename or delete a protected registry key or value, you’ll get one of the following errors:
“Cannot edit {value_name}: Error writing the value’s new contents.”
“The Registry Editor cannot rename {key_name}. Error while renaming key.”
“Unable to delete all specified values.”
“Cannot delete {key_name}: Error while deleting key.”
Even you’re logged in as Administrator, you might still lack permissions to edit a protected registry key. In such cases, you need to take ownership of that particular key and grant full permissions to your signed-in account. This step-by-step tutorial will guide you how to take full ownership of protected registry key in Windows 10.
How to Take Full Ownership of Protected Registry Key?
- To start, press the Windows logo key + R on your physical keyboard, type regedit and press Enter to open the Windows Registry.

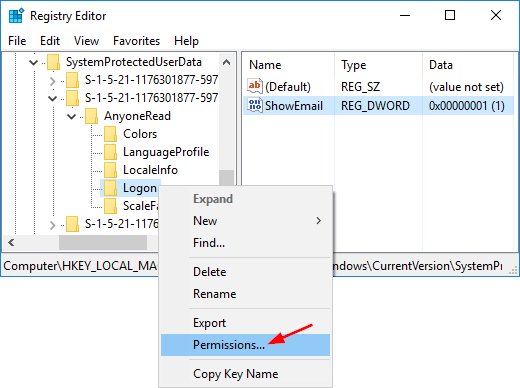
- Navigate to the protected key you want to take ownership of. For this example, we chose the following key:
HKEY_LOCAL_MACHINE\SOFTWARE\Microsoft\Windows\CurrentVersion\SystemProtectedUserData\S-1-5-21-1176301877-597599738-4051979053-1001\AnyoneRead\Logon - Right-click on the protected key, and select Permissions from the context menu that appears.
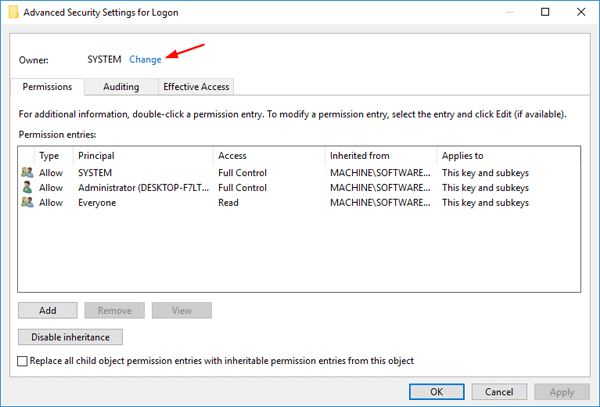
- In the Permissions window that appears, Click Advanced.

- In the Advanced Security Settings dialog, you can see the current owner (SYSTEM or “TrustedInstaller“) of your selected key. Click on Change button.
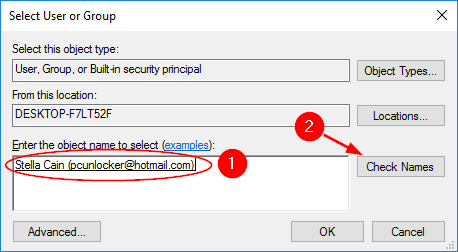
- This will open a new dialog box. Now type your user account name, and then click on “Check Names” button to convert the username to correct format. Click OK.
- Now you’ll see that your user account is showing up as the owner. Check the “Replace owner on subcontainers and objects” option if you also want to take ownership of the subkeys. Click OK.

- When back to the Permissions window, select the desired user name and then check Allow checkbox under the Full Control row, and click OK.
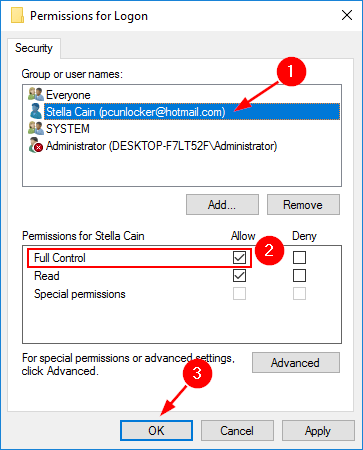
If your user account is not shown under the Group and user names list, click on Add button.
- Close Registry Editor. Now you’ve taken ownership of a protected registry key and grant your account full permissions. That’s it!