Screen saver is a nice way to protect your computer from prying eyes when you walk away without locking it. After a short time of inactivity, screen saver will automatically lock the screen and apply password protection. But sometimes screen saver will bother you while playing movie. In this tutorial we’ll show you 2 ways to turn on or off screen saver in Windows 10 / 8 /7.
Method 1: Turn On / Off Screen Saver from Screen Saver Settings Dialog
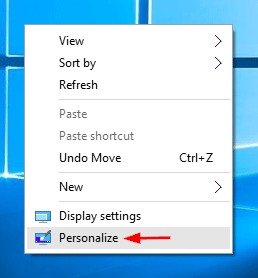
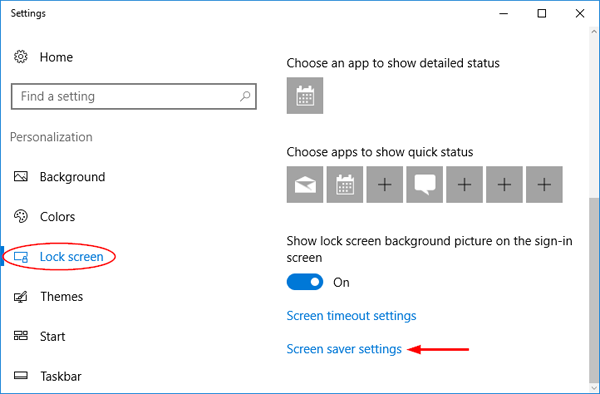
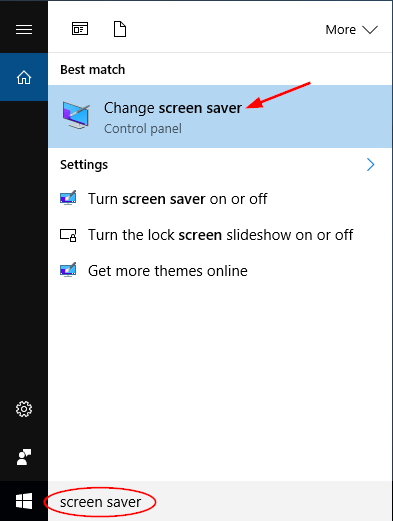
- Right-click the empty space on your desktop and select Personalize.
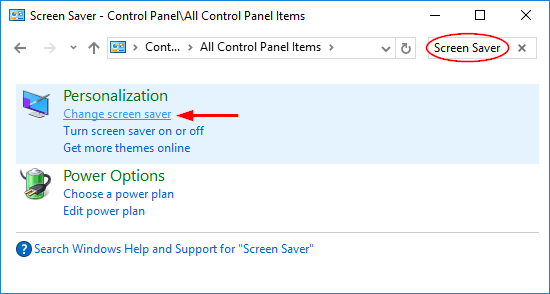
- It now opens up the Personalization settings. Click on Lock screen in the left pane, then click the Screen saver settings link in the right pane.
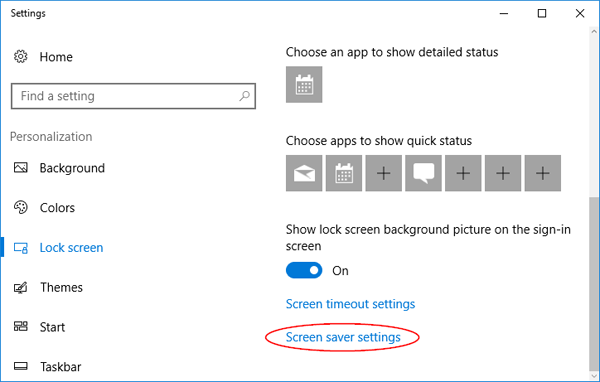
If you’re running Windows 7, simply click on the Screen Saver link at the bottom of the window.

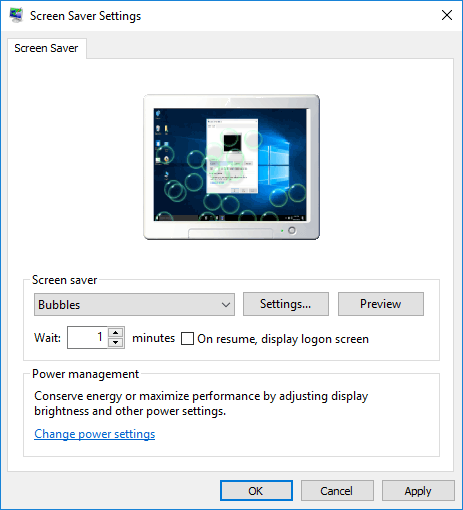
- Once Screen Saver Settings dialog is launched, you can customize the screensaver and change the idle time before the screen saver is activated. If you want to turn off screen saver, just set the screen saver as None and Uncheck the box to On resume, display logon screen.
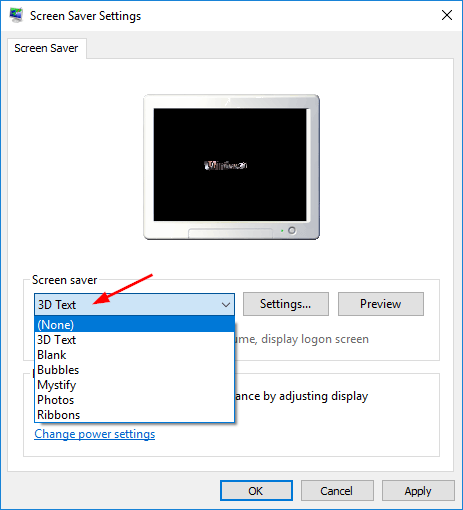
- Click Apply and then OK.
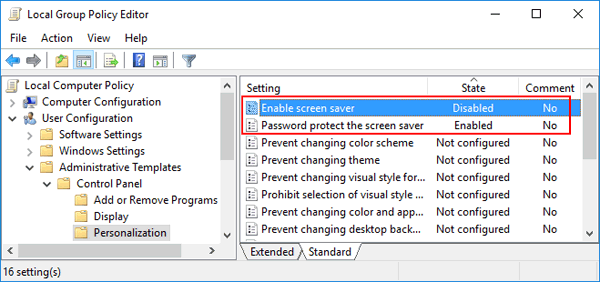
Method 2: Turn On / Off Screen Saver Using Group Policy
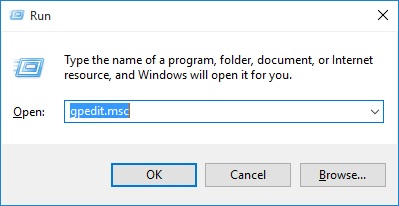
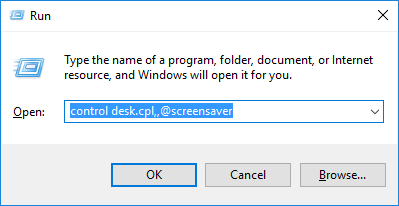
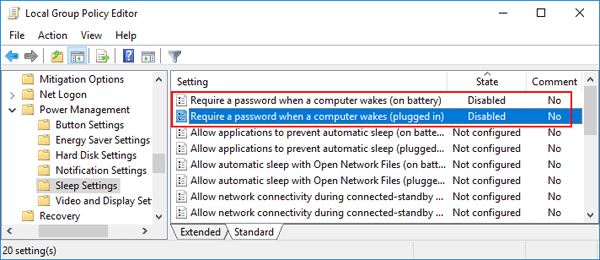
- Press Windows key + R and type gpedit.msc and hit Enter. This will open the Local Group Policy Editor.
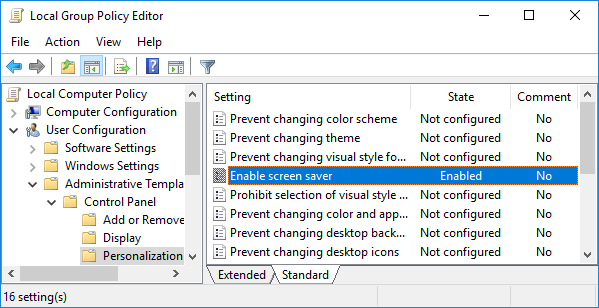
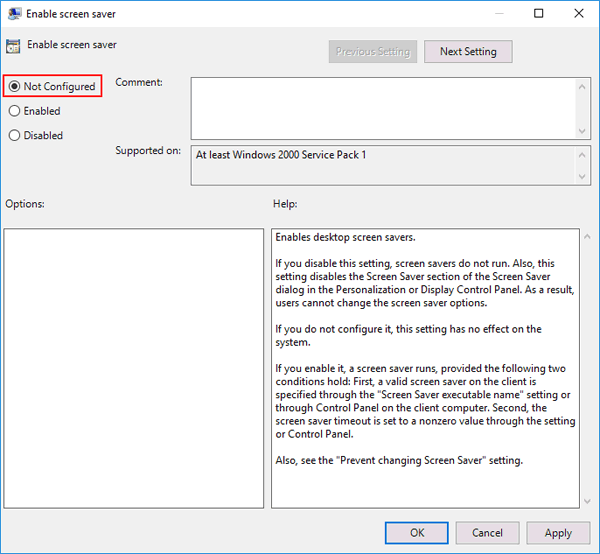
- Navigate to User Configuration > Administrative Templates > Control Panel > Personalization. Double-click on the policy labeled “Enable screen saver“.
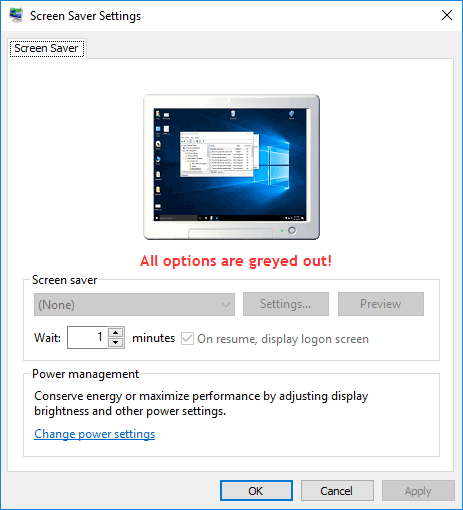
- Set it to Disabled if you want to turn off screen saver. After disabling, all the screen saver settings options will be greyed out. If you want to turn on screen saver later, you need to set that option to Enabled.
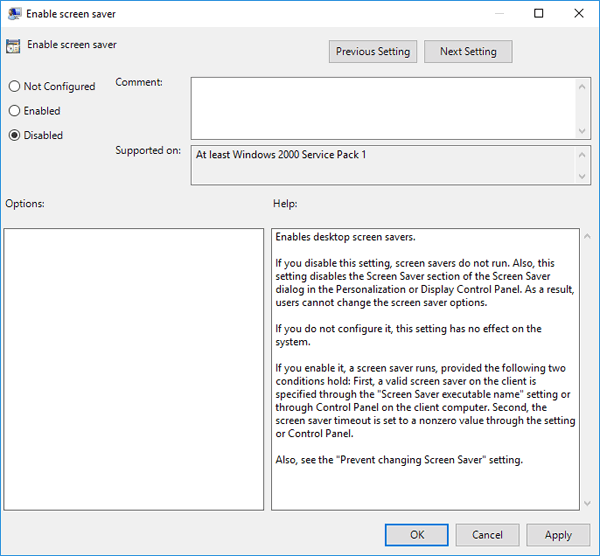
- Click OK and reboot your computer for the changes to take effect.


 This will set the password for the Administrator to be P@ssword123 (case sensitive).