In the event of a system crash or power loss, you may lost a couple of hours of work as you forgot to save your Word document. AutoSave is a useful feature in Microsoft Office that will automatically save the document you’re working on at certain intervals. In this tutorial we’ll show you how to turn on AutoSave in Word or Excel 2016 / 2013 / 2010 / 2007.
How to Turn on AutoSave in Word/Excel 2016 – 2007?
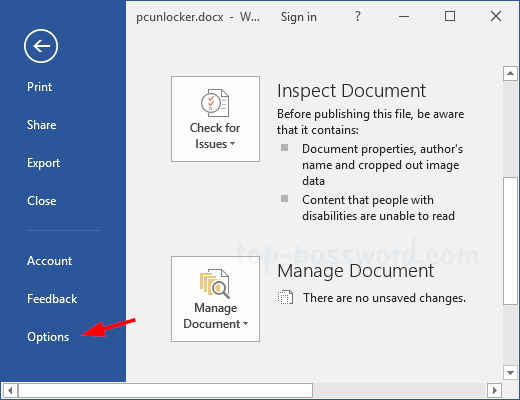
- Open your Word or Excel application, click on the File tab. On the backstage screen, click Options on the left-hand pane.

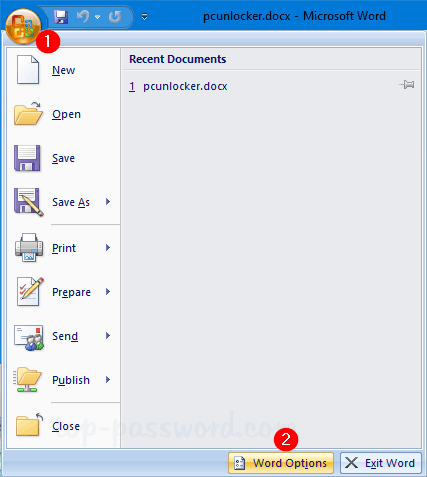
If you’re using Word/Excel 2007, just click the Office button at the top left corner and choose “Word Options” or “Excel Options“.

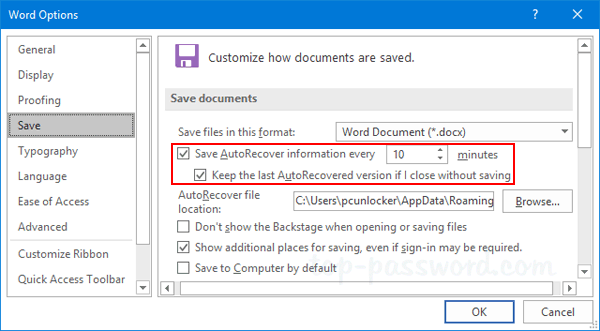
- When the Word/Excel Options dialog box opens, select the Save tab on the left navigation pane. Tick the “Save AutoRecover information every” check box. In the minutes box, you can set the time interval at which your document will be saved automatically.

Additionally, tick “Keep the last AutoRecovered version if I close without saving” check box.
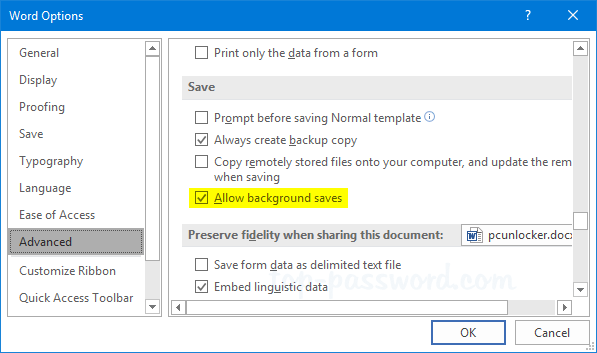
- Now, go to the Advanced tab. Scroll down to the Save section on the right-side pane and tick the “Allow background saves” check box. Click OK to save your changes.

At this point you’ve successfully turned on AutoSave in Word/Excel 2016 – 2007. When you forgot to save your work in case of a power cut or accidentally close your Word/Excel application without saving, there is good chance you can recover your latest contents.