Starting with Office 2007, both Word and Excel use Calibri as the default font. In order to make your document or spreadsheet more readable, you may want to change the default font style or adjust the font size. In this tutorial we’ll show you the easy steps to change default font in Office Word and Excel 2016 / 2019 / 365.
Part 1: Change Default Font in Office Word
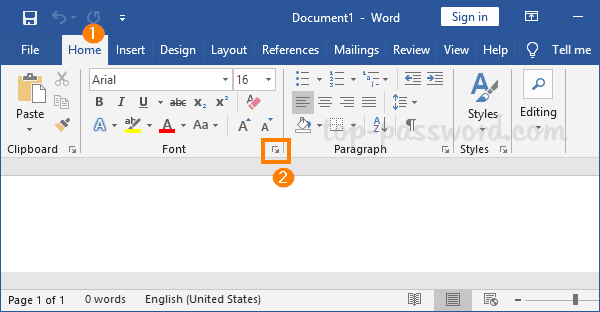
Open any document with your Office Word application. Click the Home tab in the ribbon menu, then click on the arrow icon in the bottom right-hand corner of the Font section.
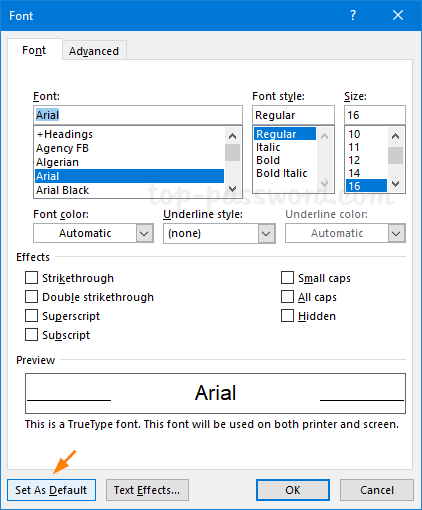
Once the Font window appears, you can change the default font style, size, effects, and even the color if you want. When done, click the Set As Default button in the bottom left corner.
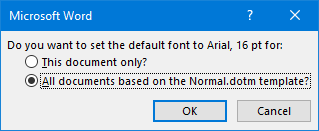
In the next dialog asking which default to set, select “All documents based on the Normal.dotm template” and click OK to confirm your changes.
Now, all new documents created with Word will use your font of choice by default.
Part 2: Change Default Font in Office Excel
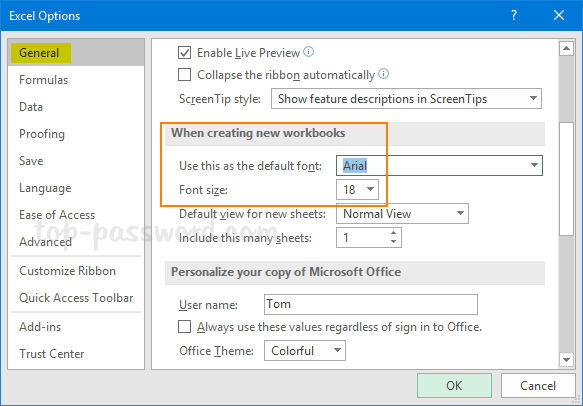
Open any spreadsheet with Office Excel application. Click the File tab in the ribbon menu and then choose the Options tab.

When the Excel Options dialog appears, select the General tab. In the right pane, scroll down to the “When creating new workbooks” section and you can choose your desired font type and size.
Click OK when you’re done. Now every time you create a new spreadsheet in Excel, the default font size and style will be exactly what you set it to.
Conclusion
Are you frustrated by always having to change the font when you create a document in Word or Excel? Just follow the above procedure to change the default font in Office Word/Excel 2016, 2019 and 365, it will save you tons of frustration and time.