A laptop touchpad works like a built-in mouse which lets you scroll, select and click without plugging anything in. We think it’s very useful, but if you feel more productive with an external mouse, you can disable touchpad completely on your Windows 10 laptop to avoid accidental taps with your thumbs or palm.
Method 1: Disable Touchpad in Windows 10 Using the Settings App
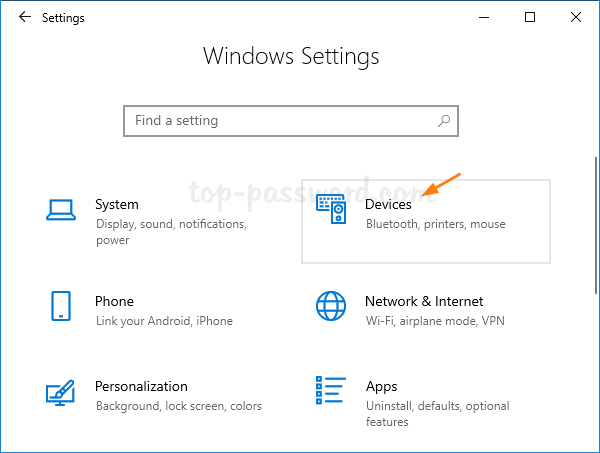
- Press the Windows + I key combination to open the Settings app, and then click on Devices.
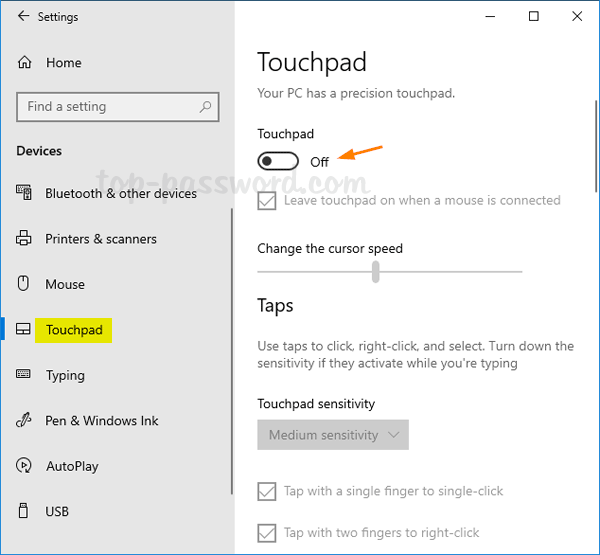
- Select the Touchpad tab. On the right side, toggle the Touchpad option to Off to disable touchpad immediately.
Method 2: Disable Touchpad in Windows 10 Using Device Manager
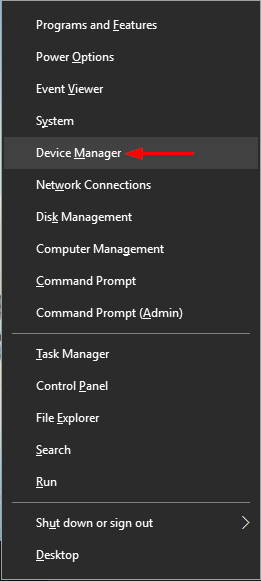
- Press the Windows + X key combination to access the Power User menu, then select Device Manager.
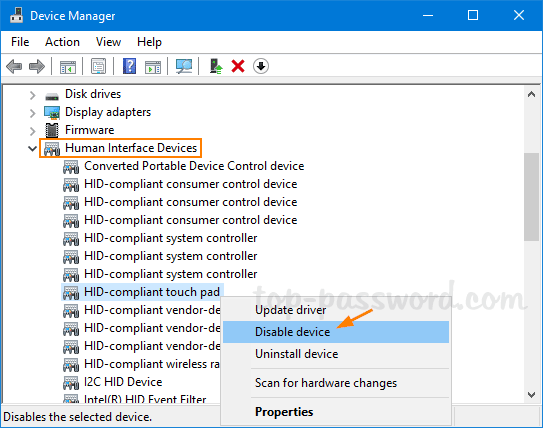
- In the Device Manager window, expand Human Interface Devices category to find your touchpad device. Right-click on it and select Disable device from the popup list.
- Click Yes to confirm and your touchpad will stop functioning in no time.
Conclusion
Using the above methods you should be able to disable touchpad on all Windows 10 laptops. Some laptops might also let you disable the touchpad from the BIOS/UEFI firmware or using a keyboard shortcut like Fn + F3, but those methods vary for different laptops.