The feature of GPU real-time monitoring is not available in Windows 8 / 7 / Vista and you have to use third-party software (like Process Explorer) to do the job. Since Windows 10 Fall Creators Update, Task Manager introduces the ability to track GPU usage and performance. In this tutorial we’ll show you how to check GPU usage in Windows 10 using Task Manager.
Part 1: View Overall GPU Usage
Press Ctrl + Shift + Esc on your keyboard to open up Task Manager. Click on the Performance tab.
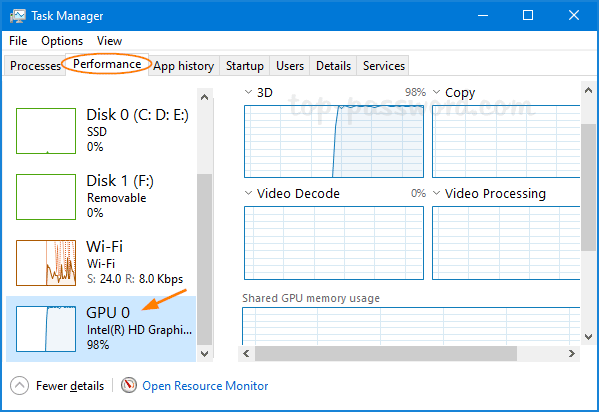
In the left pane, select one of your GPU devices and you’ll see the overall GPU resource usage.
Part 2: Check GPU Usage for An App
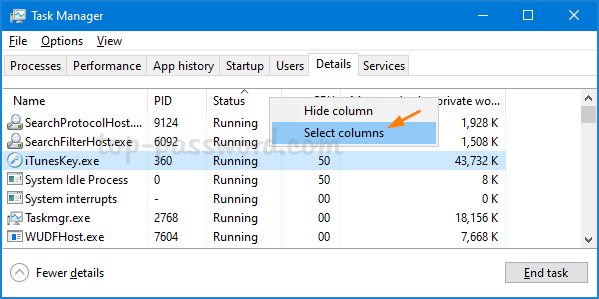
If you want to view GPU usage for any specific app, go to the Details tab of Task Manager. Right-click any column header, and then choose the Select Columns option.
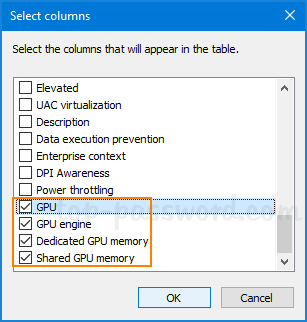
In the pop-up window, select the checkbox against GPU, GPU Engine, Dedicated GPU Memory and Shared GPU Memory. Click OK.
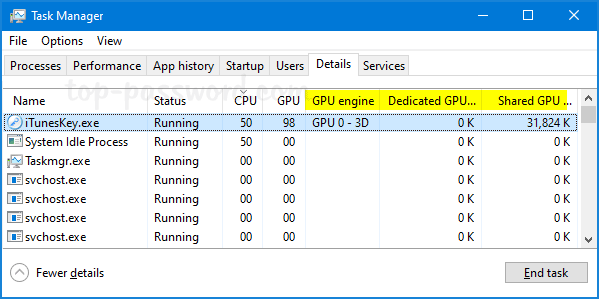
Now, Task Manager will display real-time GPU usage for each application. You can run a GPU password cracking software (like iTunesKey) or try playing a game to check GPU usage and performance.
That’s it!