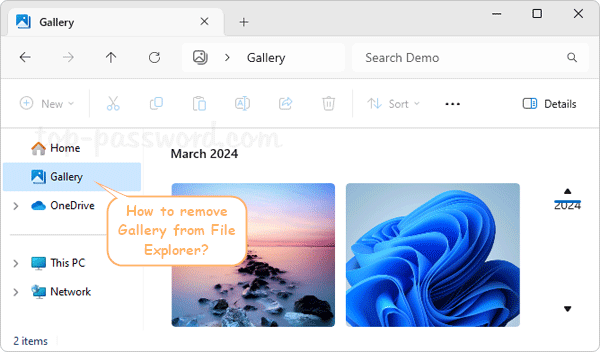
How do I remove the Gallery shortcut from File Explorer’s side panel? If you click the Gallery shortcut, it allows you to access your photo collection, including all pictures which you can see in the Photos app. However, if you find that the Gallery folder is of no use, here are 2 ways to remove it from File Explorer navigation bar in Windows 11.
Method 1: Remove Gallery from Windows 11 File Explorer for Current User
- Open Registry Editor and go to the location:
HKEY_CURRENT_USER\Software\Classes\CLSID. Right-click the CLSID key and select New -> Key.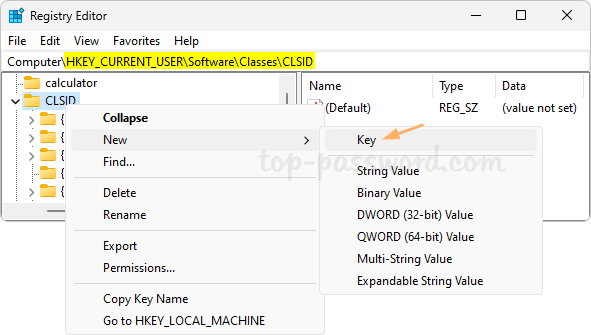
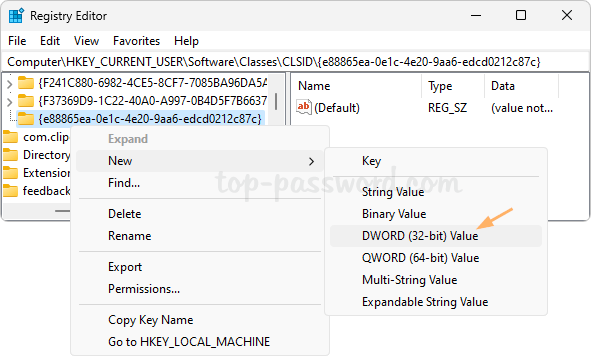
- Name the new key as {e88865ea-0e1c-4e20-9aa6-edcd0212c87c}, and then right-click it to choose New -> (32-bit) DWORD Value.
- Name the DWORD as System.IsPinnedToNameSpaceTree and set its value data to 0.
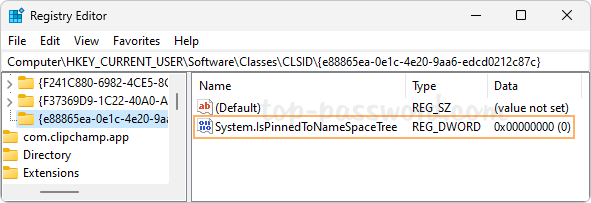
- Close Registry Editor and relaunch File Explorer, you’ll find the Gallery button will no longer show up in the navigation pane of File Explorer. Whenever you want to restore the Gallery button, just set the value data of System.IsPinnedToNameSpaceTree to 1.
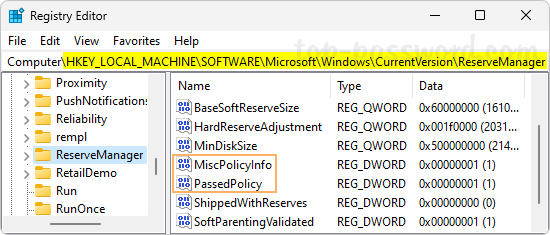
Method 2: Remove Gallery from Windows 11 File Explorer for All User
- Open Registry Editor and navigate to:
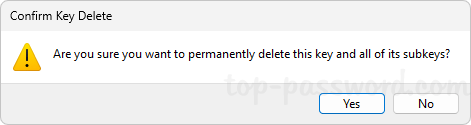
HKEY_LOCAL_MACHINE\SOFTWARE\Microsoft\Windows\CurrentVersion\Explorer\Desktop\NameSpace_41040327\{e88865ea-0e1c-4e20-9aa6-edcd0212c87c}. Right-click the {e88865ea-0e1c-4e20-9aa6-edcd0212c87c} key and choose Delete.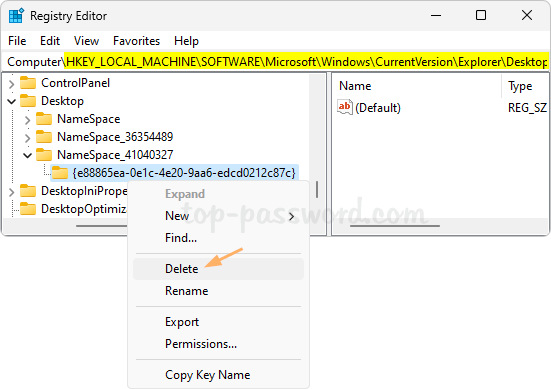
- When asked for confirmation, click Yes.
- Close Registry Editor. Reopen the File Explorer and the Gallery item should be missing from the File Explorer left panel. If you want to add Gallery back to File Explorer, you need to recreate the key {e88865ea-0e1c-4e20-9aa6-edcd0212c87c} which you’ve deleted in the step 1 above.
That’s it!