A user profile is a set of files and folders to store all the personal preferences, app settings, desktop information and other data. If your user profile is corrupted, it can cause unexpected issue with your Windows account, or even lock yourself out of the computer. When you’re unable to fix it, you can delete the user profile and start over.
In this tutorial we’ll show you 2 simple ways to delete user profile to fix problematic account in Windows 10 / 8 / 7. After your user profile is deleted, Windows will automatically create a new profile the next time you log in to the relevant account.
Note: You’re unable to delete the user profile of a Windows account you’re currently logged into. Make sure you sign into another admin account before getting started.
Method 1: Delete User Profile in Advanced System Properties
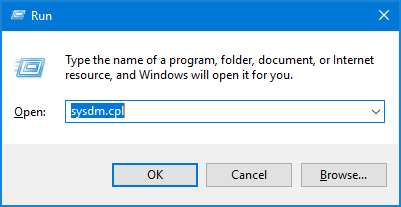
- Press the Windows key + R keyboard shortcut to open the Run dialog. Type sysdm.cpl and press Enter.
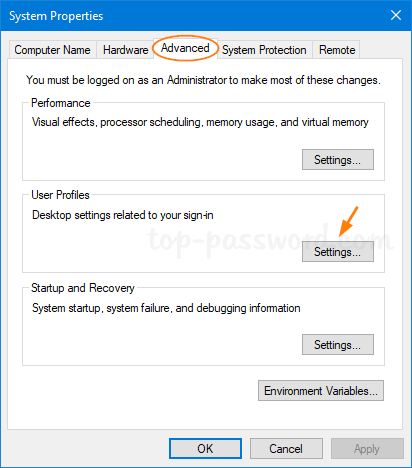
- In the System Properties window, select the Advanced tab and click on the Settings button under User Profiles.
- Select the user profile of the problematic Windows account, and click on Delete.
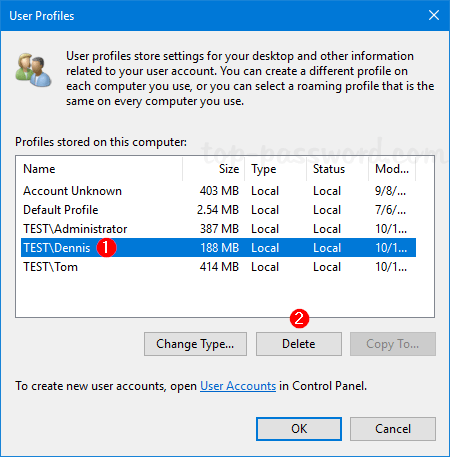
If the Delete button is greyed out, it’s possible that you’re logged into the user profile you wish to delete. To proceed, you have to log in as another admin account.
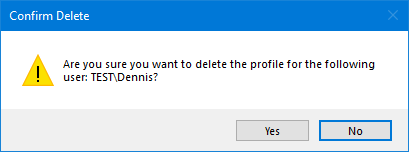
- Click Yes to confirm. The selected user profile will be deleted in a minute or two.
Method 2: Delete User Profile Manually
- Open the Registry Editor and navigate to the following key:
HKEY_LOCAL_MACHINE\SOFTWARE\Microsoft\Windows NT\CurrentVersion\ProfileList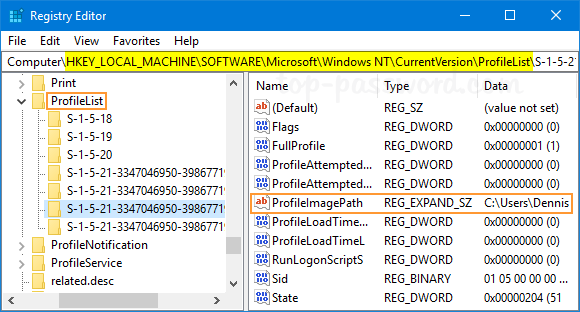
In the left pane, you will see a list of SID keys for all user profiles on your computer. Click each SID key, and then check the ProfileImagePath entry in the right pane.
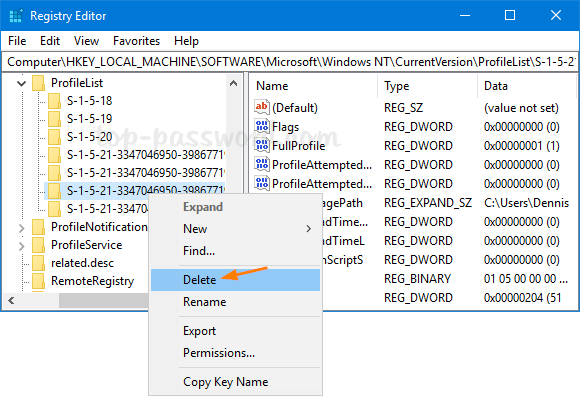
- Once you find the SID key which points to the user profile you want to remove, right-click it and select Delete.
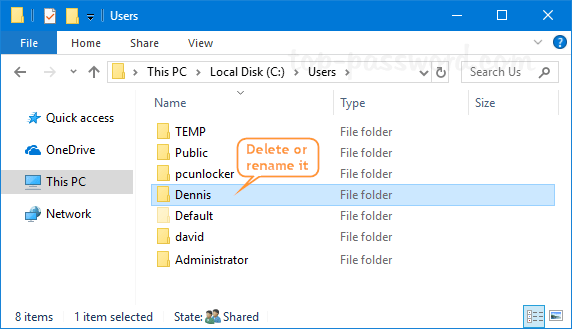
- Now, open Windows Explorer and browse to the folder C:\Users. Just delete the corresponding user profile folder, or rename it to something else if you don’t want to lose documents and files on the desktop.
- The next time you sign into the account associated with the deleted profile, Windows will set up a new user profile just as you first time turn on your brand new computer.