File and Printer Sharing is a network feature that allows Windows users to share local files and printer with other computers on a network. This is really useful on home network but it can be a security concern on public network. In this tutorial we’ll show you 3 easy ways to turn on or off file and printer sharing in Windows 10 / 8 / 7.
Method 1: Turn On / Off File and Printer Sharing through Control Panel
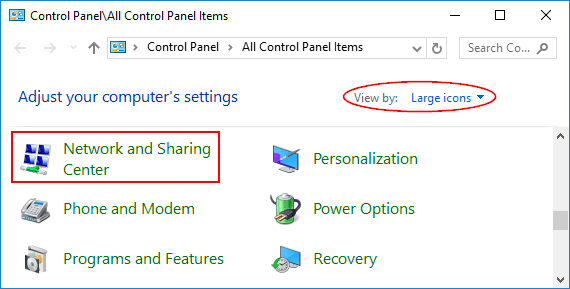
- Open Control Panel. Click the View by option at the top right, and set it to Large icons. Next, click Network and Sharing Center.
- Click on the Change advanced sharing settings link on the left side.
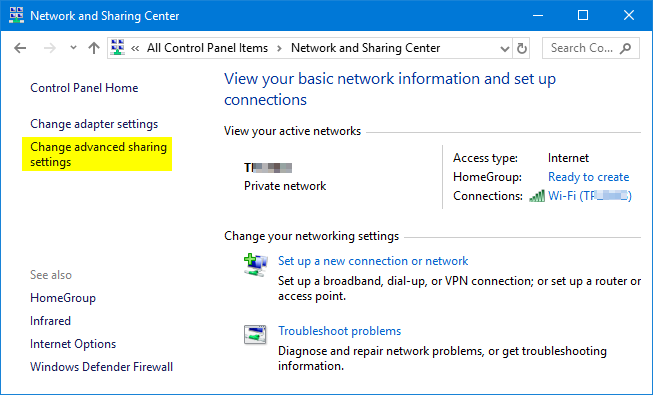
- Expand the network profile you’re using, select either Turn on file and printer sharing or Turn off file and printer sharing. Click on Save changes when done.

You can configure Windows to turn on file and printer sharing on private network, while choosing to turn off file and printer sharing when your network is set to Guest or Public.
Method 2: Turn On / Off File and Printer Sharing Using Command Prompt
Open the Command Prompt as administrator. Copy and paste the following command and hit Enter. This will turn on file and printer sharing for all network profiles.
netsh advfirewall firewall set rule group="File and Printer Sharing" new enable=Yes
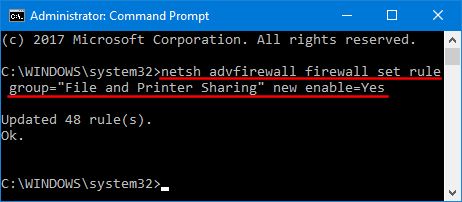
If you want to turn off file and printer sharing for all network profiles, type this command instead:
netsh advfirewall firewall set rule group="File and Printer Sharing" new enable=No
Method 3: Turn On / Off File and Printer Sharing Using PowerShell
Open Windows PowerShell as administrator. Copy and paste the command below to enable file and printer sharing for all network profiles:
Set-NetFirewallRule -DisplayGroup "File And Printer Sharing" -Enabled True
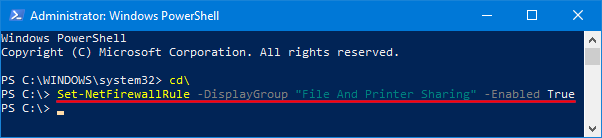
Or disable file and printer sharing:
Set-NetFirewallRule -DisplayGroup "File And Printer Sharing" -Enabled False