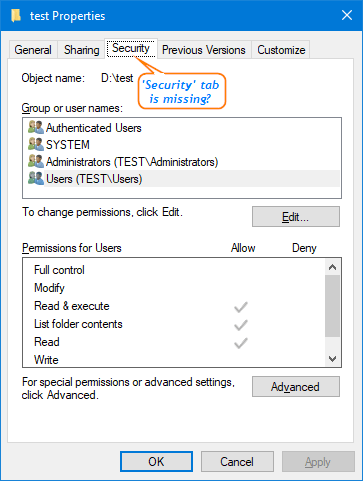
Trying to change the permissions or ownership of a folder, but the Security tab is missing? How can I disable or restore the Security tab in Windows 10? In this tutorial we’ll show you 2 simple ways to remove or enable the Security tab from folder properties in Windows 10.
Method 1: Remove or Enable Security Tab in Folder Properties Using Group Policy
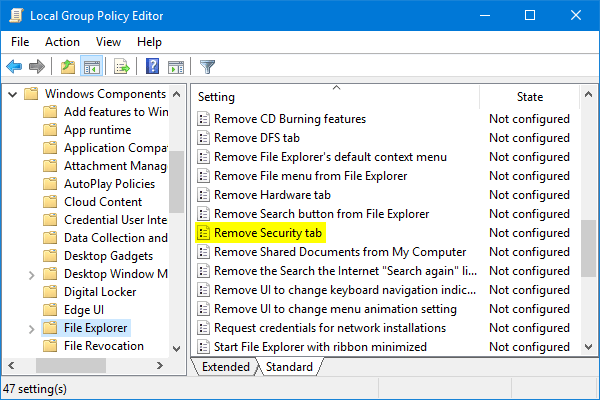
- Press the Win + R keyboard combination to bring up a run box then type gpedit.msc and press Enter.
- When the Local Group Policy Editor opens, navigate to:
User Configuration -> Administrative Templates -> Windows Components -> File Explorer - On the right hand side, double-click the “Remove Security tab” setting.
- If you want to remove Security tab, select Enabled and click Apply.
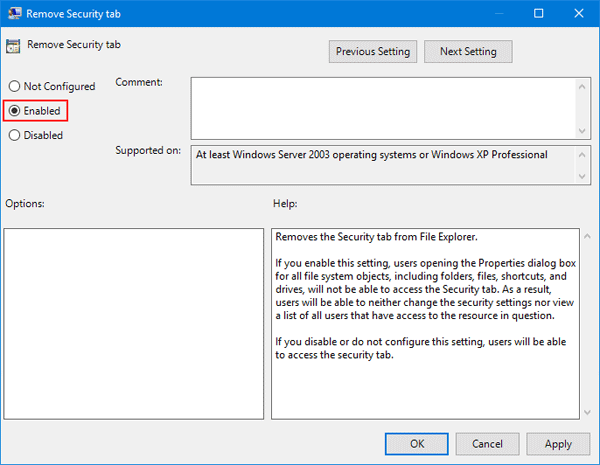
If you want to restore the missing Security tab, select Disabled instead.
- The policy setting will take effect immediately.
Method 2: Remove or Enable Security Tab in Folder Properties Using Registry Editor
- Press the Win + R keyboard combination to bring up a run box then type regedit and press Enter.
- After Registry Editor opens, navigate to the following key:
HKEY_CURRENT_USER\Software\Microsoft\Windows\CurrentVersion\Policies\Explorer - On the right-side pane, create a new DWORD (32-bit) NoSecurityTab and set its value to 1. This will hide the Security tab from folder properties.
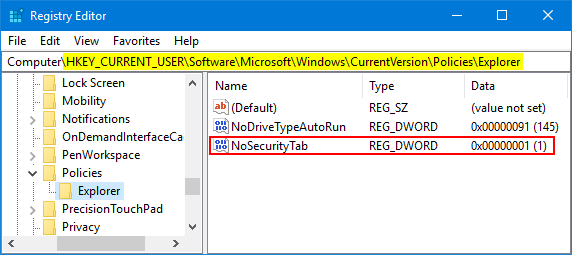
If you want to re-enable the Security tab, simply change the value of NoSecurityTab to 0.
- Close Registry Editor and re-open the folder properties, the Security tab will be hide from everyone or magically appear.