Problem reporting is also known as “Error reporting”, which is a service turned on by default in all versions of Windows. When Windows detects a hardware or software error, it will automatically collect diagnostic data and report it to Microsoft. For privacy concern, you may want to disable it. In this tutorial we’ll show you 2 simple ways to turn off problem reporting for all user accounts in Windows 10.
Method 1: Turn off Problem Reporting in Windows 10 via Registry Editor
- Open Registry Editor and navigate to:
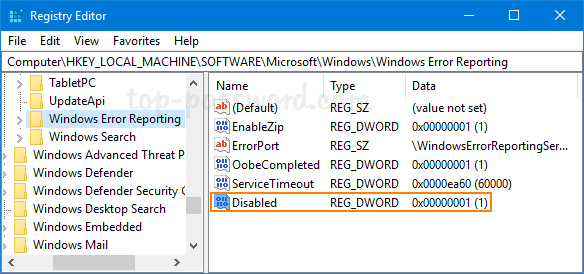
HKEY_LOCAL_MACHINE\SOFTWARE\Microsoft\Windows\Windows Error Reporting. Right-click on the “Windows Error Reporting” key in the left side and select New -> DWORD (32-bit) Value.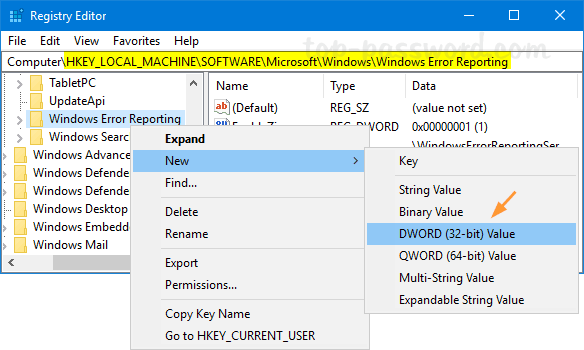
- Name the new DWORD “Disabled“, and set its value data to 1. If you need to turn on problem reporting later, just change the value to 0.
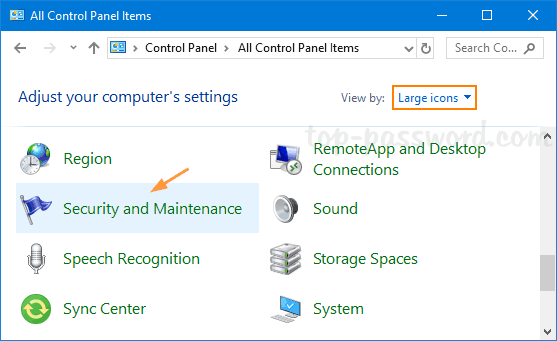
- Close Registry Editor and you can now check if problem reporting is turned off. Open Control Panel in Large icons view and click on Security and Maintenance.
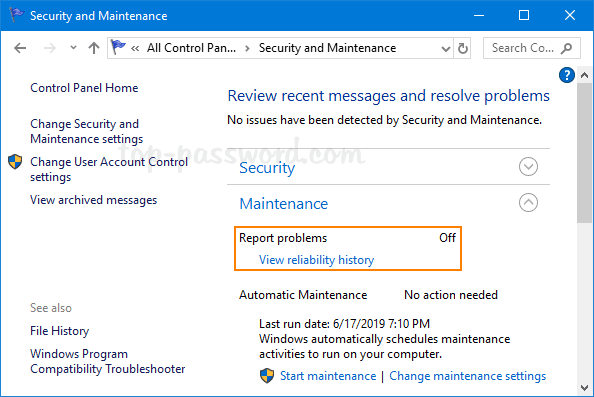
Expand the Maintenance section and you should find the “Report problems” option is set to Off.
Method 2: Turn off Problem Reporting in Windows 10 via Group Policy
- Open Local Group Policy Editor and browse to:
Computer Configuration -> Administrative Templates -> Windows Components -> Windows Error Reporting.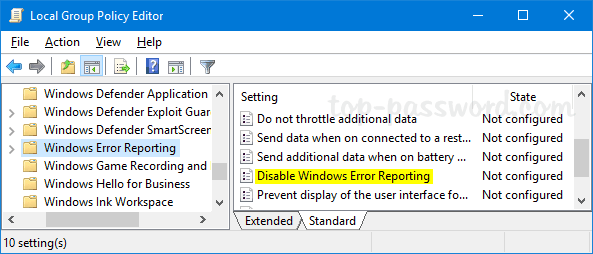
In the right pane, locate the “Disable Windows Error Reporting” policy and double-click it to modify.
- Choose the Enabled option. Click Apply and then OK.
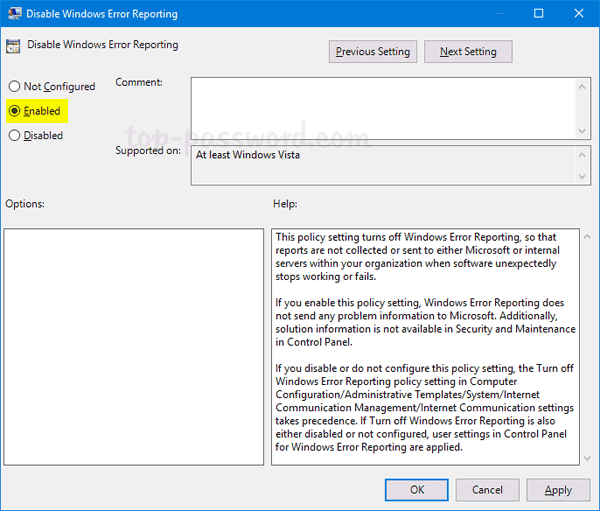
- You can now close out of the Local Group Policy Editor window, and restart your PC to apply the changes.
There is a registry key corresponding to the above group policy. If you’re unable to access Local Group Policy Editor, just open Registry Editor and navigate to HKEY_LOCAL_MACHINE\SOFTWARE\Policies\Microsoft\Windows\Windows Error Reporting, create a 32-bit DWORD Disabled and set its value to 1.