Windows 10 comes with a new feature called “Storage Sense”, which will automatically delete temporary files created by apps and erase old files that have been in the Downloads folder or Recycle bin for over 30 days. If you’re not satisfied with this feature, you can disabled it permanently. This tutorial will show you 3 simple ways to turn off Storage Sense in Windows 10.
Method 1: Disable Storage Sense in Windows 10 from Settings App
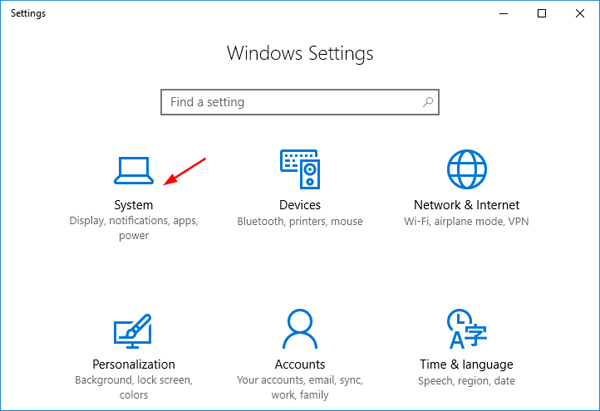
- Open the Settings app and then click the System category on the main page.
- Click the Storage in the left navigation menu. You can then turn off the Storage Sense on the right side.
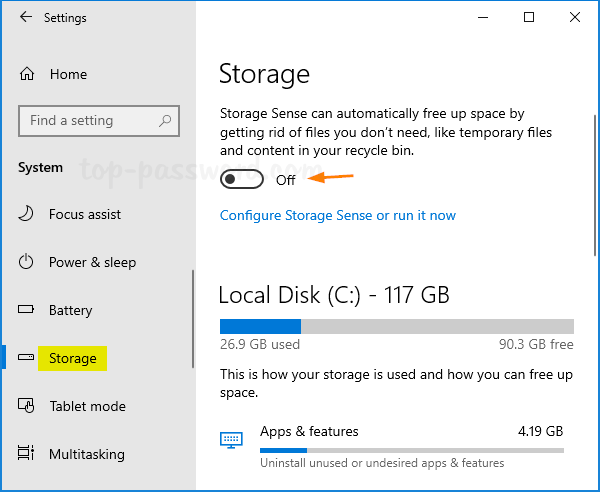
- Since Storage Sense is turned off, it will not automatically delete temporary files to free up disk space.
Method 2: Disable Storage Sense in Windows 10 Using Group Policy
- Open the Local Group Policy Editor and navigate to:
Computer Configuration\Administrative Templates\System\Storage Sense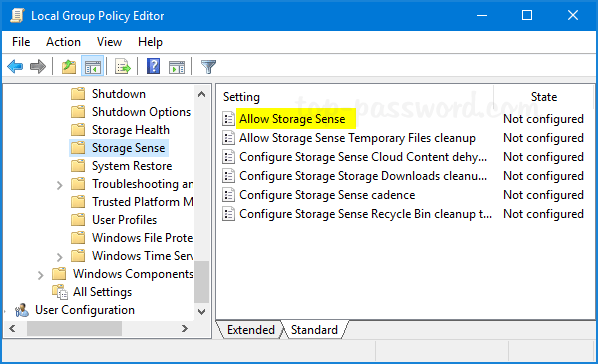
Next, double-click on the Allow Storage Sense policy on the right pane to edit it.
- Select Disabled and click OK.
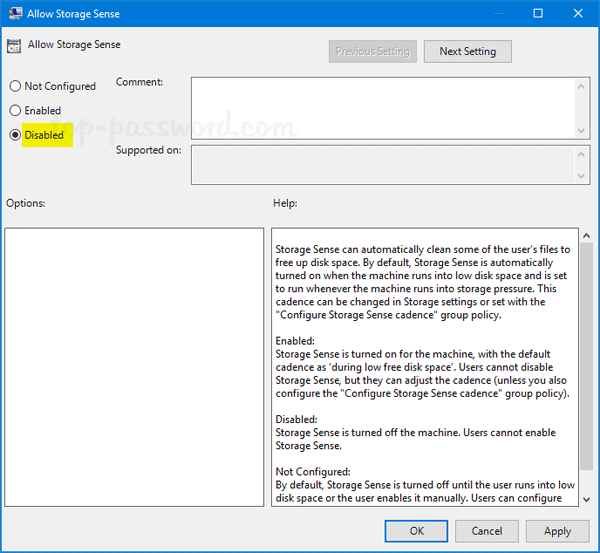
- Now you’ve successfully disabled Storage Sense on your Windows 10 PC. This method will also prevent users from turning on Storage Sense from the Settings app.
Method 3: Disable Storage Sense in Windows 10 Using Registry Editor
- Open Registry Editor and navigate to:
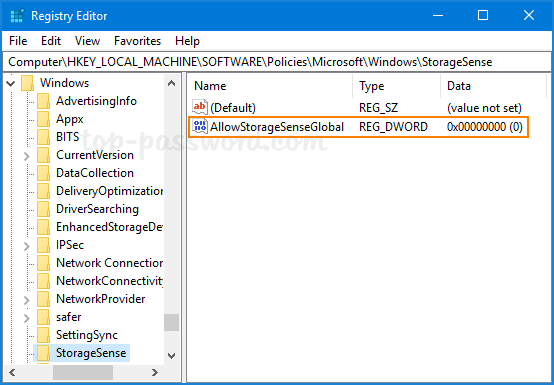
HKEY_LOCAL_MACHINE\SOFTWARE\Policies\Microsoft\Windows\StorageSense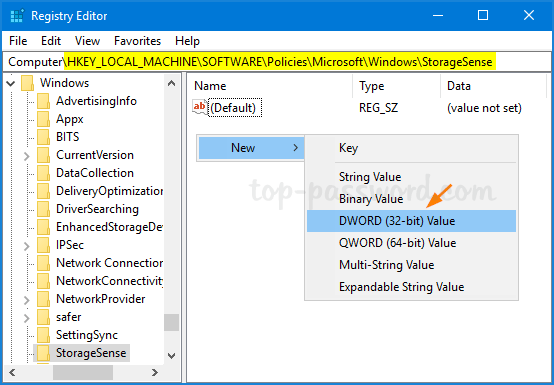
Right-click on any blank area in the right pane, and then select New -> DWORD (32-bit) Value.
- Name the new DWORD as AllowStorageSenseGlobal, and leave its value data to 0. (0: disable Storage Sense, 1: enable Storage Sense)
- After completing these steps, Restart Windows 10 to apply your changes immediately.