Windows 10 won’t boot after installing updates? A problematic update could render the computer unbootable, or get stuck in a infinite reboot loop. In this tutorial we’ll show you how to uninstall Windows 10 updates when your PC can’t boot any longer.
How to Uninstall Windows 10 Updates When PC Won’t Boot
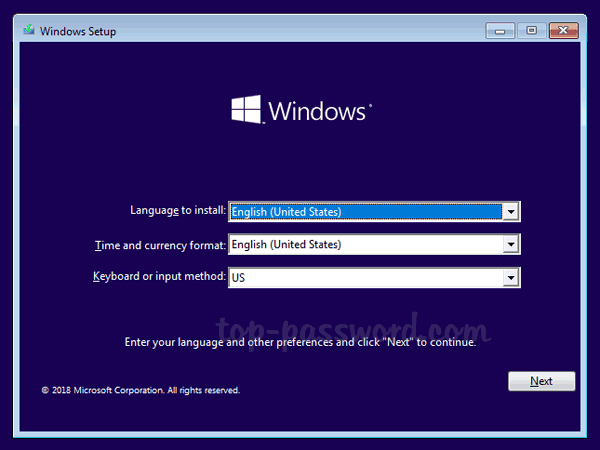
Boot your computer with Windows 10 installation media. When the Windows Setup screen appears, choose your language, time and keyboard input method, then click Next.
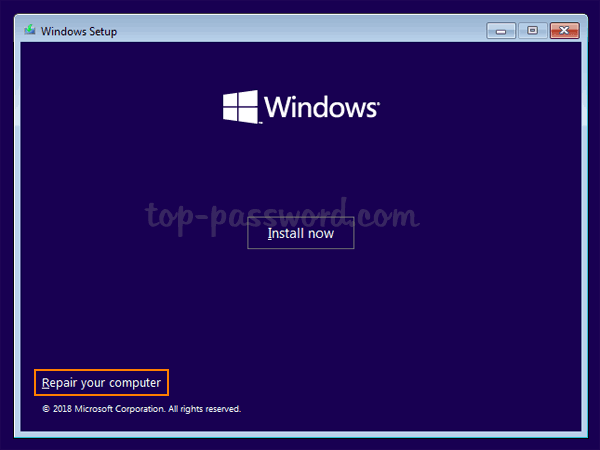
Click the Repair your computer link in the bottom-right corner.
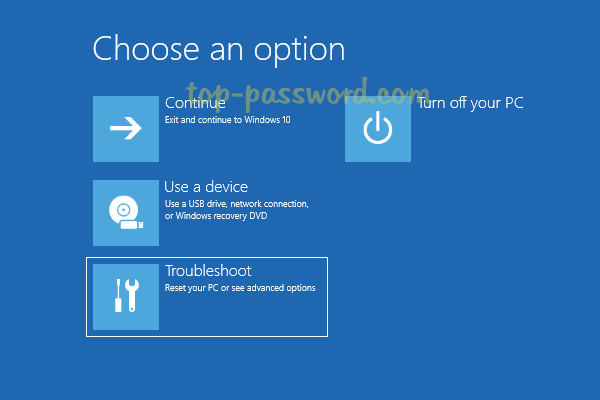
It will take you to the advanced startup screen. Just select the Troubleshoot option.
On the next screen, you can choose to uninstall Windows 10 updates using either the “Uninstall Updates” option or Command Prompt.
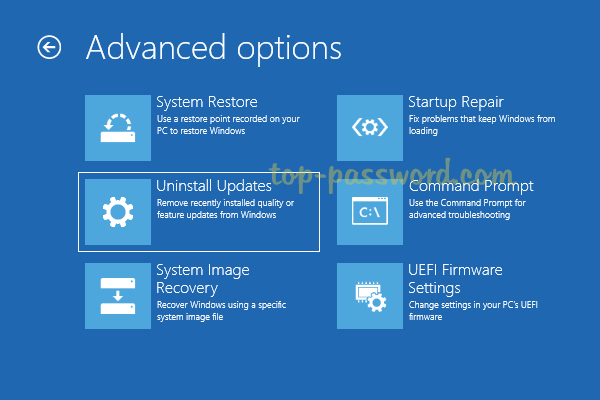
Method 1:
If you select the “Uninstall Updates” option, it will give you two options: Uninstall latest quality update, Uninstall latest feature update.

Feature updates are technically new versions of Windows 10, which become available twice a year. While quality updates (also known as “cumulative updates” or “Security update”) are pushed out every month.
Method 2:
If you choose the Command Prompt option, you can manually uninstall updates that were installed on a particular date, by following these steps:
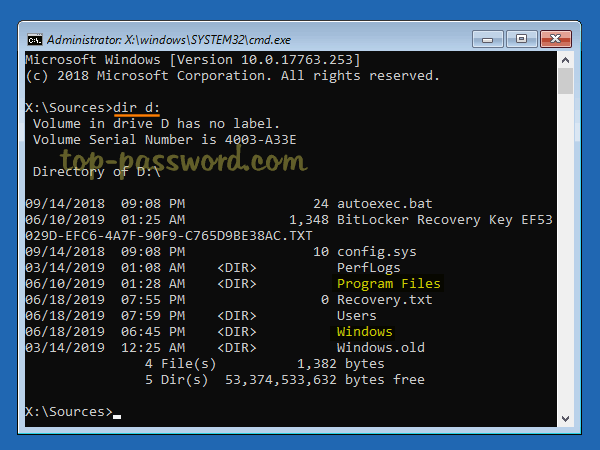
- When you’re at the Command Prompt, use the DIR command to find the drive letter of the drive where Windows 10 is installed. In my case, Windows 10 is located on drive D:.
- Next, run the following command to list all the installed updates on your system. Make sure you use the drive letter that you found in the step above:
dism /Image:D:\ /get-packages /format:list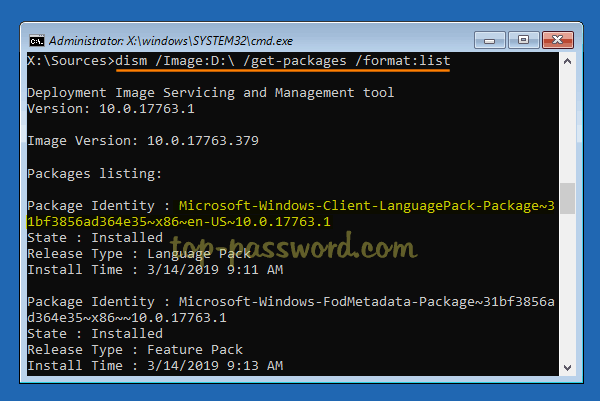
If you need to find detailed information (such as KB number) about a specific package, type this command:
dism /Image:D:\ /get-packageinfo /PackageName:Package_Identity - Now, you can uninstall the problematic update package using this command:
dism /Image:D:\ /Remove-Package /PackageName:Package_Identity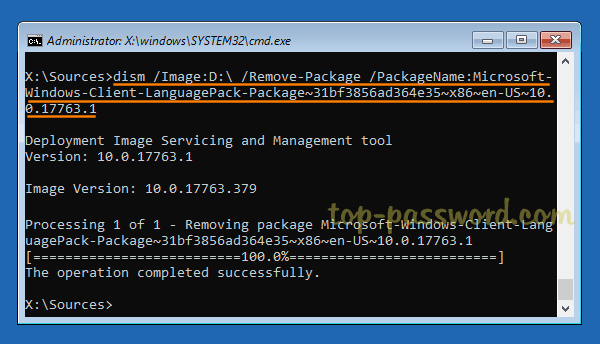
That’s it!