In previous post we’ve already explained how you can disable OneDrive from File Explorer in Windows 10. But what if you don’t want the OneDrive service in your system at all? To save system resources, you might consider to uninstall OneDrive completely instead disabling it only.
Unfortunately there is no option in the graphical user interface to uninstall OneDrive in Windows 10. So here we’ll show you how to install / uninstall OneDrive from Command Prompt.
Part 1: Uninstall OneDrive in Windows 10
- Press the Windows + X key combinations to open the Quick Access menu. Select Command Prompt (Admin).
- At the Command Prompt, type the following command and hit Enter to terminate any process of OneDrive:
taskkill /f /im OneDrive.exe - To uninstall the OneDrive from Windows 10 64-bit, issue the following commands:
%systemroot%\SysWOW64\OneDriveSetup.exe /uninstallIf you’re running the 32-bit version of Windows 10, type this command instead:
%systemroot%\System32\OneDriveSetup.exe /uninstall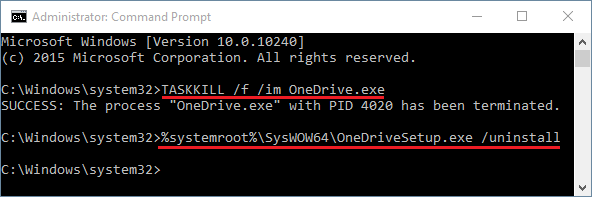
Part 2: Install OneDrive in Windows 10
If at any time later you want to use OneDrive again, you can install it from Command Prompt. Here’s how:
- Press the Windows + X key combinations to open the Quick Access menu. Select Command Prompt (Admin).
- To install the OneDrive in Windows 10 64-bit, issue the following commands:
%systemroot%\SysWOW64\OneDriveSetup.exeIf you’re running the 32-bit version of Windows 10, type this command instead:
%systemroot%\System32\OneDriveSetup.exe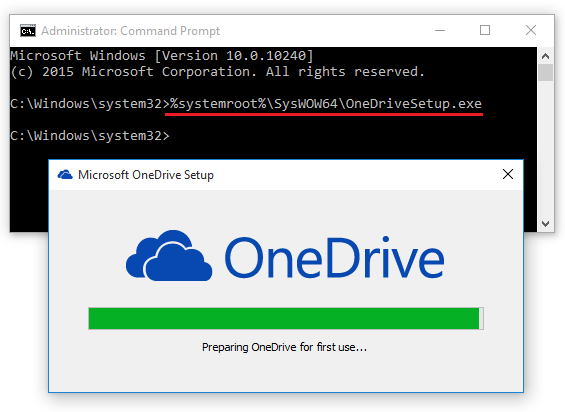
- Upon completing the installation, restart the computer and you can then use OneDrive again.