Is there a way to set preferred GPU for specific applications in Windows 10? Most Windows 10 computers come with 2 GPU (or graphics chips) installed – an integrated GPU and a dedicated GPU. For graphic intensive applications like games, you can force it to use the dedicated GPU to improve gaming performance. In this tutorial we’ll show you how to enable high-performance GPU for Windows 10 apps or games.
How to Enable High-Performance GPU for Windows 10 Apps and Games
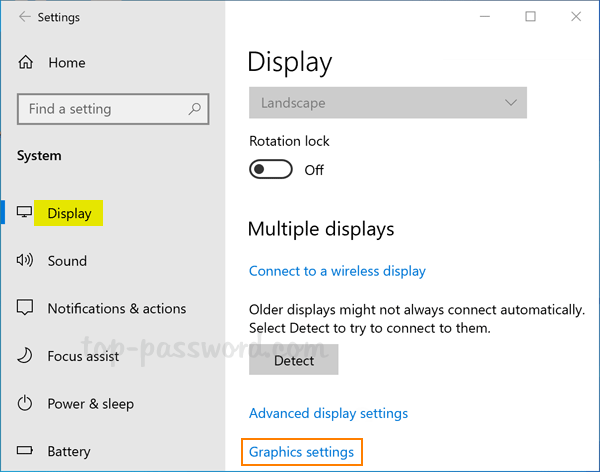
- Open up the Settings app and navigate to System -> Display. Scroll down to the bottom and click on the “Graphics settings” link.
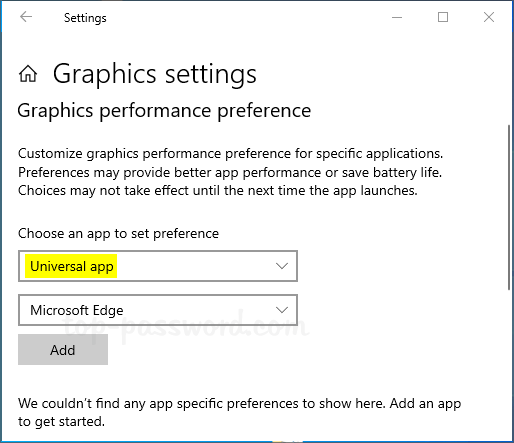
- Now, you can customize the graphics performance preference of any specific applications. For universal app, select the app from the list, and then click on Add.
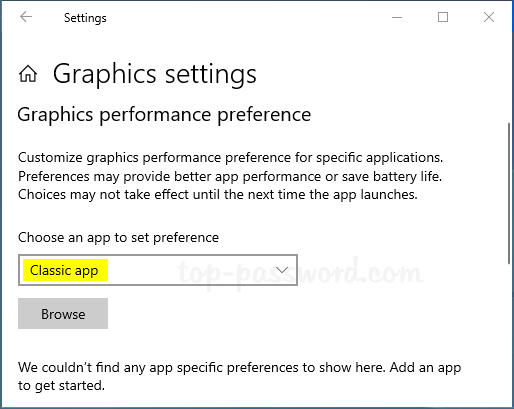
For classic app, just click on Browse to locate the .exe file of the desktop program you want to set default GPU for.
- Select the app you’ve added, and then click on the Options button to open the configuration dialog.
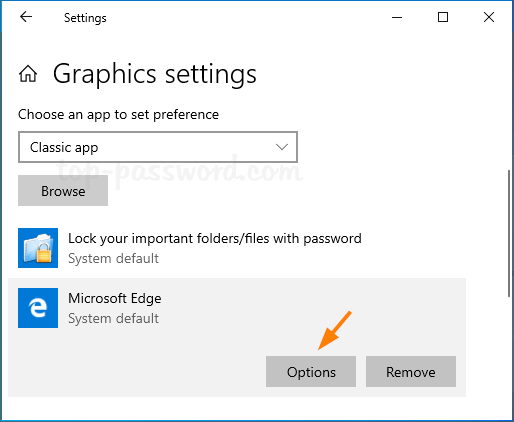
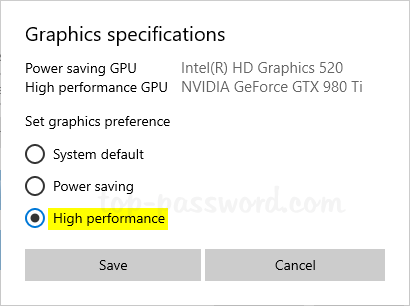
- Windows 10 considers the integrated GPU as the power-saving GPU, and the high performance GPU is the dedicated GPU or external GPU. Select High performance and click on Save.
- If your app or game is currently running, you may need to restart it to use the preferred GPU you just set. You can open Task Manager to view which GPU an application is using.