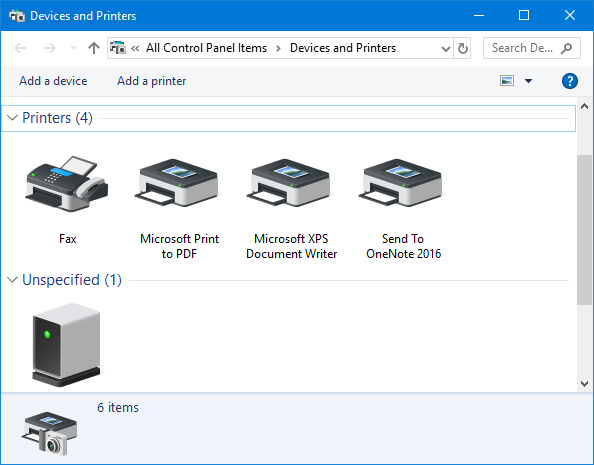
Device and Printers gives you a simple way to access and manage external devices (including printers, scanners, faxes, cameras) connected to your computer. From there you can see how many documents are in the printing queue, set the paper size for printing, add or delete a printer, etc. In this tutorial we’ll show you 4 quick ways to access the Devices and Printers in Windows 10.
Method 1: Open the Devices and Printers in Windows 10 from Run or Command Prompt
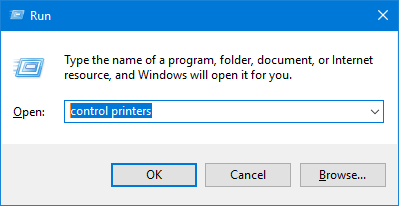
Simply press the Windows key + R shortcut to bring up the Run dialog, or open the Command Prompt. Type control printers and press Enter. The Devices and Printers window will open immediately.
Method 2: Open the Devices and Printers in Windows 10 from Control Panel
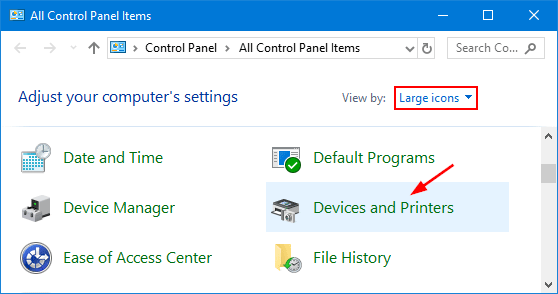
Open the Control Panel and choose Large icons under the View by drop-down list. Click on Devices and Printers.
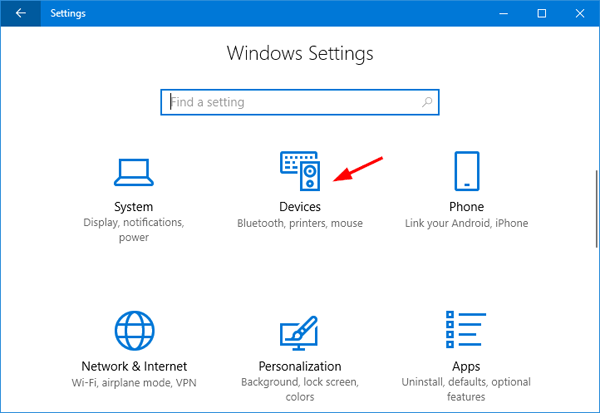
Method 3: Open the Devices and Printers in Windows 10 from Settings
Press the Windows key + I shortcut to open Settings, and then click Devices.
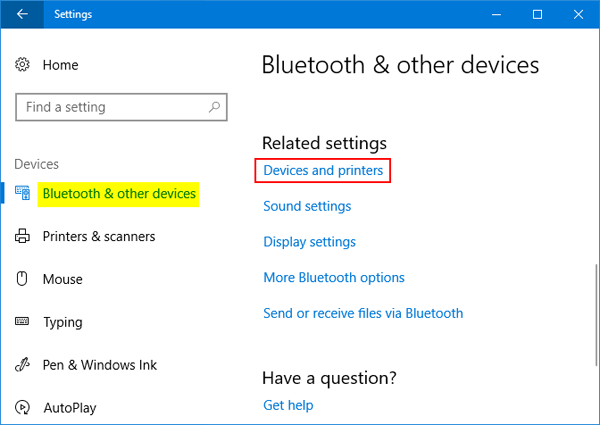
Scroll down to the “Related settings” section on the right pane, click the Devices and printers link.
Method 4: Add the Devices and Printers Context Menu in Windows 10
If you need to access Devices and Printers frequently, you can add Devices and Printers to the Desktop context menu. Follow these steps:
- Download the registry files from this link (in .zip format). Extract the zip archive and you’ll get two .reg files.
- Double-click on the add-devices-and-printers-context-menu.reg file in File Explorer.
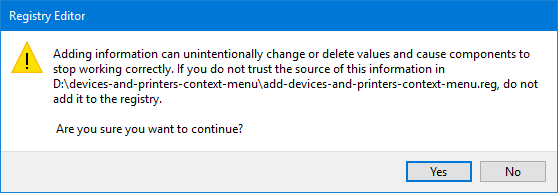
- When you see the User Account Control, click Yes to continue. Afterwards, click Yes to add the information to Registry.
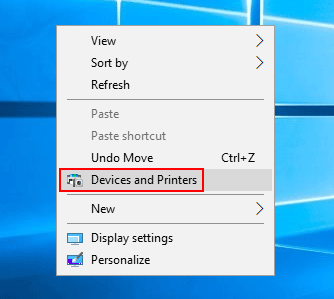
- Now, right-click on the empty space on your desktop. You can get to the “Devices and Printers” shortcut from the context menu.