By default, Windows uses a default display DPI of 96. If you find that the size of the text, icons and images is too small or bigger, you can consider increasing or decreasing DPI for your monitor. In this tutorial we’ll show you 2 simple methods to change DPI scaling level for all displays in Windows 11.
Method 1: Change DPI Scaling for All Displays via Settings App
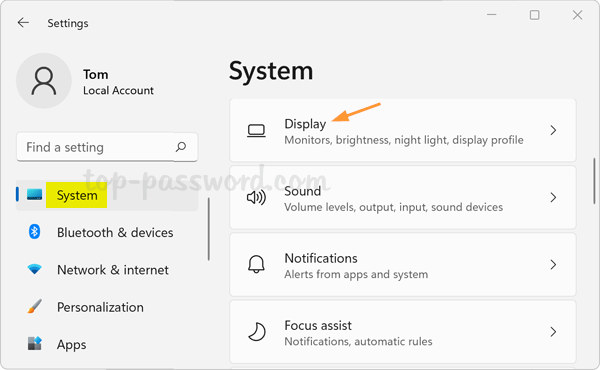
- Open the Settings app by pressing Windows + I keyboard shortcut. Next, click Display on the right side.
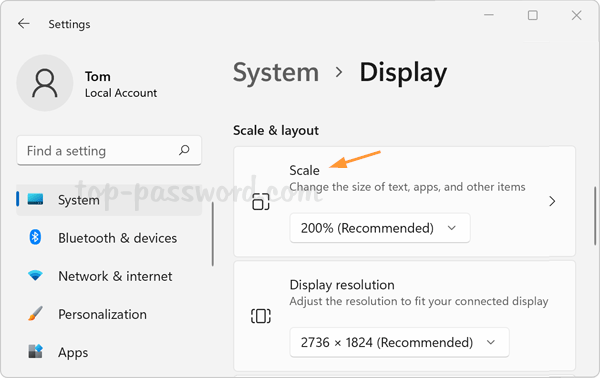
- Click Scale under the “Scale & layout” section.
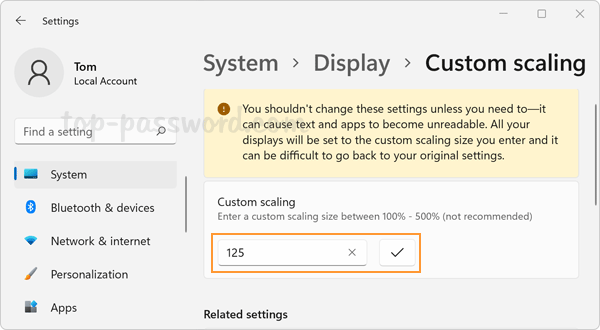
- Enter a scaling factor between 100 and 500 in the “Custom scaling” field, and click the tick button on the right-hand side to save your change.
Here is the conversion table between DPI and scale factor/level:
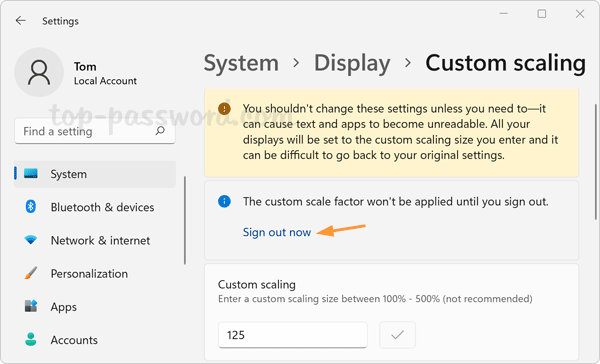
DPI Scale factor/level 96 100 120 125 144 150 192 200 - Click the “Sign out now” link to apply the new DPI.
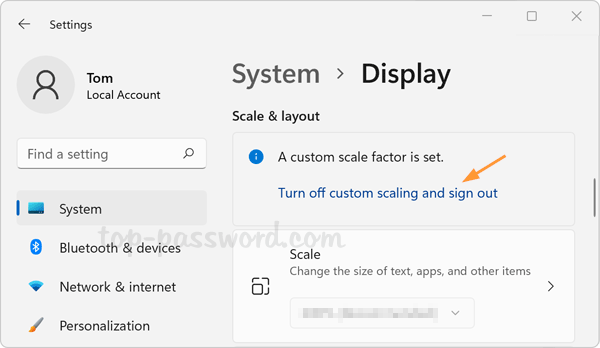
Whenever you need to use the default 96 DPI again, open the Settings app and navigate to System -> Display, click the “Turn off custom scaling and sign out” option.
Method 2: Change DPI Scaling for All Displays via Registry Editor
- Open Registry Editor and browse to the location:
HKEY_CURRENT_USER\Control Panel\Desktop. In the right pane, double-click the DWORD Win8DpiScaling and change its value data to 1.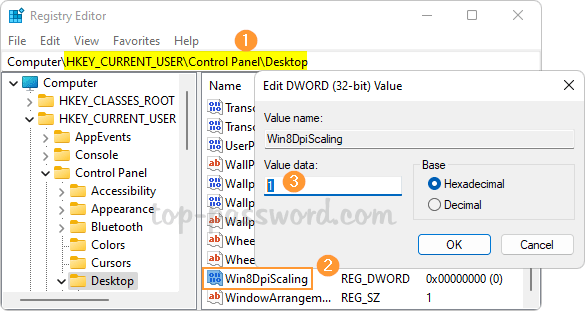
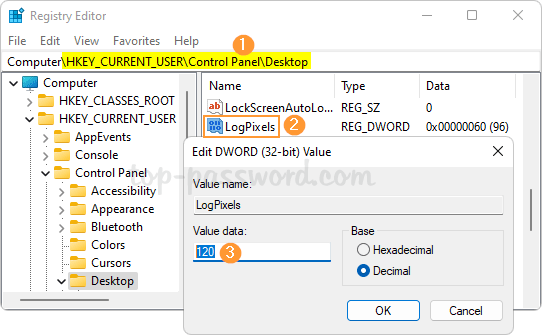
- Next, double-click the DWORD LogPixels to edit its value data. Enter a DPI value (in Decimal) of your choice from 96 to 480.
- You will now have to restart Windows to make the custom DPI take effect.
Whenever you need to disable custom DPI again, just open Registry Editor and browse to the same location, change the value data of Win8DpiScaling to 0. Windows 11 will ignore the LogPixels setting and use the default 96 DPI.