Starting with Windows 11, OneDrive becomes a standalone app, and you can completely remove it from your system if you don’t need to sync files between your computer and the cloud. In this tutorial we’ll show you 3 quick methods to completely uninstall OneDrive in Windows 11.
Method 1: Uninstall OneDrive in Windows 11 from Settings App
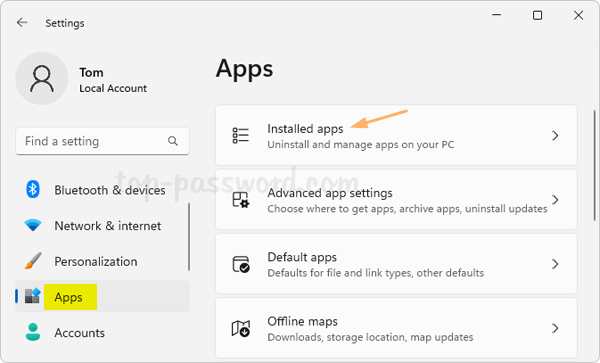
- Press the Windows key + I to launch the Settings app. Choose Apps from the left sidebar, and then click the “Installed apps” on the right.
- Type OneDrive in the search box to locate the “Microsoft OneDrive” app, and then click the three-dot button to the right of OneDrive, choose Uninstall from the pop-up menu.

- Next, click Uninstall to confirm uninstalling this app and it related info.
Method 2: Uninstall OneDrive in Windows 11 from Control Panel
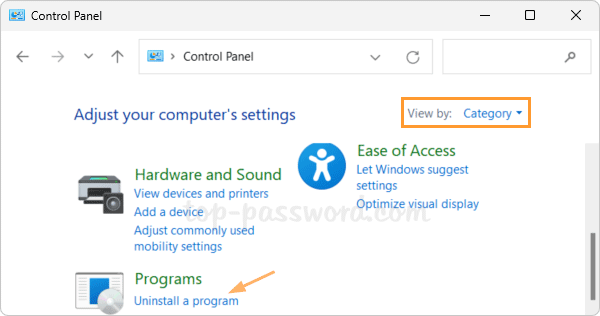
- Open Control Panel in the Category view, click the “Uninstall a program” link under the Programs section.
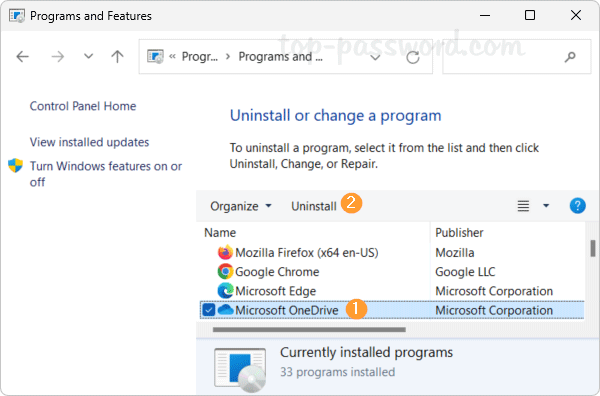
- Select the “Microsoft OneDrive” program from the list, and then click the Uninstall button at the top of the list.
- Click Yes when the User Account Control dialog pops up, and it will uninstall OneDrive within about one minute.
Method 3: Uninstall OneDrive in Windows 11 from Terminal
- Right-click the Start button in the taskbar and choose Terminal (Admin) from the pop-up menu.

- When the Terminal opens an elevated Command Prompt or PowerShell, type the following command and press Enter. It will immediately uninstall OneDrive from your PC.
winget uninstall Microsoft.OneDrive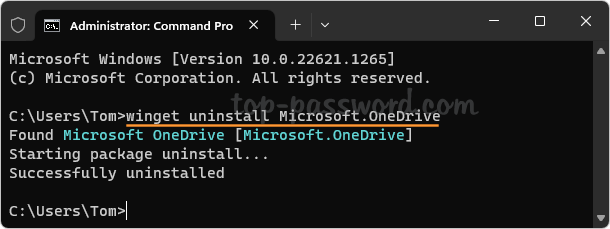
If you need to install OneDrive later, just run this command:
winget install Microsoft.OneDrive
Conclusion
The above methods should be the easiest methods to completely uninstall OneDrive from Windows 11. Whenever you need to use OneDrive again, you can download OneDrive from Microsoft’s website and install it with just a few mouse clicks.