Windows 10 has a new feature called Battery Saver, which can extend the battery life on Windows 10 laptops and tablets. It works just like the Lower Power Mode on an iPhone. In this tutorial we’ll show you how to turn on or off Battery Saver in Windows 10.
How to Turn On / Off Battery Saver in Windows 10?
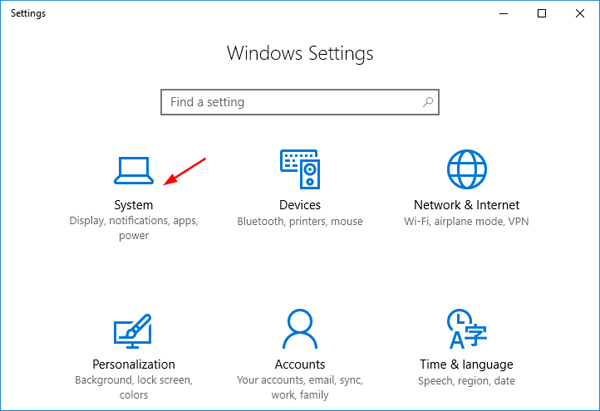
Open the Settings app by clicking the Settings icon on Windows 10 Start Menu, or pressing the Windows key + I keyboard shortcut.

In the main Settings window, click System (Display, notifications, apps and power) icon.
Select Battery on the left-hand side. Under the Battery saver section on the right side, you can access all battery saver settings.
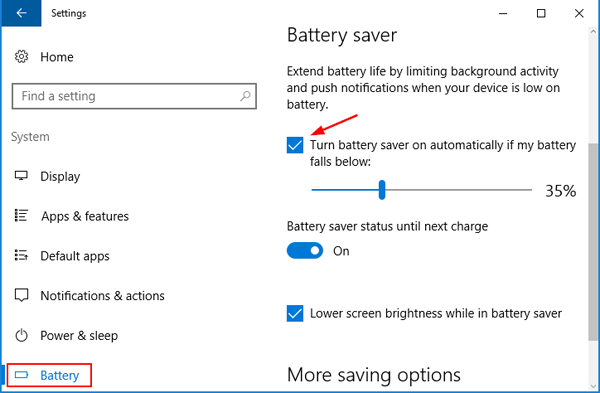
To turn on Battery Saver, make sure you check the “Turn battery saver on automatically if my battery falls below” option. Use the slider bar to change the default 20% value to the battery level you want.
Next, you’ll see a slider labeled Battery saver status until next charge. This is just another way to turn on Battery Saver. When this toggle is switched to On, you will enter Battery Saver mode now until connecting your PC to a power charger.
Battery Saver also includes an option to dim the screen brightness. If you check the “Lower screen brightness while in battery saver” setting, your display will be dimmed automatically to reduce battery usage when in Battery Saver mode.
If you want to turn off Batter Saver completely, just turn off both “Turn battery saver on automatically if my battery falls below” and “Battery saver status until next charge“. Now your PC will never enter Battery Saver mode even if you run out of battery.