PC Refresh and Reset has been available since the first release of Windows 8. In my previous post we’ve showed you how to reset your computer to factory default settings, or refresh your installation while keeping your settings and data files intact. One drawback is that you have to reinstall all your desktop applications after performing a PC reset or refresh.
If you have installed a lot of applications, or misplace the necessary installation discs or product keys, it can be an annoying and time-consuming task to get your computer back up and running. In this tutorial we’ll show you how to use the Windows built-in tool recimg.exe to create a custom image that contains all your desktop applications, so you won’t have to reinstall them after a refresh.
Part 1: Create A Custom Refresh Image in Windows 10 or Windows 8
A custom image will be a snapshot of the current state of Windows 10 / 8 and that will include all desktop applications that are currently installed on your computer. You should create a custom refresh image immediately after setting up your computer the way you want it so it’s clean and customized.
When you have your PC set up just the way you like it, here’s how to create your custom refresh image:
- Press the Windows key + X to bring up the Power User menu, and then select Command Prompt (Admin). When the UAC warning appears, click the Yes button.
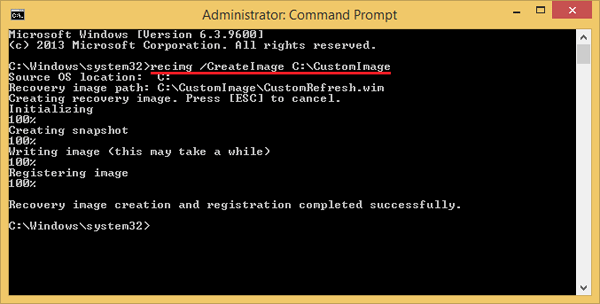
- From the command prompt, run the recimg.exe tool to create a custom image file in your specified folder.
recimg /CreateImage C:\CustomImageEnter the above command will create a new custom refresh image under the directory C:\CustomImage. If the folder doesn’t exist, it will create one for you.
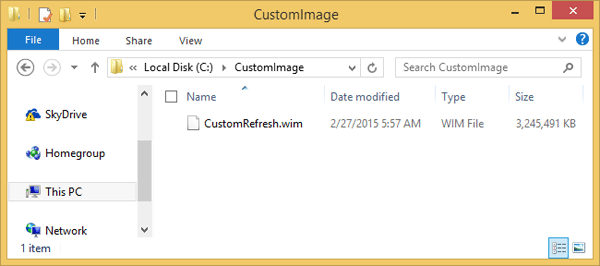
- It could take at least 30 minutes or more to finish creating the image, depending on how many applications you have installed. Once it’s done, you will see a new CustomRefresh.wim file created under your specified folder. And this .wim file will be set as the default refresh image and will be used next time when you use Refresh your PC operation.
Note: The recimg.exe tool is not included in the Windows 10 version released on July 29. You can only use it in Windows 10 Insider Builds up to Build 10122 or Windows 8/8.1.
Part 2: Refresh Your Windows 10 / 8 PC with Custom Image
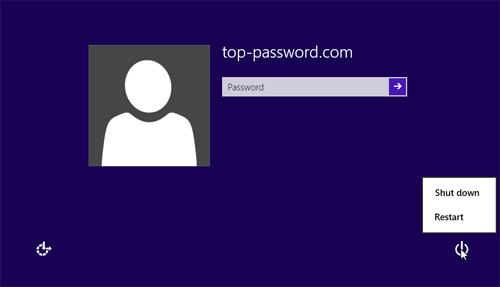
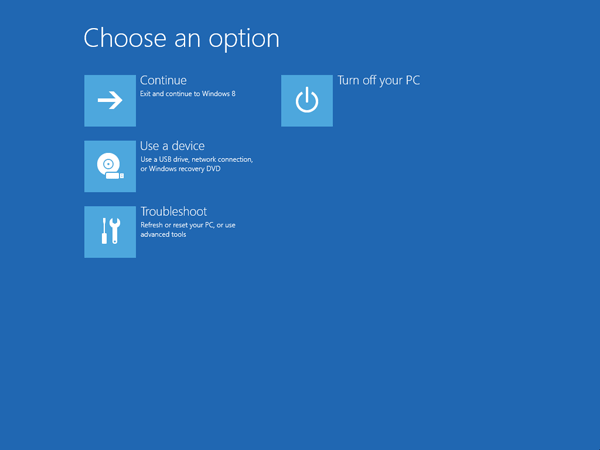
- From the Windows 10 or 8 login screen, hold down the SHIFT key and click on the Power icon visible on the bottom right of the screen, then click Restart option.
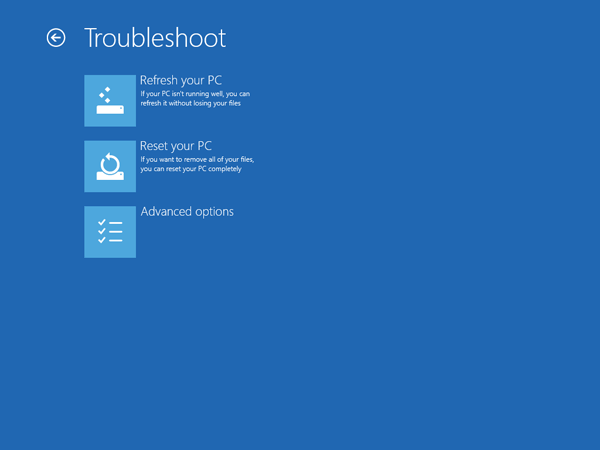
- In a moment you’ll see the recovery screen. click on the Troubleshoot option.
- Now click on the Refresh your PC option.
- Click Next. The system will reboot and begin preparing to refresh your PC. After Refresh your PC, you will notice all your previous installed application are right back to where they were. But you might lose some personal settings from those applications.
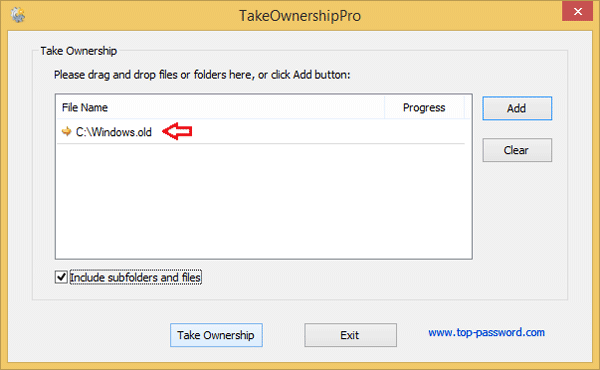
Last but not least, have a look on your C: drive and you’ll find a new folder named Windows.old, contains all the program files and Windows directory from your previous installation. If any of your applications had additional information stored in their installation directory, you can recover it from this folder.
The Windows.old folder could take up a large amount of disk space. Once you’re sure you don’t need anything from it, you can delete it to reclaim free disk space. But you might receive the “Access denied” error when you try to delete this folder. In that case, you need to take ownership of that folder using the freeware TakeOwnershipPro before deleting it.