Posts Tagged ‘change bitlocker password’

How to Stop Standard Users from Changing BitLocker Password

December 18th, 2017 by Admin

If you want to configure BitLocker in Windows 10 / 8, you have to log in as administrator. However, standard users are allowed to change BitLocker password by default. In this tutorial we’ll show you 2 ways to stop standard users from changing BitLocker password in Windows 10 / 8.

Method 1: Prevent Standard Users from Changing BitLocker Password via Group Policy

  1. Press the WIN + R keys to open the Run box. Type gpedit.msc and hit Enter.

  2. In the left pane of the Local Group Policy Editor, navigate to: Computer Configuration\Administrative Templates\Windows Components\BitLocker Drive Encryption\Operating System Drives.

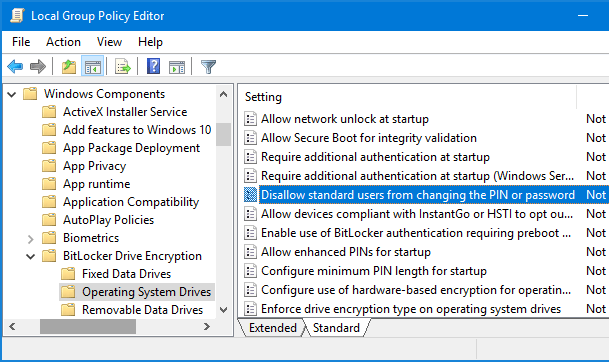
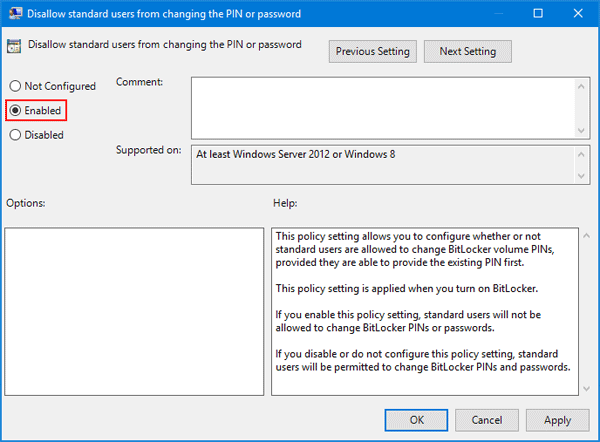
    Next, double-click on the Disallow standard users from changing the PIN or password policy in the right pane.

  3. Select the Enabled option, click Apply and then OK.

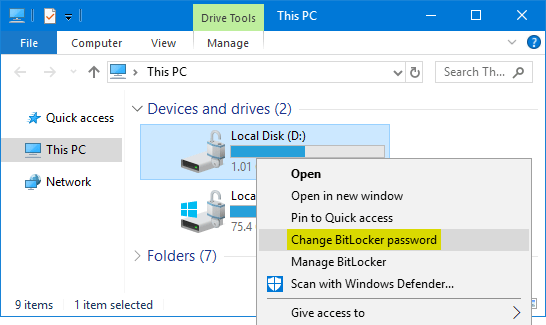
  4. When the standard users try to change BitLocker password on a fixed drive, the UAC will prompt to enter an administrator’s password firstly.

Method 2: Prevent Standard Users from Changing BitLocker Password via Registry Editor

  1. Press the WIN + R keys to open the Run box. Type regedit and hit Enter.

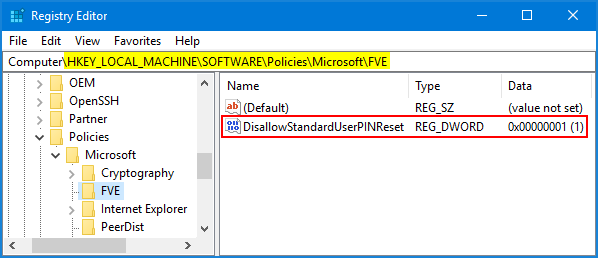
  2. In the left pane of Registry Editor, navigate to the key: HKEY_LOCAL_MACHINE\SOFTWARE\Policies\Microsoft\FVE. If the FVE key doesn’t exist, right-click the Microsoft key and create a subkey named FVE.
  3. While the FVE key is selected, right-click blank area in the right pane and create a DWORD (32-bit) value named DisallowStandardUserPINReset, set its value data to 1.

  4. Close Registry Editor.

If you want to allow standard users to change BitLocker password, just change the value data of DisallowStandardUserPINReset to 0 and you’re done.

How to Change BitLocker Password in Windows 10 / 8 / 7

December 14th, 2017 by Admin

If you’ve turned on BitLocker encryption on a fixed or removable drive, you can choose to unlock the drive with a BitLocker password. When your BitLocker password is compromised, changing the password should be a top priority. In this tutorial we’ll show you 3 ways to change BitLocker password in Windows 10 / 8 / 7.

Method 1: Change BitLocker Password from Windows Explorer

  1. Right-click on the BitLocker encrypted drive in Windows Explorer, and select Change BitLocker password from the context menu.

    Note: if the encrypted drive shows a gold lock on the icon, then you can’t see the “Change Bitlocker password” option in the context menu, and you need to unlock the BitLocker drive firstly.

  2. Enter the old password, followed by the new password (entered twice), and then click Change password.

  3. You would be shown a message that the password has been changed successfully in the same window.

Method 2: Change BitLocker Password from Control Panel

  1. Open the Control Panel and select Large icons in the View by drop-down menu. Click BitLocker Drive Encryption.

  2. Expand the drive for which you want to change the BitLocker password, and click Change password from the list of options.

  3. When the Change Password window appears, type your old password and new password. Click Change password.

  4. Now you’ve changed your BitLocker password.

Method 3: Change BitLocker Password Using Command Line

  1. Open the Command Prompt as administrator.
  2. Assuming you’re going to change Bitlocker password for drive D:, type the following command and hit Enter.
    manage-bde -changepassword d:

  3. You’ll be prompted to enter the new password twice. Note: your password won’t be shown while you’re typing.
  4. When the password has been successfully changed, you can close Command Prompt. Every time you boot into Windows, you can unlock the BitLocker drive with the new password.