Forget to lock your PC when you walk away? There are the chances that your roommate or co-worker may snoop on your computer without your knowledge. Don’t worry! Starting with the Creators Update, Windows 10 adds a security feature called Dynamic Lock, which can automatically lock your PC after 30 seconds when your Bluetooth phone goes out of range. In this tutorial we’ll walk you through the steps to set up Dynamic Lock on Windows 10 PC.
How to Set Up Dynamic Lock on Windows 10 PC?
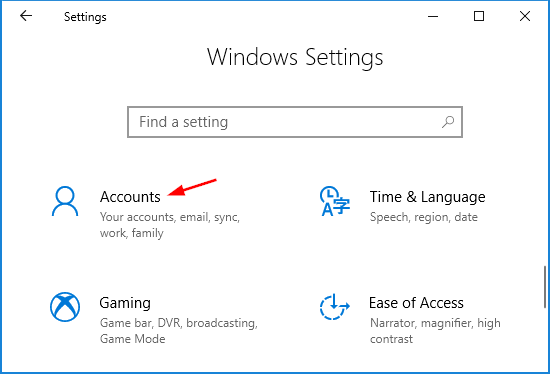
- Press the Windows key + I shortcut to open the Settings app, and then click on Accounts.
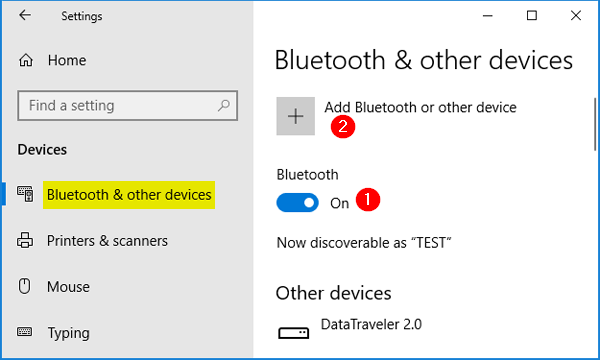
- Select the Sign-in options tab in the left panel. Scroll down to the Dynamic lock section, check the “Allow Windows to automatically lock your device when you’re away” option and then click the “Bluetooth & other devices” link.

If you don’t see the “Bluetooth & other devices” link at all, you can alternatively go to Settings -> Devices -> Bluetooth & other devices.
- Click the Bluetooth switch to set it to On, and then click the “Add Bluetooth or other device” button.
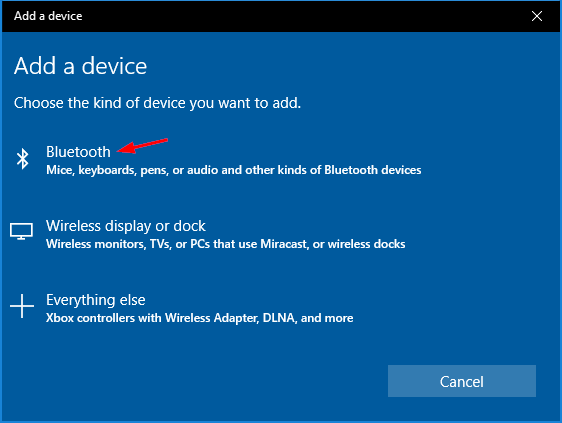
- When you see the Add A Device dialog, select Bluetooth.
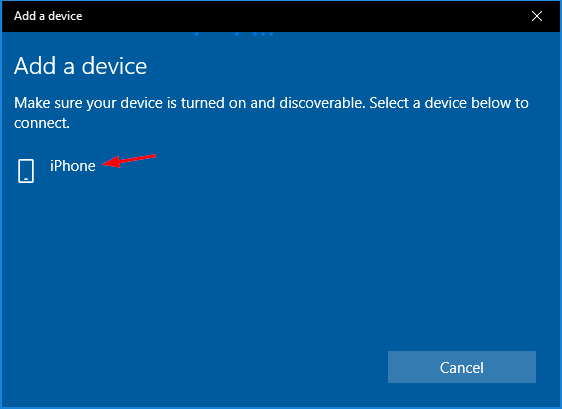
- Choose your Bluetooth phone from the list that appears.
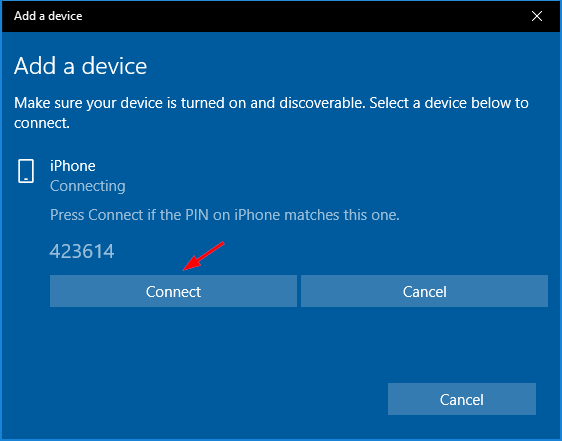
- You’ll see a PIN for pairing your phone with Windows 10 PC. Click Connect on your PC and tap on Pair button on your phone.
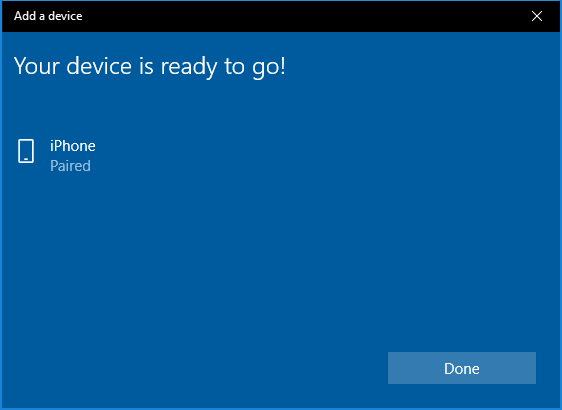
- After the pairing process is complete, click Done.
Now, walk with your phone away from your computer, Windows 10 will lock itself automatically after 30 seconds. However, when you come back to your PC, the Dynamic Lock feature won’t automatically unlock Windows 10 and you have to sign in with password.