If you’ve upgraded to Windows 11 build 22621, you can turn on the hidden feature “Desktop Stickers”, which allows you to personalize your desktop by adding funny stickers. In this tutorial we’ll walk you through the steps to enable and use desktop stickers in Windows 11.
Part 1: Enable the Desktop Stickers feature in Windows 11
- Open Registry Editor and browse to:
HKEY_LOCAL_MACHINE\SOFTWARE\Microsoft\PolicyManager\current\device. In the left side pane, right-click the device key and choose New -> Key.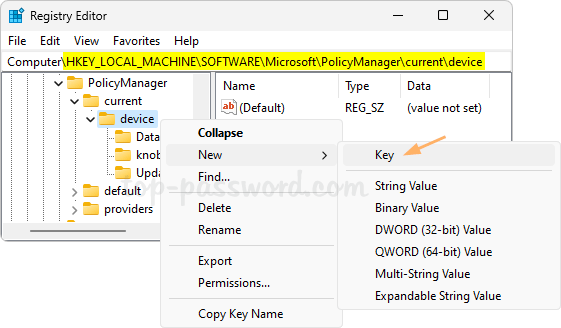
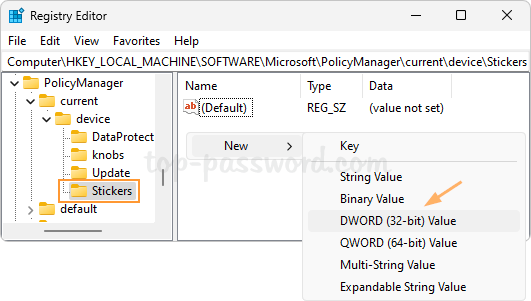
- Name the new key as Stickers, and then select it. In the right pane, right-click the empty space and select New -> DWORD (32-bit) Value.
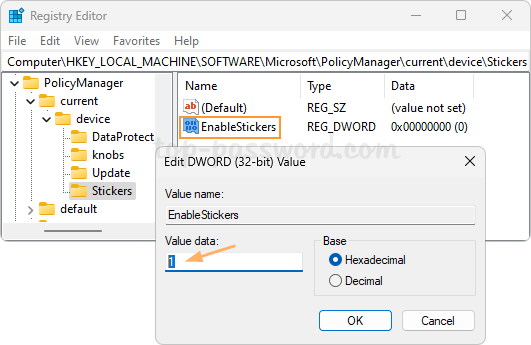
- Name the DOWRD as EnableStickers, and then double-click it and set the value data to 1.
- Close Registry Editor. You need to log off or reboot before the desktop stickers feature is activated. Whenever you need to disable the desktop sticker, just change the value data of EnableStickers to 0.
Part 2: Use Desktop Stickers in Windows 11
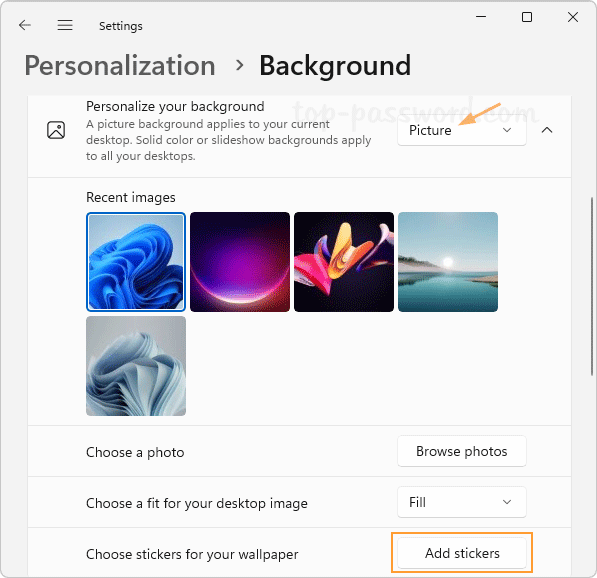
- Before getting started, open the Settings app and go to: Personalization -> Background, make sure the “Personalize your background” drop-down list is set to “Picture“.
Note: The desktop stickers aren’t available for Sideshow, Solid color and Windows spotlight.
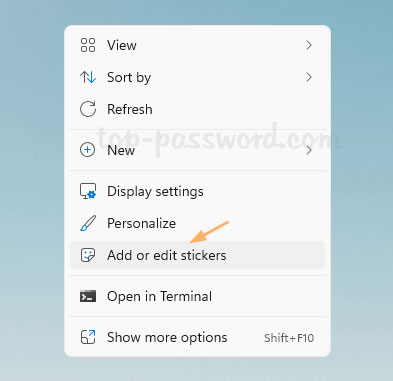
- Right-click the blank area on your desktop, and choose “Add or edit stickers” from the context menu.
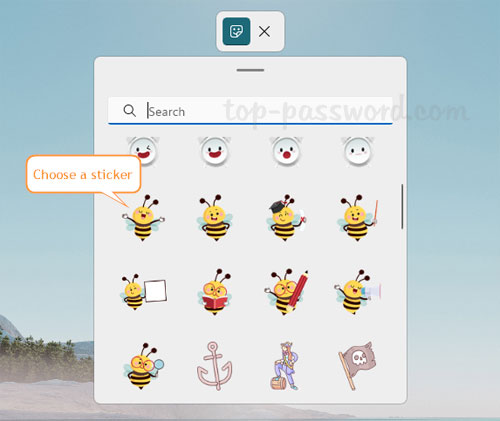
- In the pop-up window, you will be presented with a list of stickers. Clicking a sticker will add it to your desktop.
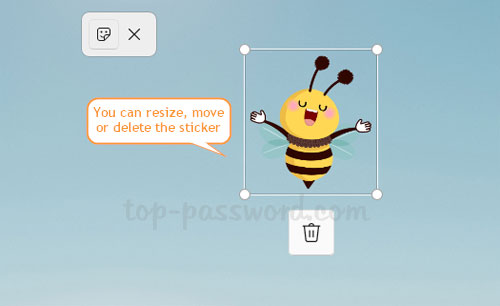
- You can resize or move the stickers you’ve added to any location on your desktop. To save your changes, click the X button at the top to exit the sticker editor.
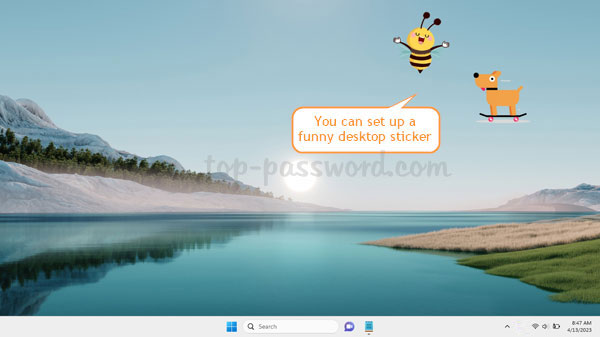
- The stickers will look as if they are part of the desktop wallpaper, and you’re unable to move or resize them until you open the sticker editor interface.
That’s it!