How do I remove Window Hello from the Lock Screen? Windows Hello is a new feature based on biometric technology that lets you log in to Windows 10 with fingerprint or facial recognition. If you want to disable Windows Hello for saving battery life, here are several ways to disable Windows 10 Face Recognition or Fingerprint login.
Method 1: Remove Windows 10 Face Recognition or Fingerprint Login
- Press the Windows logo + I keyboard shortcut to open the Settings app, and head to Accounts -> Sign-in options. In the right-side pane, look for the Windows Hello section and click the Remove button under Face Recognition or Fingerprint.
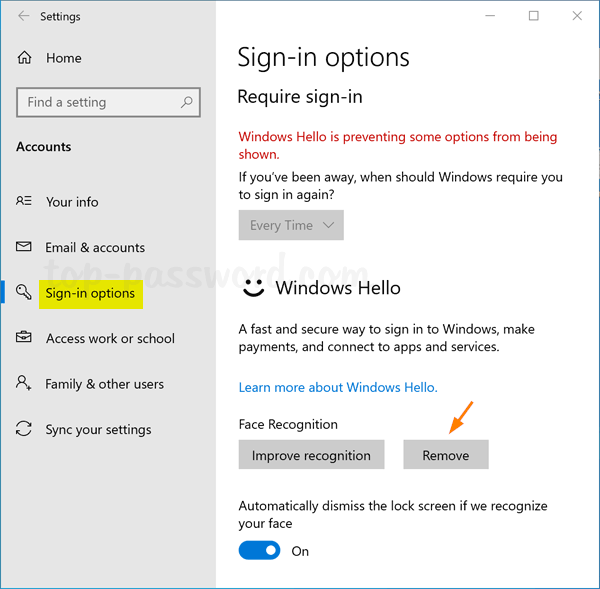
- After completing the steps, you can once again sign in to Windows 10 using a password.
Method 2: Disable Windows Hello Biometrics Using Group Policy
- Open Local Group Policy Editor and navigate to: Computer Configuration -> Administrative Templates -> Windows Components -> Biometrics. Double-click the “Allow the use of biometrics” policy on the right pane.
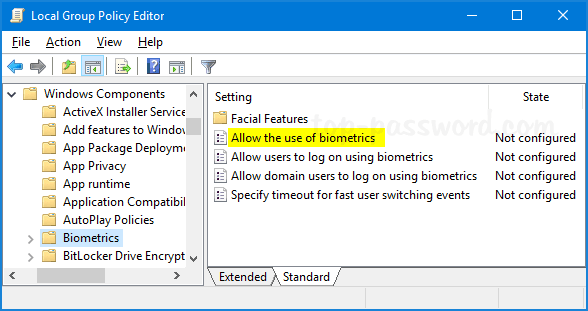
- Select the Disabled option. Click Apply and then OK.

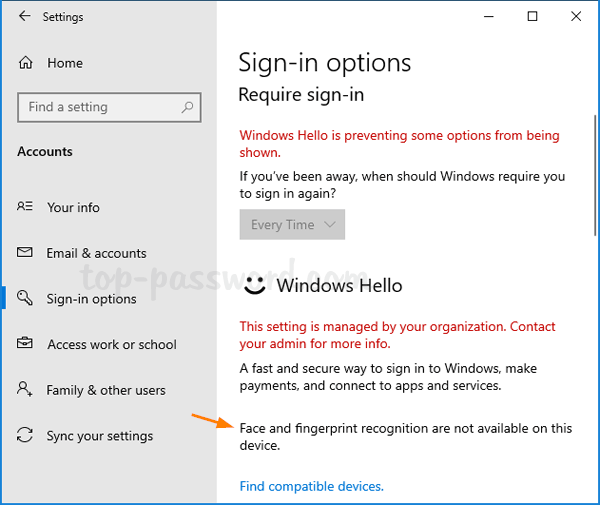
- Now, the Windows Hello feature is removed from the lock screen. If you open up the Settings app and head to the Sign-in options page, you should see a “Face and fingerprint recognition are not available on this device” message appear under Windows Hello.
Method 3: Disable Windows Hello Biometrics Using Registry Editor
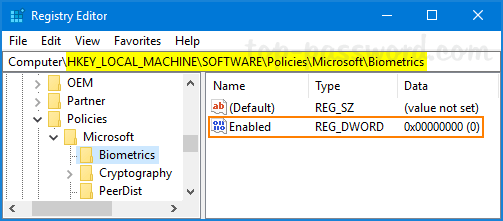
- Open Registry Editor and browse to:
HKEY_LOCAL_MACHINE\SOFTWARE\Policies\Microsoft\Biometrics. If the Biometrics key doesn’t exist, you have to create it. - Right-click on the Biometrics key and select New -> DWORD (32-bit) Value. Name it Enabled and leave its value data to 0. (0: disallow the use of biometrics; 1: Allow the use of biometrics)
- Close Registry Editor and reboot your PC to apply the changes.