How can I reduce the size of my PowerPoint presentation and make it easier to upload or share? Embedded pictures are the common cause for large PowerPoint files. In this tutorial we’ll show you an easy way to compress the embedded images and reduce the PowerPoint file size in Office 2019 / 2016.
How to Reduce PowerPoint File Size in Office 2019 / 2016
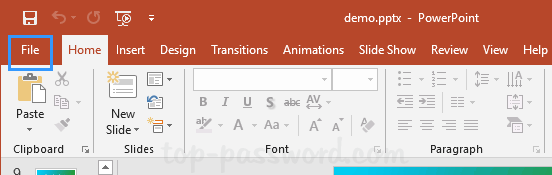
- Open the PowerPoint file you want to compress with Office 2019 / 2016 application. Click the File tab in the upper-left corner.
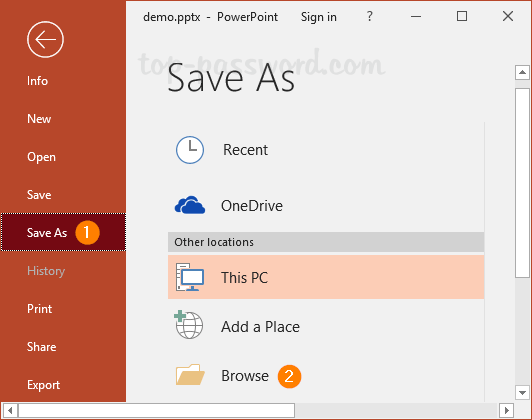
- In the new window, select the Save As tab on the left side and then click on the Browse icon.
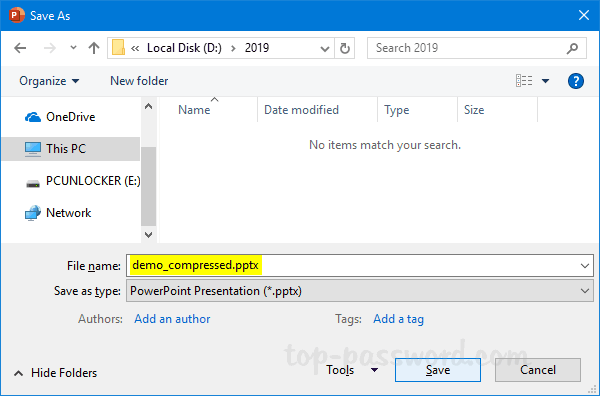
- You’ll then need to choose where to save the compressed PowerPoint file and give it a new file name.
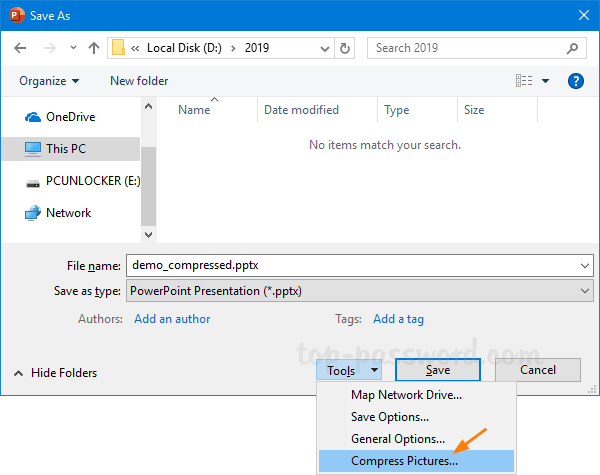
- Click the Tools drop-down list in the lower right of the Save As dialog, and select Compress Pictures.
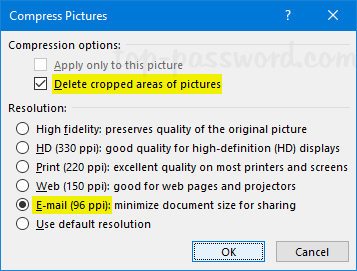
- Uncheck the “Apply only to this picture” option so you can reduce the size of all the images in your PowerPoint presentation. Leave the “Delete cropped areas of pictures” option checked, and select E-mail (96 ppi): minimize document size for sharing. Click OK.
- When you come back to the Save As dialog, click on Save. You’ll get a smaller PowerPoint file with all the embedded images compressed. It’s as simple as that to reduce PowerPoint file size in Office 2019 / 2016.